
Soups & Stews
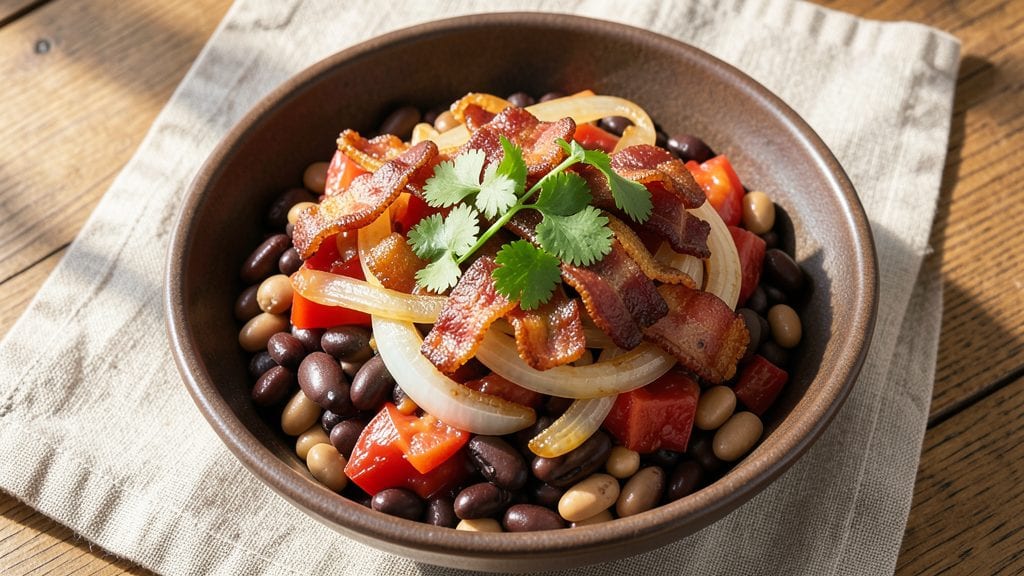
This Bush's chili beans copycat recipe brings back the nostalgic comfort of the classic canned version, but with homemade depth and smoky richness you won't find in a store-bought can.
The secret lies in building layers of flavor through slow simmering and the perfect balance of spices, creating that signature tomato base with just the right amount of heat.
I've perfected this recipe over years of testing, ensuring every bite delivers the same satisfying crunch from crispy bacon bits and tender beans in a thick, hearty sauce.
The foundation of great chili beans is a proper spice blend—smoked paprika for depth, cumin for warmth, and a touch of cayenne for subtle heat. Unlike the canned version, this recipe lets you control the seasoning exactly to your taste while developing complex flavors through 30 minutes of simmering.
The result is a dish that's hearty enough for a main course but simple enough to make on a weeknight. The bacon adds that essential smoky crunch that makes this recipe truly special.
What you'll end up with is a pot of restaurant-quality chili beans—thick, flavorful, and packed with tender beans, smoky bacon, and a rich tomato base that coats every spoonful. The texture is perfect: creamy yet substantial, with just the right amount of chunkiness from the beans and bacon.
This version stays true to the original while giving you the freedom to adjust the heat or add extra toppings like shredded cheese or green onions.
Whether you're making this for a family dinner or meal prepping for the week, the recipe scales perfectly and tastes even better the next day. The slow simmering process actually improves the flavors, making it ideal for busy schedules.
Let's get started on recreating that nostalgic taste with a homemade touch.
Ingredients for bush's chili beans copycat
Pantry staples and a few specialty items for that nostalgic Bush's chili beans taste.
| Ingredient | Amount | Notes |
|---|---|---|
| Smoked Bacon 🥓 | 6 oz | Thinly sliced, crispy preferred |
| Large White Onion 🧅 | 1 whole | Diced, medium size |
| Garlic Cloves 🧄 | 3 cloves | Minced, fresh preferred |
| Canned Kidney Beans 🍣 | 15 oz | Drained, rinsed, dark red |
| Canned Black Beans 🍣 | 15 oz | Drained, rinsed, medium |
| Canned Diced Tomatoes 🍅 | 14 ½ oz | San Marzano preferred |
| Tomato Paste 🍅 | 1 tbsp | Squeeze tube or can |
| Smoked Paprika 🌶️ | 1 ½ tsp | For authentic smokiness |
| Ground Cumin 🌿 | 1 tsp | Toasted for warmth |
| Cayenne Pepper 🔥 | ¼ tsp | Adjust for heat preference |
| Salt 🧂 | 1 ½ tsp | Kosher or sea salt |
| Black Pepper 🌶️ | ½ tsp | Freshly ground |
| Chicken Broth 💧 | ½ cup | Low-sodium preferred |
| Brown Sugar 🍯 | ½ tsp | Light or dark |
| Apple Cider Vinegar 🍎 | ½ tbsp | For tangy depth |
The bacon is non-negotiable—it's what gives this dish that signature smoky crunch. Thin-cut bacon from Oscar Mayer or Costco works perfectly, but any brand will do. Look for thick-cut if you prefer extra crispiness, just slice it thinner first. The beans? Dark red kidney beans and medium black beans are traditional, but any canned beans in the same size range will work. Drain and rinse them well to avoid a watery sauce. For the tomatoes, San Marzano cans have the best flavor, but any high-quality diced tomatoes will do—just skip the ones with added salt or preservatives.
No smoked paprika? Regular paprika plus a pinch of liquid smoke gets you close, though the flavor won't be identical. Short on cumin? Ground coriander at half the amount adds a similar earthiness. The cayenne can be swapped for red pepper flakes, but start with less—you can always add more. The apple cider vinegar might seem odd, but it's what gives the canned version that tangy kick. Balsamic vinegar works in a pinch, but it's sweeter. For the tomato paste, those squeeze tubes at Trader Joe's are perfect—they're convenient and keep forever. If you're using canned paste, one tablespoon is plenty.
This tastes even better the next day, so make extra if you can. Store in an airtight container in the fridge for up to 5 days. For meal prep, portion into containers so you can grab and reheat. The bacon bits keep their crunch if you store them separately and sprinkle them on fresh when serving. Freeze for up to 3 months if you're not planning to eat it all within a week. Just thaw overnight in the fridge before reheating.
Why You'll Love This Recipe
- No-Chop Nightmare: The bacon and onions caramelize while you’re still chopping—if you even bother. I’ll be real: I just slice the onion into thick wedges and let the pan do the work. That smoky bacon fat? It melts into the beans like a dream, turning this into a "set it and forget it" kind of meal.
- Umami Bomb: The combo of smoked bacon, garlic, and those two beans? It’s ridiculously good. The kidney beans add a little chew, the black beans soak up all the smoky-sweet flavor, and that crispy bacon on top—honestly, I’ve caught myself eating it straight from the pot with a spoon.
- Lunchbox Hero: This tastes just as amazing cold as it does hot. I make a big batch on Sundays, pack it in jars, and boom—no sad desk lunches. My kids bring it to school, my husband takes it to work, and I still eat half the leftovers before the week ends. (Yes, even on a Tuesday night.)
- Pantry Magic: Three cans, a few fridge staples, and you’ve got dinner. No fancy shopping, no last-minute grocery runs—just open, simmer, and serve. And if you’re like me, the leftovers only get better the next day. Feed a crowd, save money, and still have something delicious to eat tomorrow. Win.
Step-by-step instructions for Bush's copycat chili beans
Here's how to recreate that perfect smoky, bacon-topped chili bean blend at home.
Cook the Smoked Bacon Until Crispy
Place the 6 oz smoked bacon in a large skillet over medium heat. Let it cook undisturbed for 5-6 minutes until the edges start to curl and the bacon releases easily from the pan. This crispy texture is what gives the dish that signature crunch.
Once the bacon is deep golden brown and crispy, use a slotted spoon to transfer it to a paper towel-lined plate. Leave the rendered fat in the skillet—this is where all the flavor lives. You should have about 2 tablespoons of bacon fat remaining, which will form the base of your chili beans.
Sauté Onion and Garlic in Bacon Fat
In the same skillet, add the 1 whole large white onion that's been diced into ¼-inch pieces. Cook over medium heat for 5-6 minutes, stirring occasionally, until the onions soften and begin to turn light golden. You want them tender but not browned.
Add the 3 cloves minced garlic and cook for another 30 seconds until fragrant. Here's the thing—don't let the garlic burn. It should smell sweet and pungent, not bitter. If it starts to darken too quickly, reduce the heat slightly and stir constantly until just cooked through.
Build the Flavor Base with Spices and Tomatoes
Lower the heat to medium-low and stir in the 1 tablespoon tomato paste, spreading it evenly across the bottom of the pan. Cook for 1 minute to toast the paste slightly—this deepens its flavor.
Add the 1.5 teaspoons smoked paprika, 1 teaspoon ground cumin, 0.25 teaspoon cayenne pepper, 1.5 teaspoons salt, and 0.5 teaspoon black pepper. Stir everything together for 30 seconds to bloom the spices and distribute them evenly. Then pour in the 14.5 oz canned diced tomatoes (with juices) and 0.5 cup chicken broth. Bring to a gentle simmer.
Add Beans and Simmer Until Thickened
Add the 15 oz drained kidney beans and 15 oz drained black beans to the skillet. Stir gently to combine with the tomato mixture. The beans should be fully submerged in the liquid—if not, add 2-3 tablespoons water to help everything meld together.
Reduce the heat to low and let the mixture simmer uncovered for 20-25 minutes. Stir occasionally, especially toward the end, until the beans are heated through and the sauce has thickened slightly. You're looking for a consistency where the beans are coated but not swimming in liquid.
Finish with Vinegar and Sugar, Then Top with Bacon
Stir in the 0.5 teaspoon brown sugar and 0.5 tablespoon apple cider vinegar. The vinegar adds that bright, tangy note that cuts through the richness, while the sugar balances the acidity. Taste and adjust seasoning if needed—you might want to add a pinch more salt or cayenne depending on your preference.
Remove the skillet from heat and let the chili beans rest for 5 minutes. This gives the flavors time to meld together. Before serving, crumble the crispy bacon on top and stir gently to distribute it evenly. The contrast of that smoky, crunchy bacon against the creamy, spiced beans is what makes this dish so special.
Pro Tips For Making Bush'S Chili Beans Copycat
- CRACK THE BACON LOW: Crisp the bacon on the lowest heat setting you can tolerate—yes, even if it takes 15 minutes. I learned this the hard way when I burned the first batch; slow-rendered bacon adds depth without turning bitter, and you’ll end up with more usable fat for sautéing onions.
- SWEAT ONIONS UNTIL SOFT: Don’t rush the onion step—cook them until they’re nearly translucent and starting to caramelize at the edges. That golden hue means the onions have broken down enough to blend seamlessly into the beans, not just sit there like raw chunks.
- DRAIN BEANS DRY: After rinsing the kidney and black beans, give them a good shake in the colander to remove excess moisture. Wet beans dilute the flavor and make the final dish watery; a quick shake ensures every bite stays rich and concentrated.
- SIMMER LONG ENOUGH: Let the chili beans simmer uncovered for at least 20 minutes after everything’s combined. The flavors meld better when they’re allowed to reduce slightly, and the beans absorb the smoky bacon and onion essence—skipping this step leaves them tasting flat.
Best sauces and condiments for this dish
Smoky Tomato Base
The foundation of Bush's chili beans is that rich, smoky tomato sauce. For extra depth, use San Marzano diced tomatoes with their natural sweetness and low acidity.
I like to add 1 tablespoon tomato paste toasted in bacon fat for 1 minute—this caramelizes slightly and creates a thicker, more concentrated flavor. The smoked paprika is non-negotiable here; it's what gives that authentic canned-goods taste. 🌶️
Tangy Vinegar Brightness
The secret to balancing the richness is that apple cider vinegar splash. I use ½ tablespoon at the very end to cut through the fat and add a subtle tang. Don't skip this—it's what makes the homemade version taste more complex than the canned kind.
For a sweeter alternative, try ½ teaspoon balsamic vinegar, but it won't be quite as bright.
Sweet-Savory Balance
A pinch of brown sugar rounds out the flavors beautifully. I use just ½ teaspoon—enough to balance the acidity from the vinegar and tomatoes without making it taste cloying.
The sugar also helps caramelize the spices slightly during simmering, deepening their flavor. Don't worry if you don't have brown sugar; white sugar works just as well in a pinch.
Crispy Bacon Topping
The bacon isn't just for flavor—it's for that essential crunch. I recommend cooking it until deep golden brown and crispy, then crumbling it over the top just before serving. The contrast between the creamy beans and crunchy bacon is what makes this dish so satisfying.
For extra richness, save some of the rendered bacon fat in the skillet—it's pure flavor gold. 🥓
Spice Level Control
Adjust the heat to your preference with cayenne pepper or red pepper flakes. I use just ¼ teaspoon cayenne, but if you like it spicier, add up to ½ teaspoon during the simmering process.
For a smoky heat alternative, try ½ teaspoon chipotle powder instead—it adds depth without the sharpness of cayenne.
Broth for Depth
The ½ cup low-sodium chicken broth adds liquid without overwhelming the dish. I prefer low-sodium to control the seasoning better, but if you're using regular broth, reduce the added salt to 1 teaspoon instead of 1.5 teaspoons.
For a meatier flavor, substitute with beef broth, but chicken works perfectly for this vegetarian-friendly version. 💧
Nutrition facts
Frequently asked questions
Can I make this recipe vegetarian?
Simply omit the bacon and use vegetable broth instead of chicken broth. For extra richness, stir in 1 tablespoon olive oil when sautéing the onions. The smoky paprika and cumin will still give that signature depth without meat.
Why does my homemade version taste different from the canned?
The canned version uses preservatives and artificial flavors, while homemade develops complex layers through fresh ingredients and slow simmering. The apple cider vinegar and brown sugar in this recipe create that authentic tangy-sweet balance the canned version lacks. Taste as you go and adjust seasoning!
How can I make this spicier?
Add ½ teaspoon extra cayenne pepper during simmering or stir in 1 teaspoon hot sauce at the end. For smoky heat, replace cayenne with ½ teaspoon chipotle powder. For maximum kick, add 1 diced jalapeño with the onions. Always taste first!
Can I use dried beans instead of canned?
Yes, but soak them overnight first. Use 1.5 cups dried kidney beans and 1.5 cups dried black beans (about 3 cups total when soaked). Simmer them separately in water for 45-60 minutes until tender, then drain before adding to the chili. The texture will be slightly firmer but still delicious!
What's the best way to reheat leftovers?
Gently reheat on the stovetop over low heat with 2 tablespoons water to prevent drying. For crispy bacon, add fresh bacon bits when reheating. Microwave in 30-second bursts, stirring between each, to maintain texture. Leftovers taste even better the next day!