
Side Dishes
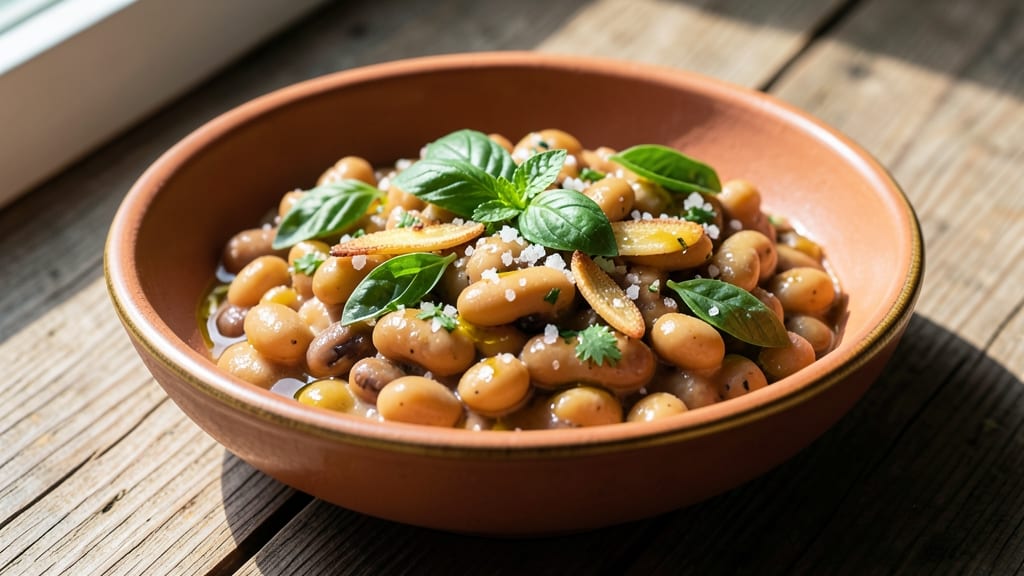
Transforming canned cannellini beans into a silky, herbed pasta sauce proves you don’t need fresh ingredients to create restaurant-quality meals. This recipe delivers a creamy, flavorful sauce in just 15 minutes—perfect for busy weeknights when you still crave homemade flavor.
The secret lies in blending the beans with garlic, herbs, and a touch of acidity, creating a velvety base that clings beautifully to pasta without heavy cream.
What makes this dish truly impressive is its versatility—it works as a standalone sauce for spaghetti, a hearty base for soups, or even a dip for crusty bread.
The canned beans eliminate prep work while delivering the same rich texture as dried, and the herbed blend transforms simple pantry staples into something extraordinary. No special equipment is needed beyond a blender or food processor, making this a foolproof method for anyone.
By the time you twirl that first forkful, you’ll taste the difference between store-bought sauces and something made with care—creamy yet light, packed with herbaceous brightness, and effortlessly elegant.
The sauce thickens as it cools, ensuring each bite delivers that perfect balance of texture and flavor. This is comfort food at its finest, reimagined for modern convenience.
Pair it with garlic bread for dipping, toss it with your favorite pasta, or serve it alongside grilled chicken for a complete meal. The possibilities are endless, and the process couldn’t be simpler. Let’s get cooking—your taste buds will thank you.
Ingredients for canned cannellini beans
Pantry staples and fresh herbs transform humble cannellini beans into velvety, restaurant-worthy pasta sauce.
| Ingredient | Amount | Notes |
|---|---|---|
| Canned Cannellini Beans 🍲 | 2 cans | 15 oz each, drained and rinsed |
| Extra-Virgin Olive Oil 🫒 | ½ cup | High-quality, fruity variety |
| Garlic Cloves 🧄 | 4 cloves | Peeled, roughly chopped |
| Fresh Basil Leaves 🌿 | ½ cup | Packed, stems removed |
| Fresh Parsley Leaves 🌿 | ¼ cup | Packed, finely chopped |
| Lemon Juice 🍋 | 2 tbsp | Freshly squeezed |
| Vegetable Broth 💧 | 1 ½ cups | Low-sodium preferred |
| Salt 🧂 | 1 tsp | Diamond Crystal kosher salt |
| Black Pepper 🌶️ | ½ tsp | Freshly ground preferred |
| Nutritional Yeast 🍞 | 2 tbsp | For umami depth (optional) |
| Pasta 🍝 | 12 oz | Spaghetti or linguine |
| Red Pepper Flakes 🌶️ | ½ tsp | Adjust to taste |
| Parmesan Cheese 🧀 | ¼ cup | Freshly grated |
The canned beans are the unsung hero here—look for no-salt-added varieties at Whole Foods or Trader Joe's for better flavor control. Fresh herbs make all the difference, so grab a bunch of basil and parsley (or sub dried at one-third the amount). The extra-virgin olive oil should be fruity and peppery—California brands like Corto or Lucini are my go-tos. If you're feeling fancy, toast the garlic cloves in the oil for 30 seconds before blending—that nutty aroma takes the sauce to the next level. Nutritional yeast adds a cheesy depth without dairy, but skip it if you're avoiding it.
No fresh herbs? Dried basil and parsley work—just use one-third the amount. Short on vegetable broth? Water plus a bouillon cube gets you close, but add a pinch of salt to balance. The lemon juice brightens everything, but if you're out, white wine vinegar or apple cider vinegar are great swaps. For extra richness, stir in 2 tbsp of crème fraîche or Greek yogurt at the end—it mimics the creaminess without heaviness. And if you're serving this as a dip, add a splash of heavy cream (just 2 tbsp) for a luxurious texture. The red pepper flakes? Adjust to taste—this sauce is mild enough for kids but spicy enough for adults.
This sauce keeps beautifully—3-4 days in the fridge, 3 months frozen. Portion it into ice cube trays before freezing for easy single-use servings. Reheat gently on the stove with a splash of water or broth to restore its silky texture. The flavor actually improves after chilling, so make extra and store it for busy nights. Pasta tosses best when the sauce is at room temperature, so let it sit for 10 minutes before serving. Pair with garlic bread or grilled vegetables for a complete meal.
Why You'll Love This Recipe
- No-Chop Necessary: I swear by this—just drain the beans, toss them with olive oil, and let the garlic sizzle. No prepping, no fuss, just warm, buttery beans in minutes. My lazy nights thank me every time.
- Garlic-Basil Magic: That first bite? The crushed garlic blooming in olive oil, fresh basil hitting your tongue—it’s like a little Italian hug. Honestly, the parsley ties it all together with that bright, fresh finish.
- Meal-Prep MVP: Make a big batch on Sunday, and you’ve got lunch sorted for the week. Toss with crusty bread for sandwiches, stir into salads, or even blend into a creamy dip. My go-to for when I’m too tired to think.
- Budget-Friendly Luxury: Canned beans are my secret weapon—cheap, shelf-stable, and still taste like you slaved over them. A few cloves of garlic and a handful of herbs turn this into something that feels special, even on a tight budget.
Step-by-step instructions for silky, herbed pasta sauce with cannellini beans
Here's how to transform simple canned beans into a velvety, herb-infused sauce that clings beautifully to pasta.
Sauté Garlic in Extra-Virgin Olive Oil
Heat the 0.5 cup extra-virgin olive oil in a large skillet over medium heat until shimmering but not smoking. Add the 4 peeled garlic cloves and cook for 30-45 seconds until they're golden around the edges but not browned. This gentle cooking releases their sweet, aromatic essence without bitterness.
Watch the garlic closely—it burns quickly. If it starts to darken, remove the pan from heat for 10 seconds to cool slightly. The oil should be fragrant with garlic's perfume, setting the foundation for the sauce's complex flavor. Keep the heat at medium throughout this step to maintain even cooking.
Blend Cannellini Beans with Herbs and Broth
In a blender, combine the 2 cans drained cannellini beans, 0.5 cup fresh basil leaves, 0.25 cup fresh parsley leaves, 1.5 cups vegetable broth, 2 tbsp lemon juice, 2 tbsp nutritional yeast, 1 tsp salt, and 0.5 tsp black pepper. Blend until completely smooth, scraping down the sides as needed. The sauce should be silky with no visible texture.
I like to add the 0.5 tsp red pepper flakes at this stage too, blending them in for even distribution. The nutritional yeast adds that savory depth that makes this sauce so satisfying. Taste the blended mixture—it should be tangy, herby, and slightly salty. If needed, adjust seasoning now before proceeding.
Combine Sauce with Garlic and Simmer
Pour the blended bean mixture into the skillet with garlic and stir over medium-low heat for 5-7 minutes until the sauce thickens slightly and coats the back of a spoon. The heat should be gentle enough to prevent the sauce from separating but warm enough to develop its flavors. You'll see small bubbles form as the sauce comes together.
This simmering step is crucial for melding all the flavors. The acidity from the lemon juice will mellow slightly, while the garlic continues to infuse its aroma. If the sauce becomes too thick, add 1-2 tablespoons water to reach your desired consistency. The final texture should be velvety yet light enough to coat pasta without weighing it down.
Cook the Pasta and Finish with Parmesan
In a separate pot, bring 4 quarts water to a rolling boil and add 12 oz pasta. Cook according to package directions until 1 minute before al dente. Reserve 1 cup pasta water before draining. Add the drained pasta to the skillet with the sauce and toss vigorously for 1-2 minutes to coat evenly.
Remove from heat and stir in the 0.25 cup freshly grated parmesan cheese. The residual heat will melt the cheese into the sauce, creating a luxurious finish. If the sauce seems too thick, add 2-3 tablespoons reserved pasta water to loosen it. The final dish should be vibrant green from the herbs, with a perfect balance of creamy, tangy, and umami flavors.
Rest and Serve Immediately
Let the pasta rest for 2-3 minutes before serving. This brief resting period allows the sauce to fully adhere to each strand of pasta, creating that coveted "first bite" experience where the sauce clings perfectly. The beans dissolve into the sauce, creating a silky texture that's surprisingly rich without being heavy.
Serve immediately while the pasta is hot. The aroma of fresh basil and parsley will fill your kitchen, and each forkful should deliver that perfect balance of creamy bean sauce, al dente pasta, and nutty parmesan. This dish comes together faster than you'd expect, but the flavor development during those final simmering minutes makes all the difference.
Pro Tips For Making Canned Cannellini Beans
- Rinse and Drain Well: Canned beans come packed in salty brine or syrup—skip rinsing and you’ll end up with a dish that tastes like a swimming pool. Drain them first, then give them a quick cold-water rinse to cut the saltiness. (Yes, even if the label says "low-sodium"—trust me, it’s still there.)
- Sauté Garlic Low and Slow: I used to burn garlic in olive oil faster than a kid left alone with a stove. For this recipe, cook the minced garlic on low heat until it’s just fragrant—not golden, not crispy, just there. High heat turns it bitter, and nobody wants that.
- Crush Half the Beans: Split your cannellini beans in two—leave half whole for texture, and mash the other half with a fork or potato masher. It thickens the dish and mimics the creaminess of dried beans without the extra effort. (Pro move: Do this after draining, so you’re not dealing with a sticky mess.)
- Finish with Fresh Herbs: Tossing in chopped basil and parsley at the end (not during cooking) keeps their bright flavors intact. If you’re short on time, use a tiny handful of dried Italian seasoning—but fresh is the thing that matters most here. (And no, the microwave won’t revive wilted herbs.)
Essential equipment for perfect results
Blender Essentials
You’ll need a high-speed blender or food processor to achieve that silky texture—no chunky bits allowed! I recommend a Ninja BN600 for its powerful motor or a Vitamix for ultra-smooth results.
If you’re using a food processor, pulse the beans first to break them up before blending with liquids. Avoid cheap blenders—they struggle with beans and can overheat. 💫
Skillet Selection
A heavy-bottomed skillet is key to even heating and preventing scorching. My go-to is a Lodge 10.5-inch cast iron—it retains heat beautifully and adds a subtle depth to the sauce.
For non-stick convenience, a Calphalon stainless steel pan works well too. Avoid thin, flimsy pans that heat unevenly and risk burning your sauce.
Measuring Tools
Precision matters when balancing flavors. Use a stainless steel measuring cup for liquids like olive oil and broth, and a kitchen scale for accurate herb measurements. I keep a OXO Good Grips set on hand—they’re durable and easy to read.
A microplane for garlic and small sharp knife for herbs ensure you’re working with finely textured ingredients that blend seamlessly into the sauce.
Optional Gadgets
For extra convenience, a garlic press saves time when mincing cloves, and a fine-mesh strainer helps drain beans efficiently. If you love fresh herbs, a herb scissors makes chopping parsley and basil effortless. These aren’t mandatory, but they’ll streamline your prep—especially when making this sauce frequently. 🌿
Storage Containers
Transfer leftover sauce to glass airtight containers like Pyrex or Le Creuset for fridge storage. For freezing, use silicone ice cube trays to portion single servings—just pop a cube into hot pasta water to thin the sauce later.
Mason jars also work well for short-term storage (up to 3 days). Always leave ½-inch headspace to prevent spills and freezer burn.
Nutrition facts
Frequently asked questions
Can I use dried cannellini beans instead of canned?
Yes, but you'll need to soak them overnight first. For 2 cans' worth, use 1 cup dried beans soaked in water for 8-12 hours, then simmer for 1.5-2 hours until tender. The texture will be slightly denser, but blending will still create a creamy sauce. Just add 1 extra cup broth to compensate for the reduced moisture.
What if I don't have fresh herbs?
Use 1 teaspoon dried basil and 1 teaspoon dried parsley instead of fresh. For best results, crush the dried herbs between your fingers to release their flavor before adding to the blender. The sauce will still be delicious, though slightly less vibrant in color and aroma.
Why does my sauce look too thick?
This happens when the beans release too much starch or the sauce reduces too much. Thin with 1-2 tablespoons reserved pasta water or warm vegetable broth. For a richer texture without thinning, stir in 1 tablespoon crème fraîche or Greek yogurt at the end. The sauce should coat the back of a spoon but still flow easily.
Can I make this sauce ahead of time?
Store the sauce in an airtight container in the fridge for up to 4 days or freeze for 3 months. The flavors actually deepen as it rests. Reheat gently on the stove with a splash of water or broth to restore its silky texture. For best results, let it come to room temperature before tossing with pasta.
What are some creative ways to use this sauce?
Beyond pasta, this versatile sauce works as a dip for garlic bread or veggie sticks, a topping for grilled chicken or fish, or a base for creamy soups. Try spreading it on toasted baguette slices with roasted veggies, or mix it into mashed potatoes for extra creaminess. The possibilities are endless—let your imagination guide you!