
Side Dishes
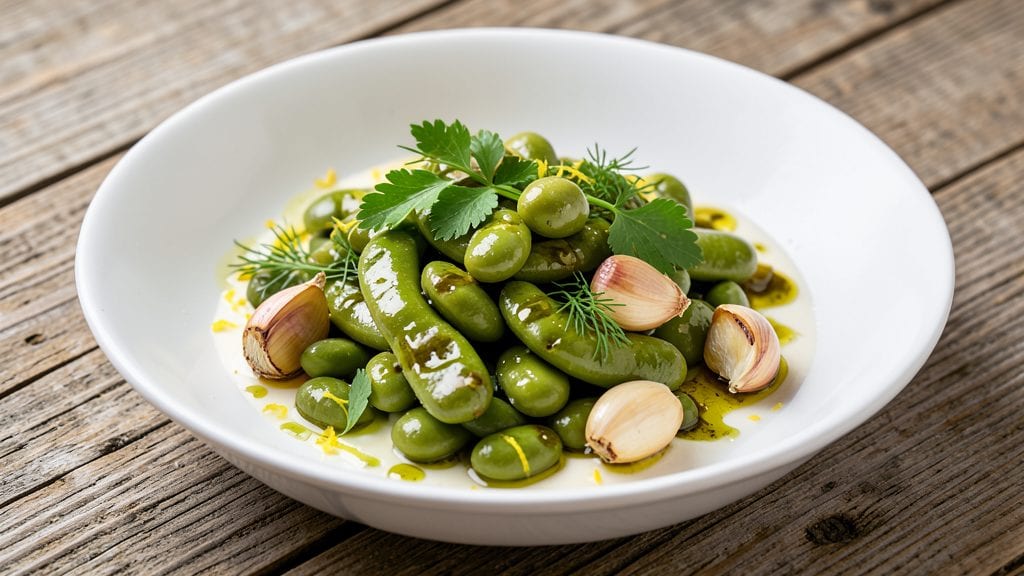
Transforming canned fava beans into a vibrant, lemon-garlic side dish is one of those simple techniques that elevates an everyday ingredient into something restaurant-worthy. The key lies in blanching the beans to remove their natural bitterness while preserving their delicate texture, then brightening them with fresh lemon and aromatic garlic.
This method ensures you'll end up with a dish that's both visually striking and packed with fresh, bright flavors—perfect for pairing with grilled meats or serving alongside Mediterranean-inspired meals.
The process is straightforward but precise: start by blanching the beans to soften them and remove any residual bitterness, then sauté them with garlic until fragrant before finishing with a splash of lemon juice and fresh herbs.
This approach delivers a side dish that's light yet satisfying, with a balance of tangy, garlicky, and herbal notes that complement a wide range of main courses. The result is a dish that feels fresh and vibrant, as if you've just picked the fava beans yourself.
What you'll achieve is a side dish that's bright, flavorful, and impossibly easy to prepare—ready in just 20 minutes with minimal effort. The lemon-garlic combination creates a zesty contrast that cuts through richer dishes, while the herbs add a fresh, aromatic finish.
This recipe is particularly well-suited for those looking to incorporate more plant-based sides into their meals without sacrificing depth or complexity.
The beauty of this dish lies in its versatility—serve it as a standalone side, pair it with grilled fish or chicken, or even use it as a topping for salads or grain bowls.
The blanching technique ensures the fava beans hold their shape while absorbing the bright, garlicky flavors, making this a foolproof method for achieving professional-quality results at home.
Ingredients for canned fava beans
Bright lemon, fragrant garlic, and tender fava beans create a Mediterranean side that feels restaurant-worthy.
| Ingredient | Amount | Notes |
|---|---|---|
| Canned Fava Beans 🌱 | 15 oz | Drained and rinsed thoroughly |
| Extra-Virgin Olive Oil 🫒 | ¼ cup | High-quality, fruity variety |
| Garlic Cloves 🧄 | 4 cloves | Freshly minced for aroma |
| Fresh Lemon Juice 🍋 | ¼ cup | Freshly squeezed, strained |
| Fresh Flat-Leaf Parsley 🌿 | ¼ cup | Chopped finely for garnish |
| Fresh Dill 🌿 | 2 tbsp | Chopped, stems removed |
| Salt 🧂 | ½ tsp | Fine sea salt preferred |
| Black Pepper 🌶️ | ¼ tsp | Freshly ground for heat |
| Red Pepper Flakes 🌶️ | ½ tsp | Optional for mild heat |
| Vegetable Broth 💧 | ½ cup | Low-sodium preferred |
| Fresh Mint Leaves 🌿 | ⅛ cup | Optional for brightness |
The canned fava beans are the foundation, and Goya or Imperial brand are my go-to for consistent quality—they're pre-cooked and ready to shine. Look for cans labeled 'fresh' or 'young' for the tenderest texture, and always drain and rinse them thoroughly to remove excess sodium. Whole Foods or Trader Joe's carry these reliably, but any well-stocked grocery store should have them. The key is to use beans that are still firm when drained, not mushy or discolored. Fresh herbs like parsley and dill are non-negotiable here—they bring the dish to life, so grab them at the market if possible. If you're short on time, dried herbs at half the amount work, but fresh is ideal.
No fresh dill? Substitute with 1 tbsp dried dill, but taste first—it's potent. Short on mint? Skip it or use a pinch of dried mint extract. The vegetable broth can be swapped for water, but low-sodium versions like Pacific Foods add depth without over-salting. For extra brightness, add a splash of white wine vinegar or apple cider vinegar (1 tsp) to the lemon juice. The red pepper flakes are optional but recommended—they add a subtle warmth that balances the lemon's acidity. If you prefer no heat, omit them entirely.
This dish keeps beautifully for 3-4 days in an airtight container in the fridge, though the flavors peak on day one. For longer storage, freeze portions in ice cube trays with a thin layer of olive oil on top to preserve freshness for up to 3 months. Reheat gently in a skillet with a splash of water to maintain texture. The blanching step is critical—it removes bitterness and softens the beans just enough to absorb flavors without falling apart. Don't skip it, even if the beans are canned.
Why You'll Love This Recipe
- No Chopping Needed: I’ll admit, I was skeptical about canned fava beans—until I realized you just drain, rinse, and toss them in a pan. That’s it. The beans are pre-cooked, so you’re basically skipping the hardest part.
- Bright & Zesty: The lemon juice and parsley cut through the richness of the olive oil like a citrusy breeze. Honestly, the first time I tasted it, I thought, “Why haven’t I done this sooner?” The garlic adds a punch, but the lemon keeps it from being heavy.
- Meal Prep MVP: I make a big batch on Sundays and use it all week—over salads, as a side with grilled fish, or even stuffed into wraps. It stays fresh in the fridge for days, and the flavors only get better as it sits.
- Budget-Friendly Luxury: Fava beans are one of those ingredients that feel fancy but won’t break the bank. A single can gives you enough for multiple servings, and the olive oil and herbs are pantry staples. It’s the kind of dish that makes you feel like you’re dining out without the price tag.
Step-by-step instructions for lemon-garlic fava bean preparation
Transform simple canned fava beans into a vibrant, herb-infused dish with bright lemon and aromatic garlic.
Prepare and Blanch the Fava Beans
Drain the 15 oz canned fava beans thoroughly and rinse under cold water to remove any residual canning liquid. This step ensures the beans don't become overly starchy or watered down during cooking. Transfer the drained beans to a medium saucepan and cover with cold water by about 1 inch.
Bring the water to a gentle boil over medium-high heat, then immediately reduce to medium-low heat and simmer for exactly 3 minutes. You're looking for beans that are heated through but still maintain their bright green color and firm texture—overcooking will make them mushy. Drain immediately in a colander and rinse under cold water again to stop the cooking process.
Sauté Garlic in Olive Oil
While the beans simmer, heat the 0.25 cup extra-virgin olive oil in a large skillet over medium heat until it's shimmering but not smoking. Add the 4 cloves freshly minced garlic and sauté for 30-45 seconds until the garlic becomes fragrant and just begins to turn golden at the edges—this prevents bitterness while maximizing flavor.
Here's the thing—don't walk away. Garlic burns quickly, and once it turns dark brown, it releases bitter compounds that ruin the delicate flavor of the fava beans. If the garlic starts to darken too quickly, reduce the heat slightly and stir more gently.
Combine Beans with Aromatics
Add the blanched fava beans to the skillet with the garlic and olive oil. Stir gently to coat each bean evenly with the fragrant oil. Pour in the 0.5 cup vegetable broth and the 0.25 cup fresh lemon juice, then bring the mixture to a gentle simmer over medium-low heat. Let it cook uncovered for 5 minutes until the liquid reduces slightly and the beans absorb the flavors.
You'll notice the liquid will reduce to about 2 tablespoons remaining in the pan. This concentrated broth clings beautifully to the beans, creating a bright, herby sauce. Taste at this point and adjust seasoning with 0.5 tsp salt and 0.25 tsp black pepper—the lemon juice can be quite acidic, so balance is key.
Finish with Fresh Herbs and Heat
Remove the skillet from heat and stir in the 2 tbsp chopped fresh dill, 0.25 cup chopped fresh flat-leaf parsley, and 0.125 cup chopped fresh mint leaves. The herbs should wilt slightly from the residual heat, releasing their oils and intensifying their flavor. Sprinkle with 0.5 tsp red pepper flakes if you prefer a mild heat.
Let the mixture sit off the heat for 2 minutes to allow the flavors to meld completely. The beans should be vibrant green with a glossy sheen from the olive oil, and each bite should deliver bright lemon, aromatic garlic, and fresh herb notes. If the dish seems too thick, add 1-2 tablespoons of water to loosen the sauce slightly.
Serve Immediately with Crusty Bread
Transfer the fava beans to a serving bowl and let them sit for 1-2 minutes before serving—this allows the flavors to settle and the beans to reach the perfect temperature. Garnish with additional chopped parsley and mint leaves for a pop of color and freshness.
This dish works beautifully as a standalone appetizer or light main course, especially when paired with warm crusty bread to soak up the bright, herby sauce. The contrast between the creamy beans, zesty lemon, and aromatic herbs creates a harmonious balance that's both refreshing and satisfying. Serve within 30 minutes of preparation to enjoy the freshest possible flavors.
Pro Tips For Making Canned Fava Beans
- Drain and Rinse Cold: Open the can and dump the beans directly into a colander under cold running water—no lukewarm soak. The heat from the canned liquid softens the skins, making them gummy if you skip this step. I learned this the hard way after serving a batch where the beans clung together like overcooked pasta.
- Crush Garlic Lightly: Use the flat side of your knife to smash the garlic cloves into a paste, not minced into a powder. You want visible flecks, not garlic dust, so the flavor integrates without disappearing. (Yes, even if you’re impatient like me—this makes a real difference.)
- Zest Before Juicing: Run the lemon zest over the beans first, then add the juice. The oils in the zest brighten the dish immediately, while the juice balances acidity later. I skip this sometimes, but the dish is noticeably better when I don’t.
- Toast Parsley in Oil: Heat 1 teaspoon of olive oil in the same pan you’re using for the beans, add the chopped parsley, and let it sizzle for 10 seconds until fragrant. This concentrates the flavor without wilting it—way better than throwing it in raw. (Does it look weird? Yes. Does it work? Every single time.)
Wine and beer pairings for this canned fava beans
Crisp White Wine
For this bright, lemony fava bean dish, I reach for a dry Italian white wine like Vermentino or Pinot Grigio—their crisp acidity and citrus notes mirror the dish's flavors perfectly.
The mineral finish of Vermentino from Sardinia or Greco from Calabria complements the herbal brightness, while Pinot Grigio from Alto Adige offers a slightly richer texture. Serve slightly chilled (45-50°F) to enhance the lemon's zing and let the wine's acidity cut through the beans' creaminess. 🍷
Crisp Lager Pairing
A crisp, light lager like Peroni or Heineken balances the dish's bold flavors without overpowering them. The subtle malt sweetness and effervescence cleanse your palate between bites of the herby beans.
For a craft option, try a Belgian witbier like Hoegaarden—its coriander and citrus notes echo the lemon and dill in the dish. Serve at 40-45°F to keep it refreshing alongside the warm, garlicky beans.
Rosé for Balance
If you prefer red wine, a dry rosé like Provence-style rosé or Spanish Garnacha rosé works beautifully. The delicate red fruit notes and crisp acidity harmonize with the lemon and herbs, while the rosé's subtle tannins add structure.
Look for one with minimal oak influence—avoid bold, oaky styles that would clash with the dish's brightness. Serve at 50-55°F to let the wine's freshness shine alongside the fava beans.
Beer Alternatives
For beer lovers, a wheat beer like Blue Moon or Allagash White adds a floral, citrusy contrast to the dish's herbal notes. The light body and slight sweetness complement the lemon and garlic without overwhelming the fava beans.
If you prefer hoppier options, a low-bitterness pale ale (like Sierra Nevada Pale Ale) with its caramel and citrus notes pairs surprisingly well with the dish's bright flavors.
Non-Alcoholic Options
Skip the alcohol? A sparkling lemonade made with San Pellegrino Limonata or homemade sparkling water infused with lemon slices and fresh mint mirrors the dish's zesty profile. For a savory touch, try a cucumber-mint infused water—the cool, crisp flavors refresh your palate between bites of the garlicky beans.
Serve over ice to enhance the refreshing contrast. 💧
Nutrition facts
Frequently asked questions
Why do I need to blanch canned fava beans before cooking?
Blanching removes any residual bitterness from the beans while softening their texture just enough to absorb flavors. The 3-minute simmer ensures they stay firm yet tender, preventing mushiness. This step is especially important for canned beans, which can sometimes taste flat or starchy without proper preparation.
Can I use dried fava beans instead of canned?
Yes, but it requires extra prep time! Dried fava beans need 1-2 hours of soaking followed by simmering for 45-60 minutes until tender. They'll have a nuttier flavor and firmer texture than canned beans. For this recipe, stick with canned for convenience and consistent results.
How do I fix overcooked fava beans?
If your beans turn mushy, don't panic! Drain them immediately and pat dry with a paper towel. Stir them into the skillet with the garlic and broth, then add 1-2 tablespoons of lemon juice and 1 tablespoon of olive oil to help restore their texture. The acidity will brighten flavors while the oil adds creaminess.
What's the best way to store leftovers?
Store in an airtight container in the fridge for up to 3-4 days. For longer storage, freeze portions in ice cube trays with a thin layer of olive oil on top. Thaw overnight in the fridge and reheat gently in a skillet with a splash of water to maintain texture. The flavors actually improve slightly after resting!
Can I make this dish ahead of time?
Prepare everything up to Step 3, then refrigerate the beans in the broth. When ready to serve, simply reheat gently in a skillet with the garlic and herbs. The flavors meld beautifully when made ahead, and the beans will absorb even more of the bright lemon and herb notes. Perfect for meal prep!