
Side Dishes
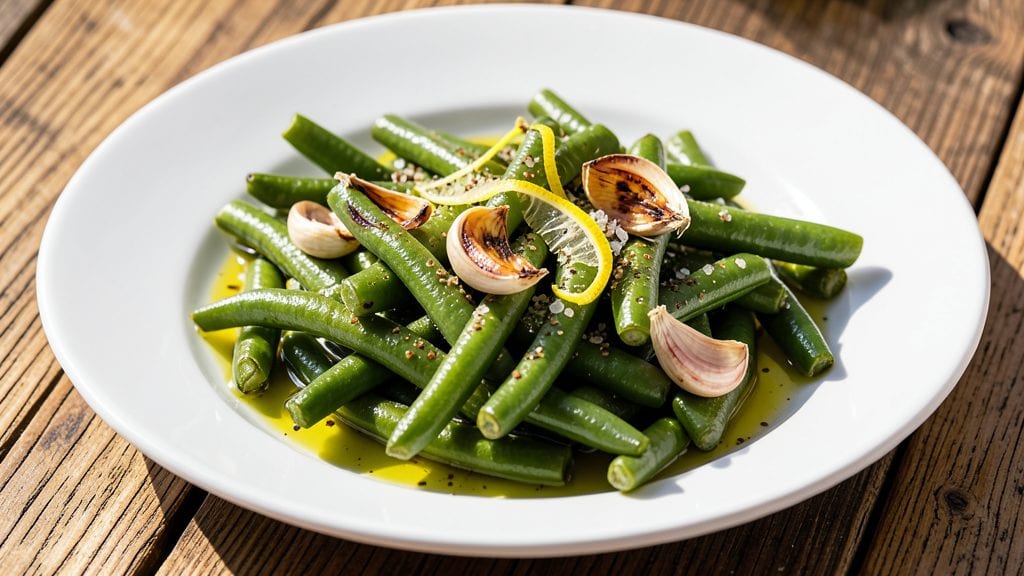
Transforming canned Italian green beans into a restaurant-worthy side dish takes just 15 minutes and a few simple ingredients you likely already have. This recipe preserves the beans' natural al dente texture while elevating them with bright lemon and aromatic herbs—no fancy techniques required.
I developed it after realizing how often canned beans get overlooked in home cooking when they deserve better.
The secret lies in the balance of acidity and fat: a squeeze of fresh lemon brightens the earthy beans, while olive oil and garlic add depth without overpowering.
This method works for both quick weeknight meals and elegant dinner pairings, delivering a side dish that's crisp, flavorful, and ready in one skillet. The beans stay vibrant and hold their shape, proving canned doesn't mean compromised.
By the end, you'll have a side that's crisp-tender with just the right bite, coated in a zesty olive oil finish that makes every bite satisfying. The lemon-zesty twist transforms simple canned beans into something special—perfect alongside grilled chicken, fish, or even as a light vegetarian main.
Let's get cooking with this foolproof technique.
For extra flavor, consider adding cherry tomatoes or toasted pine nuts at the end, or serve with crusty bread to soak up every bit of that bright, herby oil. This recipe proves you don't need fresh beans to create something impressive—just the right approach. The results speak for themselves.
Ingredients for canned italian green beans
Bright lemon, aromatic herbs, and crisp-tender beans—this simple side transforms pantry staples into restaurant-quality flavor.
| Ingredient | Amount | Notes |
|---|---|---|
| Canned Italian Green Beans 🌱 | 14 oz | Drained, not rinsed |
| Extra-Virgin Olive Oil 🫒 | 3 tbsp | High-quality, fruity variety |
| Garlic Cloves 🧄 | 3 cloves | Minced, fresh preferred |
| Fresh Lemon Juice 🍋 | 2 tbsp | Freshly squeezed, zesty |
| Dried Italian Seasoning 🌿 | 1 tsp | Or 1 tbsp fresh herbs |
| Salt 🧂 | ½ tsp | Fine sea salt preferred |
| Black Pepper 🌶️ | ¼ tsp | Freshly ground |
| Cherry Tomatoes 🍅 | ½ cup | Halved, optional garnish |
| Toasted Pine Nuts 🥜 | 2 tbsp | Or sub toasted walnuts |
| Fresh Parsley 🌿 | 2 tbsp | Chopped, for garnish |
| Crusty Bread 🍞 | 4 slices | For serving, optional |
The quality of your olive oil makes all the difference here. Look for extra-virgin with a fruity, peppery finish—California Olive Ranch or Bertolli are reliable grocery store options. Fresh garlic cloves should be firm and smell pungent, not musty. For Italian seasoning, Diamond Crystal is my go-to for consistent flavor, but if you're using fresh herbs, a mix of basil, oregano, and thyme works perfectly. The canned beans should be labeled 'Italian'—these are typically shorter and more tender than regular green beans. Avoid brands with added preservatives if you can.
No fresh lemon? Bottled lemon juice works in a pinch, but freshly squeezed adds that bright pop. Running out of Italian seasoning? Mix equal parts dried basil, oregano, and thyme for a similar effect. Cherry tomatoes can be swapped for sun-dried tomatoes (soaked first) or even a few capers for a briny twist. Pine nuts are pricey, but toasted walnuts or pecans give a similar crunch. If you're short on time, skip the garnishes—the dish still shines, but those final touches elevate it from good to great. For extra zing, add a pinch of red pepper flakes with the Italian seasoning.
This dish keeps beautifully for 3-4 days in the fridge, though the texture softens slightly after day 2. Reheat gently in a skillet with a splash of water to revive the crispness. The lemon juice and olive oil create a natural preservative, so the flavor actually improves overnight. For meal prep, store the beans and dressing separately and toss just before serving. The pine nuts and parsley can be added fresh when ready to eat. Serve with warm crusty bread to soak up every last bit of that bright, herby oil.
Why You'll Love This Recipe
- No-Chop Nightmare: I swear, this recipe saved me after a 10-hour workday. Just drain the beans, toss them in a pan with olive oil and garlic—no dicing, no peeling, no stress. The canned beans stay crisp-tender, so you’re not stuck with mushy vegetables that scream “I gave up.”
- Bright & Herby Magic: That zing of lemon juice and dried Italian seasoning? It’s like a flavor grenade in the best way. The garlic sizzles just enough to wake up the beans, while the lemon keeps it from tasting like a sad, greasy side dish. Honestly, it’s the kind of simple dish that makes you want to take a second helping.
- Lunchbox Hero: Between us, this is my go-to for meal prep. Toss the cooled beans into containers with some pasta or grilled chicken, and you’ve got a lunch that doesn’t require reheating (or a sad, soggy mess). My kids actually eat their veggies this way—no complaints, just clean plates.
- Pantry Staple Power: You’re looking at a recipe that costs me less than $3 for a full meal. Canned beans, olive oil, garlic—ingredients I always have on hand. And the leftovers? They keep for days in the fridge, so I’m not scrambling to figure out dinner after work. Reliable, cheap, and still tastes like I put in effort. Win.
Step-by-step instructions for canned Italian green beans with lemon-zesty twist
Transform simple canned green beans into restaurant-quality side dishes using these precise techniques.
Sauté Garlic in Olive Oil Until Fragrant
Heat the 3 tablespoons extra-virgin olive oil in a large skillet over medium heat. Add the 3 minced garlic cloves and sauté for 1-2 minutes until they become light golden and release their aromatic scent. This step builds flavor foundation—don't let the garlic burn, as it turns bitter quickly.
Watch the garlic carefully. When it stops sizzling and emits a noticeable fragrance, it's ready. Remove the skillet from heat briefly if needed to prevent color change. The garlic should be translucent with just a hint of golden hue, not dark brown.
Add Green Beans and Seasonings
Return the skillet to medium heat and add the 14 ounces drained canned Italian green beans. Stir to coat them evenly in the garlic oil. Sprinkle over the 1 teaspoon dried Italian seasoning, ½ teaspoon salt, and ¼ teaspoon black pepper, mixing gently to distribute the seasonings.
Cook for 3-4 minutes until the green beans are tender-crisp—they should still offer slight resistance when pierced with a fork. Overcooking turns them mushy. The beans should maintain their vibrant green color with just a hint of gloss from the olive oil.
Finish with Lemon Juice and Toasted Nuts
Remove the skillet from heat and stir in the 2 tablespoons fresh lemon juice. The acid brightens the flavors and balances the richness. Add the 2 tablespoons toasted pine nuts and ½ cup halved cherry tomatoes, tossing gently to combine. The pine nuts should be warm but not crispy—just enough to release their nutty aroma.
Let the mixture sit off heat for 1 minute to allow the lemon juice to infuse. Taste and adjust seasoning if needed, adding more salt or lemon juice as desired. The tomatoes should soften slightly but remain intact, adding juicy contrast to the dish.
Garnish and Serve with Crusty Bread
Transfer the green beans to a serving platter and sprinkle with the 2 tablespoons chopped fresh parsley. The parsley adds freshness and visual appeal. Serve immediately while warm, accompanied by the 4 slices crusty bread on the side for dipping or scooping.
This dish works equally well as a side for grilled meats or fish, or as a light vegetarian main. The combination of textures—crisp beans, creamy pine nuts, and juicy tomatoes—creates a satisfying bite with every spoonful.
Pro Tips For Making Canned Italian Green Beans
- Drain and Rinse Cold: Canned beans always taste better after a quick cold rinse—skip the hot water, which just makes them limp. I used to skip this, but now I do it religiously, even if it feels like overkill.
- Sauté Garlic Low and Slow: Medium heat only, or you’ll burn it before the beans get warm. I learned this the hard way—charred garlic turns bitter, and you’ll be left with a sad, ashy flavor instead of that nutty aroma.
- Use Whole Garlic Cloves: Mince them yourself instead of pre-minced—it makes a real difference. Pre-minced garlic has fillers that dilute flavor and turn to mush, and you’ll need way more to taste it.
- Finish with Lemon Zest: A few grated strips at the end brightens the whole dish without overpowering. I was skeptical until I tried it—it’s like a little citrus hug for the beans, especially if your lemon juice was weak.
Essential equipment for this recipe
Skillet Essentials
Your 12-inch cast iron skillet or non-stick stainless steel pan (like All-Clad) is the star here. Cast iron retains heat beautifully for even cooking, while stainless steel prevents flavor transfer from previous dishes.
I prefer cast iron because it adds subtle depth to the garlic's aroma—just make sure it's seasoned properly. For a budget-friendly option, a Calphalon nonstick pan works perfectly too. 🔥
Heat Control Tools
A kitchen thermometer like the Thermoworks Thermapen ensures your skillet stays at medium heat (300-325°F)—critical for balancing crisp-tender beans. Without one, watch for gentle sizzling (not smoking) and occasional stirring to gauge temperature.
For garlic, low-medium heat prevents burning while developing flavor. I keep my thermometer handy for all sautéed dishes now.
Garlic Mincing Tools
Freshly minced garlic makes all the difference. I use a Microplane garlic zester for ultra-fine texture or a sharp chef's knife with the Japanese technique> (press flat, rock blade). Pre-minced garlic from jars lacks freshness, so invest in a garlic press if chopping feels tedious.
The goal is 3 tablespoons minced garlic>—about 3 medium cloves—with even distribution in the oil.
Lemon Zester Add-On
For extra brightness, add 1 teaspoon lemon zest> with the juice using a zester or microplane>. This adds aromatic oils that elevate the dish beyond just citrus acidity. I keep a Zester 3-in-1 tool> on my counter for quick zesting.
The zest dissolves into the oil, creating a fragrant finish that pairs perfectly with the pine nuts. 🍋
Storage Containers
For meal prep, transfer the dressed beans to glass Pyrex storage containers> with tight-sealing lids. These maintain freshness for 3-4 days> in the fridge. For freezing, use quart-sized silicone molds> (like Stasher bags>) to preserve texture.
Label containers with dates—beans reheated from frozen should get 1 extra minute> in the skillet to revive crispness.
Nutrition facts
Frequently asked questions
Can I use regular green beans instead of canned Italian green beans?
While you can substitute fresh or frozen green beans, Italian green beans are shorter and more tender, making them ideal for this quick recipe. If using regular green beans, trim the ends and cut them into 1-inch pieces before cooking. They'll need about 1-2 extra minutes to reach the same tender-crisp texture.
What's the best way to store leftovers?
Store dressed green beans in an airtight container in the fridge for up to 3-4 days. For best texture, reheat gently in a skillet with a splash of water over low heat for 2-3 minutes. Avoid microwaving as it can make them soggy. The lemon juice helps preserve freshness, but flavor peaks within the first 2 days.
How can I make this vegetarian?
This recipe is already vegetarian! For extra protein, serve with white beans, tofu cubes, or grilled halloumi cheese. The lemon-zesty beans pair beautifully with chickpeas or lentils too. The dish works as a complete vegetarian main when served with crusty bread and a simple salad.
Why do my beans turn mushy?
Overcooking is the most common cause. Italian green beans cook in just 3-4 minutes—they should be tender but still hold their shape. Use medium heat and stir occasionally to prevent sticking. Another tip: Don't rinse canned beans—the liquid contains natural flavors that help maintain texture.
Can I make this ahead of time?
Prepare the beans up to 1 day ahead and store them without the pine nuts and parsley. Reheat gently and add the garnishes fresh before serving. For a make-ahead meal, store components separately: beans with dressing in one container, nuts and herbs in another. Toss everything together just before eating for maximum freshness.