
Side Dishes
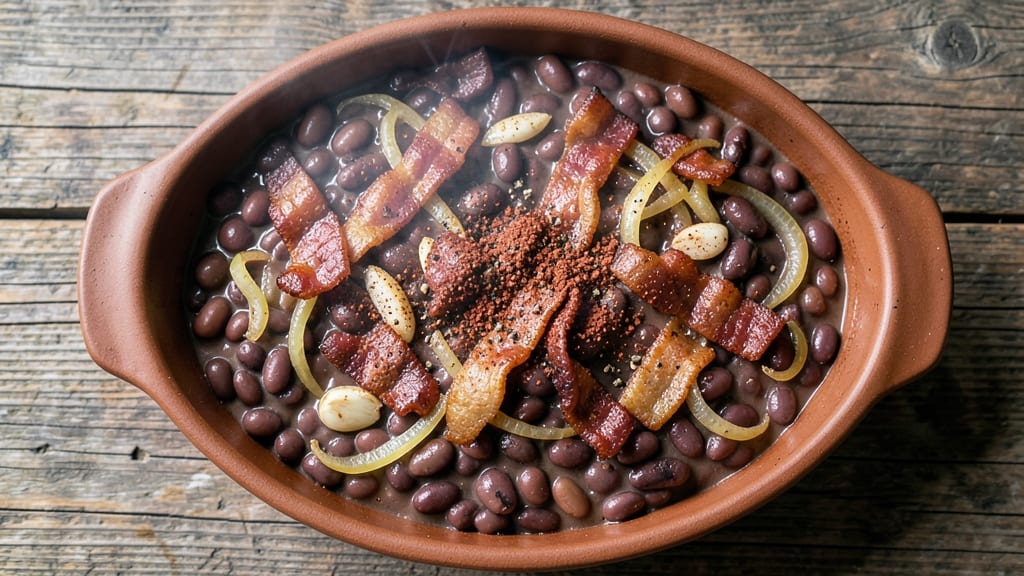
This hillbilly beans recipe brings Appalachian comfort to your table with just one pot and a crispy, smoky bacon top that can't be beat. The slow-cooked magic transforms simple ingredients into a dish rich with Southern tradition—tender beans, savory pork, and spices that simmer into perfect harmony.
I first made these during a family gathering when we needed a hearty side that would feed everyone without extra dishes.
The beauty of hillbilly beans lies in their simplicity: dried beans, pork (or bacon), and a few pantry staples come together for a dish that's both rustic and deeply satisfying.
The key is patience—letting the flavors meld over hours until the beans are tender and the bacon forms that coveted crispy crust on top. This one-pot method means minimal cleanup, but maximum flavor that'll have everyone asking for seconds.
What you're left with is a dish that's crispy on top, tender inside, and packed with smoky, savory notes that pair perfectly with cornbread or collard greens. The aroma alone will have your kitchen smelling like a Southern kitchen should—warm, inviting, and full of tradition.
This recipe delivers on the promise of comfort food without compromise.
Whether you're serving a crowd or meal prepping for the week, hillbilly beans are the ultimate crowd-pleaser. The leftovers actually taste better the next day as the flavors deepen even more. Let's get cooking—your taste buds will thank you.
Ingredients for hillbilly beans
Pantry staples plus a few key ingredients for that iconic crispy, smoky hillbilly bean magic.
| Ingredient | Amount | Notes |
|---|---|---|
| Dried Navy Beans 🌱 | 2 cups | Rinsed before soaking |
| Thick-Cut Bacon 🥓 | 1 ½ lb | Thick-cut for crispy top |
| Yellow Onion 🧅 | 1 whole | Diced, medium size |
| Garlic Cloves 🧄 | 4 cloves | Minced, fresh preferred |
| Smoked Paprika 🌶️ | 1 tbsp | For deep smoky flavor |
| Ground Black Pepper 🌶️ | 1 tsp | Freshly ground preferred |
| Salt 🧂 | 2 tsp | Kosher or sea salt |
| Apple Cider Vinegar 🍎 | 1 tbsp | Brightens flavors |
| Brown Sugar 🍬 | 2 tbsp | Light or dark |
| Water 💧 | 6 cups | For soaking beans |
| Chicken Broth 🍲 | 4 cups | Low-sodium preferred |
| Fresh Parsley 🌿 | ¼ cup | Chopped, for garnish |
The bacon is non-negotiable for that crispy top—thick-cut is worth hunting down at Costco or your local butcher shop. The beans? Navy beans hold up best, but pinto or great northern work too. I always soak mine overnight, but if you're short on time, the quick-soak method (boiling water + 2 minutes) works. For the smoked paprika, Penzeys or bulk bins at Whole Foods have the best quality. Look for vibrant color and a fresh date—it loses punch fast once opened.
No thick-cut bacon? Regular bacon chopped into smaller pieces still works, but it won't get as crispy. Swap the apple cider vinegar for red wine vinegar at half the amount. The brown sugar? White sugar works too, but it won't caramelize as nicely. If you're making this ahead, skip the parsley until serving—it wilts fast. The broth can be beef or vegetable, but low-sodium is key so you can control the saltiness. For extra smokiness, add a pinch of liquid smoke (about 1/4 tsp).
This tastes even better the next day—double the batch if you can. Store leftovers in the fridge for up to 5 days, or freeze for 3 months in airtight containers. The crispy bacon top gets soggy if reheated, so I always make a fresh one when serving leftovers. Garnish with fresh parsley right before eating—it brightens everything up. Pairs perfectly with cornbread or crusty bread for soaking up all that smoky goodness.
Why You'll Love This Recipe
- One-Pot Magic: I swear by this—just toss everything in one pot, let it simmer, and walk away. The bacon renders while the beans soak, no chopping, no fuss, and honestly? That’s half the battle won.
- Smoky Bacon Bliss: That crispy bacon crumbles into the beans like a flavor bomb—salty, smoky, and just enough to make the whole dish sing. Between us, the smoked paprika ties it all together with a warmth that lingers.
- Crowd-Pleaser Always: Serve it at a picnic, potluck, or even Thanksgiving leftovers—it disappears fast. My uncle’s family fights over seconds, and he’s not even a fan of beans. (Yes, even on a Tuesday night.)
- Budget Stretch: Dried beans and bacon stretch this recipe into four or five meals without breaking the bank. I’ll be real: it’s my go-to when grocery money’s tight, but no one ever guesses how affordable it is.
Step-by-step instructions for hillbilly beans
Here's how to create that perfect crispy bacon top while keeping the beans tender and flavorful.
Soak and Prepare the Beans
Start by rinsing the 2 cups of dried navy beans under cold water to remove any debris. Place them in a large bowl and cover with the 6 cups of water by about 2 inches. Let them soak overnight—or at least 8 hours—this ensures they cook evenly and quickly. I know it's tempting to skip soaking, but trust me, it makes all the difference in texture.
After soaking, drain the beans and give them a quick rinse again. This removes any excess starch that could make the beans gummy. Transfer them to a large Dutch oven or heavy pot—they'll need plenty of room to expand as they cook. Keep them ready for the next step.
Cook the Bacon and Build the Flavor Base
Place the 1.5 lb of thick-cut bacon in a cold skillet over medium heat. Cook it slowly, stirring occasionally, until it renders most of its fat and becomes crispy—this usually takes about 15 minutes. The key here is patience; don't rush the bacon or it'll burn. Once crispy, use a slotted spoon to remove the bacon and set it aside on paper towels to drain excess fat.
In the same skillet, add the diced 1 whole yellow onion and cook for 5 minutes until softened. Add the 4 minced garlic cloves and cook for another 30 seconds until fragrant. This forms the aromatic base for your beans. Transfer this onion-garlic mixture to your Dutch oven with the soaked beans.
Season and Simmer the Beans
Add the 4 cups of chicken broth, 1 tbsp of smoked paprika, 1 tsp of ground black pepper, and 2 tsp of salt to the Dutch oven. Stir everything together, then bring to a boil over high heat. Once boiling, reduce the heat to low, cover, and let it simmer for 1 hour. You want to keep the beans submerged—add water if needed—but don't stir too often as this can break them apart.
After 1 hour, check the beans for tenderness. They should be soft but still hold their shape. If they're not quite there, continue simmering for another 30 minutes. The beans will thicken as they cook, so don't worry if the liquid seems reduced. This is normal and part of the process.
Create the Crispy Bacon Top
Here's where the magic happens. Preheat your oven to 400°F. Once the beans are fully cooked, stir in the 1 tbsp of apple cider vinegar and 2 tbsp of brown sugar. These ingredients brighten the flavors and add a touch of sweetness that balances the smokiness.
Crumble the cooked bacon over the top of the beans, spreading it evenly. The goal is to create a thick, even layer that will crisp up beautifully. Place the Dutch oven in the preheated oven and bake for 15-20 minutes until the bacon top is golden brown and crispy. Watch it closely so it doesn't burn.
Finish and Serve
Remove the beans from the oven and let them rest for 5 minutes. This allows the flavors to meld and the crispy bacon top to set. Before serving, stir the beans gently to redistribute any toppings that may have settled. Garnish with the 0.25 cup of chopped fresh parsley for a pop of color and freshness.
Serve the hillbilly beans hot, straight from the pot. The contrast between the crispy bacon top and tender beans is what makes this dish so special. I like to serve it with cornbread or crusty bread to soak up all that delicious flavor. Enjoy your one-pot masterpiece!
Pro Tips For Making Hillbilly Beans
- COOK THE BEANS LOW AND SLOW: Start them on high to boil, then drop the heat to a bare simmer—think tiny bubbles, not rolling. I learned this the hard way after my beans turned to mush in 30 minutes. Navy beans need at least 1.5 hours, but 2 hours guarantees they’ll stay creamy, not mealy.
- CUT THE ONIONS THIN AND EVEN: No, not just "chopped"—slice them paper-thin so they melt into the bacon fat instead of sitting like chunks. My grandmother swore by this, and she was right: uniform slices caramelize faster and sweeten the whole dish. Use the mandoline if you’re impatient like me.
- SKIP THE RUSH TO ADD PAPRIKA: Toss in the smoked paprika after the beans are tender, not at the start. Adding it early burns the flavor, and you’ll taste the bitter edge instead of that deep, smoky warmth. Stir it in with the bacon and garlic at the very end—trust me, it makes a real difference.
- USE THE BACON GREASE WISELY: Don’t strain out that bacon fat—it’s the secret to flavor. After frying the bacon, leave it in the pot and add the onions right to the rendered fat. The onions will soak up all that smoky goodness, and you’ll end up with a dish that tastes like it simmered all day, not 45 minutes.
Essential equipment for hillbilly beans
Dutch Oven
The heart of hillbilly beans is your Dutch oven—it's the only pot that can handle the slow simmer AND the crispy bacon bake. I use a Lodge 5.5-quart cast iron Dutch oven because it distributes heat evenly and retains it perfectly.
If you don't have one, a heavy enameled pot (like All-Clad) works too, but avoid thin aluminum—it won't hold up to the long cook time. 🔥
Skillet for Bacon
For that perfect crispy bacon top, you need a 10-inch cast iron skillet—it's the only pan that can render fat evenly while keeping the bacon crisp. I recommend a Lodge 10-inch cast iron skillet because it's affordable, durable, and heats up fast.
If you're in a pinch, a nonstick skillet works, but it won't give you the same crispy texture. Avoid stainless steel—it won't render the fat properly.
Slotted Spoon
A long-handled slotted spoon (like the OXO Good Grips) is essential for removing crispy bacon without breaking it apart. I use mine to transfer the bacon from the skillet to the beans, ensuring every crispy bite stays intact.
The slots also help drain excess fat, keeping your beans from getting greasy. Trust me, this is one tool you won't want to skip!
Measuring Spoons
Precision matters with spices in hillbilly beans. Invest in a stainless steel measuring set (like Amazon Basics) for accurate measurements of smoked paprika, brown sugar, and apple cider vinegar.
A cheap plastic set can give inconsistent results, especially when dealing with small amounts like 1 teaspoon of black pepper or 1 tablespoon of vinegar. Accurate measurements ensure balanced flavors every time. 💡
Mixing Spoon
Use a wooden spoon (like OXO Good Grips) to stir the beans during simmering—it won't scratch your Dutch oven like metal utensils. Wood also helps distribute heat evenly, preventing hot spots that could burn the beans.
After baking, I use the same spoon to gently redistribute the crispy bacon top before serving. It’s a small detail, but it makes all the difference in texture and presentation.
Baking Sheet
If you’re pre-crisping bacon separately (for extra crunch), line a half-sheet pan with parchment paper and bake the bacon at 400°F for 10-12 minutes before adding it to the beans. I use Starfrit half-sheet pans because they’re sturdy and fit perfectly in most ovens.
This step ensures your bacon top stays crispy even after simmering. Pro tip: Place a wire rack on the pan to prevent soggy bacon from sitting in its own grease. ✨
Nutrition facts
Frequently asked questions
Can I use canned beans instead of dried for hillbilly beans?
While you can use canned beans in a pinch, dried beans develop a richer texture and deeper flavor. If using canned, drain and rinse them well, then simmer for 30-45 minutes with the broth to absorb flavors. For best results, stick with dried beans soaked overnight—they create that perfect tender yet firm bite.
Why does my bacon top get soggy?
The bacon top needs proper heat to crisp. Always bake at 400°F for 15-20 minutes—don't skip the oven step! For extra crunch, pre-crisp the bacon on a baking sheet before adding it to the beans. If it still gets soggy, try using more bacon or adding a sprinkle of crushed cornflakes to the top before baking.
What's the best way to make this dish vegetarian?
Swap the bacon for smoked tofu or tempeh, crisped in the oven before adding to the beans. Use liquid smoke (¼ tsp) and extra smoked paprika for that smoky depth. For protein, add 1 cup of cooked lentils or crumbled seitan to the pot. The dish will still be hearty and flavorful!
How do I make hillbilly beans in a slow cooker?
Cook the bacon as directed, then add everything (except the crispy top) to your slow cooker. Use low heat for 6-7 hours or high heat for 3-4 hours. Stir in vinegar and sugar at the end, then top with crisped bacon baked separately in the oven. The slow cooker keeps the beans tender without overcooking.
Can I make this dish ahead of time?
Make the beans up to 2 days ahead and refrigerate. Reheat gently on the stove, then add fresh crispy bacon on top before serving. For freezing, store in airtight containers for up to 3 months. Thaw overnight in the fridge—never microwave—then crisp the bacon fresh for serving.