
Side Dishes
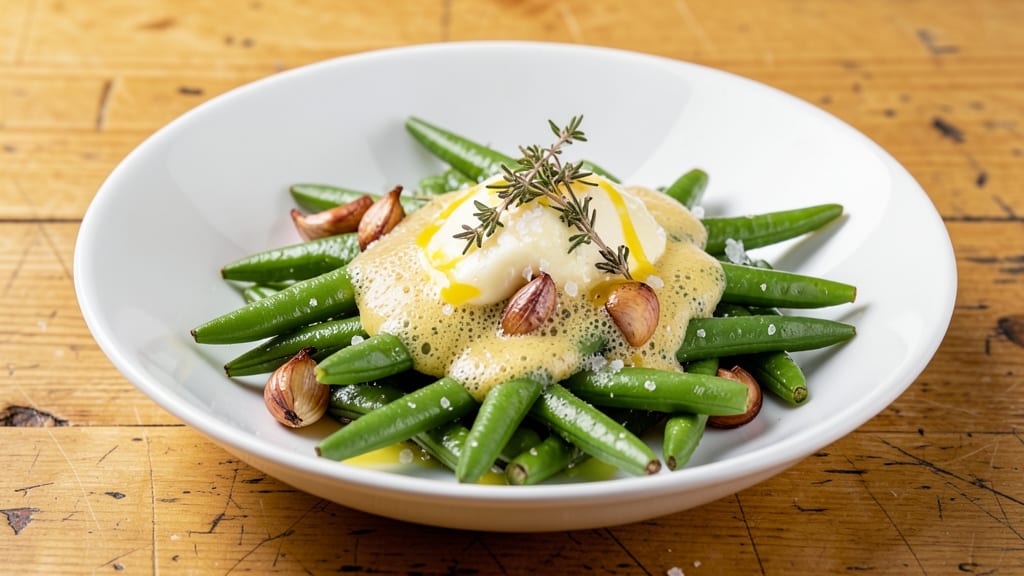
Nana's green beans recipe is the kind of dish that transforms a simple side into a centerpiece—crisp-tender green beans kissed with garlic and brightened by lemon, just like my grandmother used to make.
The secret lies in the balance of time and technique: blanching first for that signature snap, then sautéing until the edges caramelize just enough to hold onto every flavor.
I still remember the way her kitchen filled with that garlic-herb aroma, and this recipe brings back those memories with every batch.
What makes this recipe special is how it captures Southern home cooking at its finest—no fuss, just pure flavor. You'll work with fresh green beans, garlic, butter, and a splash of lemon juice, all combined in a 15-minute process that delivers restaurant-quality results.
The key is patience during the blanching step; it ensures the beans stay crisp while absorbing the savory garlic butter. This isn't just a side dish—it's a taste of home, and it's foolproof once you understand the technique.
By the end, you'll have a bowl of vibrant green beans with edges that are just tender enough to bite through, all coated in a garlicky, lemony butter that makes every mouthful sing.
The aroma alone will have everyone at the table asking for seconds, and the bright, fresh flavors cut through richer dishes beautifully. This is the kind of recipe that gets passed down through generations, and now it's yours to perfect.
Serve it alongside roasted chicken, fried fish, or even as a standalone dish with crusty bread to soak up every last bit of that garlicky butter. The beauty of this recipe is its versatility—you can adjust the seasoning to suit your taste, but the core technique remains the same.
Let's get cooking and bring a little Southern charm to your dinner table.
Ingredients for nana's green beans
Fresh green beans, garlic, butter, and lemon—just like Nana used to make it.
| Ingredient | Amount | Notes |
|---|---|---|
| Fresh Green Beans 🥦 | 1 ½ lb | Trimmed, ends snapped off |
| Unsalted Butter 🧈 | 4 tbsp | Cold, cut into small pieces |
| Garlic Cloves 🧄 | 4 cloves | Minced, fresh preferred |
| Lemon Juice 🍋 | 1 ½ tbsp | Freshly squeezed, seeds removed |
| Dried Thyme 🌿 | ½ tsp | Or 1 tsp fresh thyme leaves |
| Salt 🧂 | ¾ tsp | Kosher or sea salt |
| Black Pepper 🌶️ | ¼ tsp | Freshly ground preferred |
| Red Pepper Flakes 🔥 | ¼ tsp | Optional, for heat |
| Fresh Parsley 🌿 | 2 tbsp | Chopped, for garnish |
| Water 💧 | 4 cups | For blanching |
| Ice Cubes ❄️ | 2 cups | For shocking beans |
The green beans are the star, so pick fresh ones with bright green color and crisp ends. If you can't find fresh, frozen works too—just thaw and drain well. For the garlic, look for plump cloves with no sprouting; the fresher, the better. I always grab organic butter from Trader Joe's for this recipe—it has that rich, clean flavor that stands up to the lemon. The thyme? Dried is fine here, but fresh thyme leaves make a world of difference if you've got them. And don't skip the ice bath—it's what keeps those beans crisp-tender.
No fresh thyme? Dried oregano at half the amount works in a pinch, but thyme's that earthy, floral note is what makes this taste like Nana's. Ran out of lemon juice? Substitute lime juice—it's brighter, but close enough. The red pepper flakes are optional, but if you love heat, add them. For the butter, margarine won't give the same flavor, so stick with the real thing. And if you're short on time, microwave the butter 40 seconds to just melt it before tossing with the beans—no one will know the difference.
Blanched beans keep in the fridge for 3-4 days if stored in airtight containers with a splash of water. The cooked dish reheats beautifully—just toss with a pat of butter and a pinch of salt. For extra flavor, save the starchy water from blanching and use it to make a quick soup base. And if you make a big batch, freeze portions in single layers on a tray before transferring to bags—keeps for up to 6 months. Trust me, you'll want leftovers.
Why You'll Love This Recipe
- One-Pan Magic: I swear by this—just toss the beans, butter, and garlic in one skillet. No chopping, no fuss, no extra dishes. The only prep is trimming the ends, and even that’s quick if you do it while watching TV.
- Butter-Garlic Lemon Bang: That first bite? Crispy green beans kissed by rich butter and garlic, then brightened with lemon—it’s the kind of flavor that makes you pause mid-bite. Honestly, the thyme ties it all together like a secret handshake.
- Potluck Hero: This dish travels perfectly—no soggy sides, no sad greens. Bring it to a picnic, holiday dinner, or even a casual BBQ, and watch it disappear faster than the good wine. (Yes, even on a Tuesday night.)
- Budget Brightener: Green beans are cheap, butter is stretchy, and this recipe feeds four for under $8. The leftovers? Just as good reheated the next day—toss them in eggs or over toast for a lazy breakfast. My wallet and my taste buds thank me.
Step-by-step instructions for Nana's green beans recipe
Here's how to achieve that perfect Southern-style balance of crisp-tender texture and bright, zesty flavor.
Blanch and Shock the Green Beans
Bring the 4 cups water to a rolling boil in a large pot. While waiting, trim the 1.5 lb fresh green beans by snapping off the ends and cutting any thick stems. Add the beans to the boiling water and cook for exactly 3 minutes - they should be bright green but still slightly crisp. Watch closely as they cook; overcooking will turn them mushy.
Drain the beans immediately and transfer them to a large bowl filled with the 2 cups ice cubes. Let them sit for 5 minutes to stop the cooking process completely. This blanching and shocking technique is what creates that signature crisp-tender texture Nana's recipe is known for. The ice water also helps preserve their vibrant green color.
Sauté Garlic in Butter Until Fragrant
In a large skillet, melt the 4 tbsp unsalted butter over medium heat. Add the 4 cloves minced garlic and cook for 30 seconds until the butter foams and the garlic becomes golden but doesn't brown. You'll know it's ready when the kitchen fills with that irresistible garlic aroma - this is crucial for building flavor. Remove the skillet from heat temporarily to prevent burning.
While the garlic cooks, sprinkle the 0.5 tsp dried thyme, 0.75 tsp salt, 0.25 tsp black pepper, and 0.25 tsp red pepper flakes into the skillet. Stir these together with a wooden spoon to create a flavorful paste that will coat the beans perfectly. This seasoning blend is what gives Nana's recipe that distinctive Southern taste profile.
Combine Beans with Seasoned Butter
Return the skillet to medium heat and add the shocked green beans. Toss gently but thoroughly to coat each bean with the garlic butter mixture. Cook for 2-3 minutes until the beans are heated through and the butter has melted completely into the beans. You'll see the beans glisten with the butter - this is your visual cue that they're properly coated.
Add the 1.5 tbsp lemon juice and toss again. The lemon juice should brighten the flavors and cut through the richness of the butter. Cook for another 30 seconds while stirring constantly. The beans should be hot throughout but still maintain their crisp texture - they should offer slight resistance when pierced with a fork.
Finish with Fresh Parsley and Serve Immediately
Remove the skillet from heat and stir in the 2 tbsp chopped fresh parsley. The parsley adds a fresh, vibrant note that balances the richness of the butter and garlic. Taste the beans and adjust seasoning if needed - you might need a pinch more salt or pepper to taste, depending on your preference for heat.
Transfer the green beans to a serving dish and serve immediately while they're hot. The timing is important here - these beans are best enjoyed right away when they're at their peak texture. The crisp-tender quality will begin to soften as they cool, so serve them promptly to your family or guests for that authentic Southern restaurant experience.
Pro Tips For Making Nana'S Green Beans
- Trim the Ends First: Snip the tough stem ends off your green beans before washing them—it’s faster than peeling and keeps the beans from turning mushy. I used to skip this, and my beans always ended up with that sad, limp texture.
- Sear the Garlic Low: Cook the minced garlic on low heat until it’s just golden, not browned—burnt garlic ruins the whole dish. I learned this the hard way after making my kitchen smell like a campfire.
- Salt the Butter Early: Mix the salt into the cold butter before melting it into the pan—this way, the butter won’t burn while the beans cook. I was skeptical until I tried it; now, I never go back.
- Deglaze with Lemon: After the beans are done, splash in the lemon juice immediately while the pan is still hot to lift all the browned bits—this adds depth of flavor without extra effort. It’s the thing that makes this recipe taste like Nana’s, not just any green beans.
Common mistakes when making your nana's green beans
Overcooking the Beans
Blanching for more than 3 minutes turns your crisp-tender green beans into mushy disappointment. I’ve ruined batches by glancing away for just 30 seconds too long—don’t make my mistake!
Set a timer and watch the water bubble vigorously. The beans should float to the surface when done, with bright green color and slight resistance when pierced. 🌱
Skipping the Ice Bath
The ice bath isn’t just a fancy step—it’s the secret to Nana’s signature texture. Without shocking the beans, they’ll continue cooking during the transfer, resulting in limp, sad green beans. I learned this the hard way after serving a batch that tasted like it had been boiled for hours.
Use 2 cups of ice cubes in a bowl large enough to fully submerge the beans.
Burning the Garlic
Garlic burns faster than you think! Cooking it for more than 30 seconds over medium heat turns it bitter and dark. I’ve had to start over after a batch turned into a flavorless, brown sludge.
Keep the heat at medium and remove the pan from heat as soon as it’s golden. The kitchen should smell heavenly, not smoky. 🧄
Using Too Much Butter
While butter makes these beans irresistible, 4 tbsp is the perfect amount—any more and the beans will turn greasy. I once doubled the butter thinking it would add more flavor, but it just made the dish heavy.
Use cold butter cut into small pieces so it melts gradually and coats the beans evenly without overwhelming them.
Not Seasoning Gradually
Adding all the salt at once can make the beans taste flat. Instead, season the garlic butter first, then toss the beans in, and finally adjust to taste at the end. I’ve seen people skip this step and end up with bland green beans.
Start with the 0.75 tsp salt in the butter, then add more if needed after tasting—this ensures perfect balance every time. 🧂
Letting the Beans Sit Too Long
These green beans are best served immediately—their crisp-tender texture softens as they cool. I’ve had guests complain about soggy beans because I left them on the stove too long. Serve them right after tossing with the garlic butter while they’re still hot and vibrant.
If you must reheat, add a pat of butter and a splash of water to restore crispness.
Nutrition facts
Frequently asked questions
Can I use frozen green beans instead of fresh?
Frozen green beans work perfectly—just thaw and drain them well first. For best results, pat them dry with a paper towel before blanching to ensure even cooking. The texture will be slightly softer than fresh, but the flavor remains just as bright when tossed with the garlic butter.
How do I adjust the recipe for a larger crowd?
Double or triple the ingredients while keeping proportions the same. Use a larger pot for blanching (maintain 4 cups water per 1.5 lb beans) and a bigger skillet for sautéing. The key is to keep the beans in a single layer when cooking so they crisp properly. Serve family-style with extra garlic butter on the side.
Can I make this recipe ahead of time?
Blanched beans can be prepped 1 day ahead and stored in airtight containers with a splash of water. Reheat by tossing with fresh butter and lemon juice over medium heat for 2-3 minutes. For best texture, add fresh parsley right before serving. The flavor develops better when made fresh, but this works for busy days!
What if I don't have fresh parsley?
No problem! Use 1 tbsp chopped chives or 1 tsp dried parsley as a substitute. The parsley adds freshness, but these alternatives work well too. If you're out of herbs entirely, skip it—the garlic butter still delivers that signature Southern flavor.
Why do my beans turn out mushy?
Overcooking during blanching is the most common cause. Keep the cooking time to exactly 3 minutes and use the ice bath immediately after. Also, avoid crowding the pot—beans need room to circulate in the boiling water. For extra crispness, try steaming instead of boiling for 4-5 minutes.