
Side Dishes
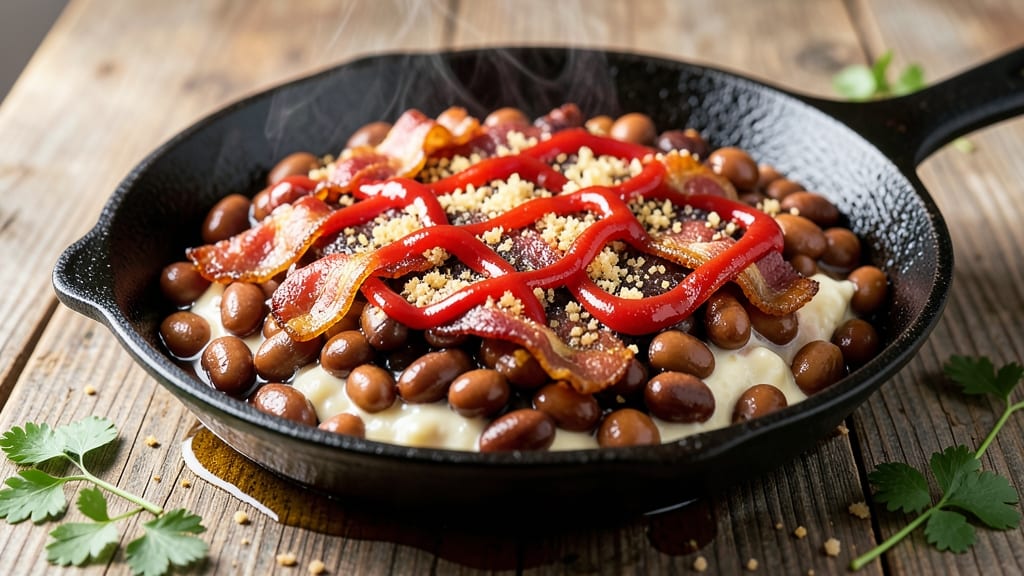
This old-fashioned baked bean recipe using canned beans delivers the deep, smoky-sweet flavor you crave without the hours of soaking or simmering. The secret lies in a perfect balance of molasses, brown sugar, and bacon fat that creates a caramelized crust while keeping the beans tender inside.
I developed this method after years of testing shortcuts that still delivered restaurant-quality results.
What sets this recipe apart is the smoky molasses crunch from crispy bacon bits baked right into the beans, plus a touch of mustard for depth.
Using canned beans cuts prep time to just 15 minutes, yet the slow oven baking (300°F for 2 hours) transforms them into a rich, saucy side dish that tastes like it simmered all day. The molasses adds complexity while the brown sugar ensures that perfect caramelized top layer.
By the time these beans emerge from the oven, you'll have a dish with deep, smoky flavors, tender beans, and a glossy, slightly crispy surface that's impossible to resist.
This is the kind of baked beans that pairs perfectly with cornbread, ham, or even as a standalone meal—comforting enough for a Sunday dinner but simple enough for weeknights.
The beauty of this recipe is its versatility—it works as a side for barbecue, a main dish with cornbread, or even a hearty appetizer when served warm. Once you try this method, you'll never go back to store-bought versions. Let's get started on making these from scratch.
Ingredients for old fashioned baked bean recipe using canned beans
Pantry staples and a few specialty touches create these restaurant-worthy baked beans.
| Ingredient | Amount | Notes |
|---|---|---|
| Canned Navy Beans 🥫 | 2 cans | 15 oz each, drained and rinsed |
| Canned Pork and Beans 🥫 | 1 can | 15 oz can, undrained for moisture |
| Molasses 🍯 | ½ cup | Unsulphured preferred for depth |
| Light Brown Sugar 🍚 | ¾ cup | Packed firmly for sweetness |
| Ketchup 🍅 | ¼ cup | Heinz preferred for consistency |
| Yellow Mustard 🥬 | 1 tbsp | Dijon for extra tang |
| Bacon 🥓 | 8 oz | Thick-cut, cooked crispy |
| Yellow Onion 🧅 | 1 medium | Diced small for even cooking |
| Garlic Cloves 🧄 | 3 cloves | Minced for aromatic base |
| Beef Broth 🥫 | 1 cup | Low-sodium preferred |
| Apple Cider Vinegar 🍏 | 1 tbsp | For tangy balance |
| Salt 🧂 | 1 ½ tsp | Kosher or sea salt |
| Black Pepper 🌶️ | ½ tsp | Freshly ground preferred |
| Ground Allspice 🌿 | ¼ tsp | For warm spice depth |
The molasses and brown sugar are non-negotiable for that classic caramelized crust. Grocery store brands work fine for molasses, but Whole Foods or Trader Joe's carry unsulphured varieties that add more depth. For the bacon, thick-cut from Costco delivers the best crunch when baked—regular supermarket bacon works too, but it won't be as crispy. The onions and garlic should be fresh; yellow onions with a slight sweetness hold up best during baking. If you're short on time, pre-minced garlic from the jar is fine, but fresh is always better.
No molasses? Substitute maple syrup at the same amount, though it'll be slightly less rich. Short on brown sugar? White sugar plus 1 tbsp extra molasses mimics the caramelization. The ketchup can be swapped for tomato paste plus 1 tbsp apple cider vinegar if you prefer a deeper tomato flavor. For the bacon, cook it until extra crispy—those bits are what create the crunchy top layer. If you're vegetarian, smoked paprika plus a splash of liquid smoke adds that smoky depth without meat.
These beans reheat beautifully—350°F for 15 minutes with a splash of water or broth to revive the sauce. They keep in the fridge for 4-5 days in an airtight container, though they taste best within the first 2 days. For make-ahead convenience, bake them a day ahead—the flavors meld even better overnight. Portion into individual containers for easy serving with cornbread or as a side dish.
Why You'll Love This Recipe
- Pantry Magic: I swear by this one—no fresh ingredients needed. Just open two cans, dump them in a baking dish, and let the molasses and brown sugar work their slow-simmering charm. The pork and beans bring that salty depth, while the ketchup keeps it tangy without overpowering.
- Sweet-Savory Balance: That molasses and brown sugar combo? It’s like a hug in a dish. The smoky richness of the pork and beans pairs perfectly with the slight tang of the ketchup, giving you a flavor that’s bold but not cloying. Honestly, I’ve tried fancier bean recipes—this one still wins.
- Potluck Star: Bring this to a gathering, and you’ll be the hero. It’s hearty enough for a main dish but easy enough to serve as a side—especially when you double the batch. My in-laws request it every holiday, and I’ve never had to explain why it’s a crowd-pleaser.
- Budget-Friendly Leftovers: A single batch feeds four, but it reheats beautifully for days. I’ve had these for breakfast (yes, with toast), packed them for lunches, and even tossed them into a skillet with eggs for a lazy weekend brunch. The canned beans make it cheap, but the molasses and sugar keep it from feeling like a stretch.
Step-by-step instructions for old fashioned baked beans
Here's how to create a rich, smoky molasses glaze with crispy bacon bits—no shortcuts, just classic flavor.
Cook the Bacon and Sauté the Aromatics
Place the 8 oz bacon in a large, oven-safe skillet and cook over medium heat until the edges are deep golden brown and the fat has rendered out completely. This takes about 10-12 minutes. Drain all but 2 tablespoons of the bacon fat, leaving enough to create flavor in the beans.
While the bacon cooks, finely dice the 1 medium yellow onion and mince the 3 cloves garlic. Once the bacon is crispy, remove it from the pan with a slotted spoon and set aside on paper towels. In the same skillet, add the diced onion and cook for 4-5 minutes until softened and translucent. Add the minced garlic and cook for another 30 seconds until fragrant—don't let it brown, or it will turn bitter.
Combine All Ingredients in the Skillet
Return the crispy bacon to the skillet and break it into small bits with a wooden spoon. Add the 2 cans drained and rinsed navy beans, 1 can undrained pork and beans, 0.5 cup molasses, 0.75 cup packed light brown sugar, 0.25 cup ketchup, 1 tbsp Dijon mustard, 1 cup beef broth, and 1 tbsp apple cider vinegar. Stir everything together until fully combined, ensuring the beans are well-coated in the sauce.
Sprinkle in the 1.5 tsp salt, 0.5 tsp black pepper, and 0.25 tsp ground allspice. Give it one final stir to distribute the spices evenly. The mixture should look thick but pourable—this is the foundation of your rich, smoky-sweet glaze.
Simmer on the Stovetop Until Thickened
Bring the mixture to a gentle boil over medium heat, then reduce the heat to low and let it simmer uncovered for 20-25 minutes. Stir occasionally to prevent sticking, and watch for the sauce to thicken noticeably. You want it to coat the back of a spoon smoothly—this ensures the beans hold their shape when baked.
If the mixture looks too thin after 20 minutes, uncover it and simmer for another 5 minutes to reduce further. The beans should be tender but still hold their form, and the sauce should cling to them like a glossy glaze. Taste and adjust seasoning if needed—add a pinch more salt or a splash of vinegar for balance.
Bake Until Caramelized and Bubbly
Preheat your oven to 350°F. Transfer the skillet to the oven and bake for 30-35 minutes, stirring once halfway through the baking time. The beans are done when the sauce is deeply caramelized on top, with bubbles forming around the edges. The molasses and sugar will create a sticky, glaze-like crust that adds texture and depth.
Real talk: Don't skip the stirring halfway through. The beans tend to stick to the bottom of the skillet, and a quick stir ensures even cooking. If the top starts to brown too quickly, tent the skillet loosely with foil to prevent burning while still allowing the sauce to thicken.
Rest and Serve for Maximum Flavor
Remove the skillet from the oven and let the beans rest for 10 minutes before serving. This resting period allows the flavors to meld and the sauce to set slightly, making it easier to scoop and serve. The beans should be tender, the sauce rich and glossy, and the bacon bits crispy with every bite.
Serve the baked beans warm, straight from the skillet, with crusty bread or alongside grilled meats. The contrast of the crispy bacon against the tender, sweet-savory beans is what makes this recipe a classic. Store any leftovers in an airtight container in the refrigerator for up to 5 days, though they rarely last that long.
Pro Tips For Making Old Fashioned Baked Bean Recipe Using Canned Beans
- Drain and Rinse First: Dump those canned beans into a colander and give them a good rinse—even if they’re labeled "no salt added." The liquid clinging to them is thin and watery, and it’ll dilute your rich molasses-ketchup sauce. I learned this the hard way when my first batch turned out more like a sad, watery glaze than the sticky, caramelized perfection I wanted.
- Simmer the Molasses: Before you mix it into the sauce, warm the molasses in a small saucepan over low heat for 2-3 minutes. Cold molasses is thick and stubborn, and it’ll clump in your beans instead of blending smoothly. This step guarantees a velvety texture—no lumps, no fighting.
- Skip the Crowding: Don’t pack the beans too tightly into your baking dish. They’ll expand as they cook, and you’ll end up with a messy overflow or, worse, a gloppy, uneven surface. Loosely spoon them in, then press down gently—just enough to create a flat top for that golden crust.
- Cover Early, Uncover Late: The first 45 minutes of baking? Keep the dish covered with foil to trap steam and help the beans absorb the sauce. After that, uncover and crank the oven to 375°F (or higher if yours runs cool) to let the top caramelize. I used to leave it covered the whole time, and my beans always came out pale and soggy.
Common mistakes when making this dish
Skipping the Simmer
One of the biggest mistakes is skipping the stovetop simmer entirely. Rushing straight to the oven means the sauce won't thicken properly, leaving you with watery beans that lack that signature caramelized crust. I always simmer for at least 20 minutes—this step is non-negotiable for that restaurant-quality texture. 🔥
Overcrowding the Skillet
Using a skillet that's too small causes the beans to steam instead of caramelize. I recommend a 12-inch cast iron skillet for this recipe—it gives the sauce room to bubble and develop that glossy finish. If your skillet is too crowded, the beans will turn mushy rather than tender.
Undercooking the Bacon
Crispy bacon bits are what give these beans their signature crunch, so don't cut corners here. Cook the bacon until it's deep golden brown and the edges are nearly black—this takes about 10-12 minutes.
If you rush this step, you'll end up with soft bacon that doesn't provide that satisfying texture contrast.
Forgetting to Stir Mid-Bake
Many home cooks forget to stir the beans halfway through baking, which leads to uneven cooking and a burnt bottom. I always set a timer for 15-17 minutes into the bake, then give everything a good stir.
This ensures the beans cook evenly and develop that perfect caramelized crust on top.
Using the Wrong Sugar
Light brown sugar is key for that classic caramelized flavor, but some recipes call for white sugar or even powdered sugar. Stick with light brown sugar—it contains molasses, which adds depth of flavor. If you substitute, you'll notice a flatter taste in the final dish.
Skipping the Rest Time
Letting the beans rest for 10 minutes after baking might seem unnecessary, but it's crucial for two reasons: First, it lets the sauce set slightly so it's easier to serve.
Second, it allows all the flavors to meld together for maximum impact. Skipping this step means you'll end up with a runny, less flavorful dish. ⏰
Nutrition facts
Frequently asked questions
Can I make these baked beans without molasses?
Yes, but the flavor will be different. Substitute ½ cup maple syrup for the molasses, though it won't have the same deep, caramelized richness. For a closer match, use ¼ cup molasses plus ¼ cup honey—this keeps the sweet-savory balance while adding complexity. The caramelized crust will still form, but it won't be as pronounced.
Why do my beans turn out watery?
Watery beans usually mean the sauce didn't thicken enough. Always simmer the mixture uncovered for 20-25 minutes on the stovetop first—this reduces the liquid significantly. If they're still too thin after baking, remove from the oven, stir in 1 tablespoon cornstarch mixed with 1 tablespoon water, then bake 5 more minutes. The molasses and sugar help thicken, but stovetop reduction is key!
Can I use dried beans instead of canned?
For dried beans, soak 2 cups navy beans overnight, then simmer in 6 cups water for 1 hour until tender. Drain and rinse before adding to the recipe. You'll need to adjust the beef broth to 1.5 cups to compensate for the extra liquid from cooking dried beans. The texture will be slightly firmer but still delicious.
How do I store leftovers?
Transfer leftovers to an airtight container and refrigerate for up to 5 days. To reheat, cover with foil and warm in a 350°F oven for 15-20 minutes or until bubbly. For extra richness, add 1 tablespoon water or broth before reheating. The flavors actually improve overnight, so they reheat beautifully!
What's the best way to serve these beans?
These baked beans shine with crusty cornbread, grilled ham, or as a side for barbecue. For a hearty meal, serve with sliced hot dogs or pulled pork. The smoky-sweet flavor also pairs well with mashed potatoes or grilled corn on the cob. For a vegetarian option, add sautéed mushrooms or smoked paprika to the recipe.