
Side Dishes
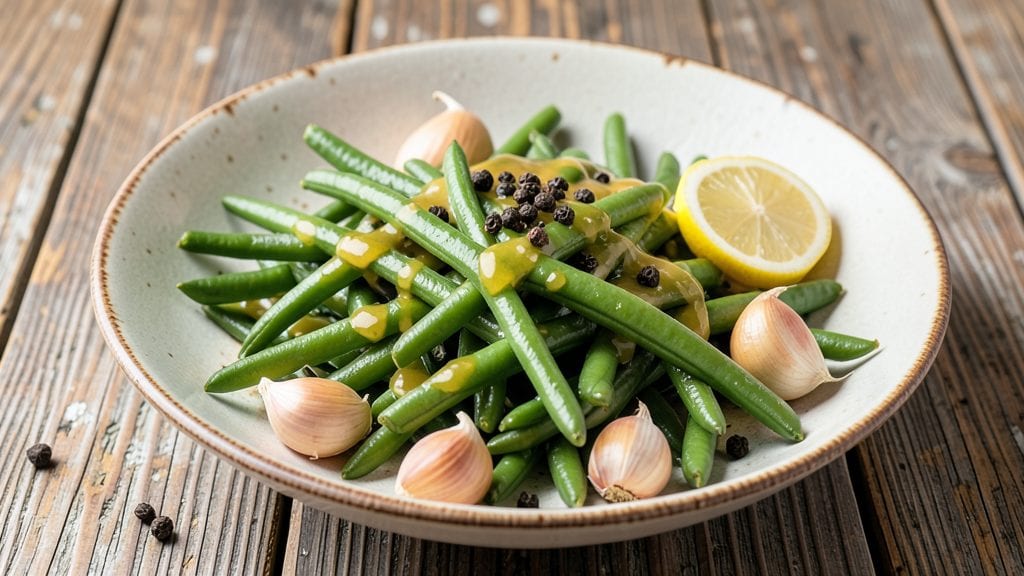
This old-fashioned green bean recipe brings back the comforting flavors of home-cooked meals your grandmother would serve—crisp-tender beans with bright garlic and lemon that elevate any dinner table.
The secret lies in precise blanching and a simple yet flavorful finish that transforms ordinary green beans into a side dish worth anticipating. I’ve perfected this method over years of family gatherings, where it consistently earns rave reviews for its balance of texture and taste.
The beauty of this recipe is its versatility—it works as a classic side for roasted meats, holiday feasts, or even as a light vegetarian main when paired with crusty bread.
What sets it apart is the garlic-lemon butter finish, which adds depth without overpowering the natural sweetness of the beans. The process is straightforward: blanch the beans just until tender-crisp, then toss them in a warm butter mixture infused with minced garlic and fresh lemon juice.
By the time you’re done, you’ll have crisp-tender green beans that hold their shape yet yield slightly to the bite—golden in spots from the butter, brightened by lemon, and infused with aromatic garlic.
The aroma alone will have everyone at the table asking for seconds. This recipe delivers restaurant-quality results with minimal effort, making it a staple for both everyday dinners and special occasions.
For those who prefer a modern twist, try roasting the blanched beans for an extra-crispy texture or adding crispy bacon for a smoky depth. The original method remains foolproof, but these variations keep the dish fresh and adaptable.
Let’s get started on this timeless classic that never goes out of style.
Ingredients for old fashioned green bean
Nine simple ingredients transform ordinary green beans into a restaurant-worthy side dish.
| Ingredient | Amount | Notes |
|---|---|---|
| Fresh Green Beans 🥦 | 1 ½ lb | Trimmed, ends snapped off |
| Unsalted Butter 🧈 | ½ cup | Cold, cut into small cubes |
| Garlic Cloves 🧄 | 4 cloves | Minced, fresh preferred |
| Lemon Juice 🍋 | 2 tbsp | Freshly squeezed, strained |
| Salt 🧂 | 1 ½ tsp | Kosher or sea salt |
| Black Pepper 🌶️ | ½ tsp | Freshly ground preferred |
| Fresh Lemon Zest 🍋 | 1 tbsp | Fine, from organic lemon |
| Fresh Parsley 🌿 | ¼ cup | Chopped, for garnish |
| Ice Cubes ❄️ | 3 cups | For shock cooling beans |
| Water 💧 | 4 cups | For blanching |
The green beans should be bright green and crisp, not wilted or yellowing—local farmers markets or the produce section at Whole Foods are best for quality. Look for haricot verts if you want extra slender beans, but standard green beans work perfectly. European-style beans like those from Trader Joe's have a slightly sweeter flavor, but any fresh green beans will do. Avoid pre-cut or pre-washed beans—they lose their crispness faster. If you can't find fresh, frozen green beans are a solid backup, but thaw and pat them dry thoroughly before cooking to prevent sogginess.
No fresh garlic? Garlic powder at half the amount works in a pinch, but the flavor won't be as bright. Pre-minced garlic from jars is convenient, but it often has added fillers—freshly minced is always better. The lemon juice can be substituted with white wine vinegar, though it won't have the same freshness. Store-bought lemon juice is fine, but freshly squeezed has more depth. For the butter, European-style unsalted butter like Plugrá adds a richer flavor, but any good-quality unsalted butter will work. If you're avoiding dairy, olive oil can replace the butter, though the texture will be slightly different.
Blanched green beans keep their best texture for 3-4 days in the fridge, stored in an airtight container. For longer storage, freeze them in a single layer on a tray before transferring to a bag—this prevents clumping. Reheat gently in a skillet with a splash of water or directly from frozen in boiling water for 2-3 minutes. The garlic-lemon butter sauce can be made ahead and reheated separately, then tossed with the beans just before serving. This dish also reheats beautifully for leftovers, making it perfect for meal prep.
Why You'll Love This Recipe
- Five-Ingredient Magic: I swear by this one—just beans, butter, garlic, lemon, and salt. That’s it. No fancy pantry trips, no last-minute grocery runs. Honestly, I keep a bag of green beans in the fridge just for this.
- Butter-Garlic Bliss: The secret’s in the melt. Rich butter coats the garlic until it’s golden, then those beans get that crisp-tender bite with a bright lemon finish. It’s the kind of flavor that makes you pause mid-bite—like a hug for your taste buds.
- Weeknight & Holiday: Same recipe, different vibes. Toss it with grilled chicken for a quick dinner or serve it alongside roasted pork at Thanksgiving. My in-laws think it’s fancy; my kids think it’s just “the good green beans.”
- Leftovers That Don’t Suck: Unlike some side dishes that turn sad overnight, these stay crisp and flavorful for days. I’ll reheat them in a skillet with a splash of water—no soggy mess, just that same perfect bite every time. Budget-friendly? Absolutely.
Step-by-step instructions for crisp-tender blanched green beans
Here's the classic method that delivers perfectly tender green beans with bright garlic and lemon flavor.
Blanch the Green Beans for Perfect Tenderness
Bring the 4 cups water to a rolling boil in a large pot. While waiting, trim the 1.5 lb fresh green beans by snapping off the ends - they should break cleanly where they naturally bend. Add the beans to the boiling water and cook for exactly 3-4 minutes until they turn bright green and are tender but still slightly crisp. You'll know they're done when you can easily pierce them with a fork.
Drain the beans immediately using a colander and transfer them to a large bowl filled with the 3 cups ice cubes. This ice bath stops the cooking process instantly and preserves their vibrant color and crisp texture. Let them sit for 5 minutes while you prepare the remaining ingredients. The beans should be completely chilled when you're ready to proceed.
Sauté Garlic in Butter Until Fragrant
While the beans cool, melt the 0.5 cup unsalted butter in a large skillet over medium heat. Add the 4 cloves minced garlic and cook for 30-45 seconds until the garlic becomes golden and releases its fragrant aroma. Be careful not to let it brown - you want it to be just fragrant, not bitter. The butter should foam gently but not bubble vigorously.
Remove the skillet from heat and stir in the 1 tbsp fresh lemon zest and 0.5 tsp black pepper. This combination creates a bright, aromatic base that complements the beans perfectly. Let the mixture sit off the heat while you prepare to combine everything.
Combine Beans with Garlic Butter
Drain the green beans thoroughly from the ice water and add them to the skillet with the garlic butter. Sprinkle with the 1.5 tsp salt and toss gently with tongs to coat each bean evenly with the flavorful butter. Cook over medium-low heat for 2-3 minutes, just until the beans are heated through and the butter begins to crisp slightly around the edges.
Add the 2 tbsp lemon juice and toss again to distribute evenly. The acidity from the lemon juice brightens the flavors and cuts through the richness of the butter. You want the beans to be hot but still maintain their crisp texture - they should be tender with a slight bite when you test one.
Garnish and Serve Immediately
Transfer the green beans to a serving platter and sprinkle with the 0.25 cup chopped fresh parsley. The parsley adds a fresh, herbal note that balances the richness of the butter and the brightness of the lemon. Toss gently to distribute the parsley evenly without breaking the beans.
Serve immediately while the beans are still hot and crisp-tender. The combination of bright lemon, aromatic garlic, and rich butter creates a classic side dish that pairs perfectly with grilled meats, roasted chicken, or as a standalone vegetable course. The beans should be tender enough to eat easily but still maintain a pleasant bite.
Pro Tips For Making Old Fashioned Green Bean
- Trim Like a Pro: Use a sharp knife and cut the stems off at a 45-degree angle—this lets them sit flat in the pan instead of wobbling around. I used to hack at them with a dull knife and ended up with uneven ends that never browned right.
- Melt Butter Slow: Start with cold butter and let it melt over medium heat—if you crank it too high, you’ll burn the garlic before the beans even get warm. I learned this the hard way when my kitchen smelled like regret.
- Salt the Water Early: Toss the trimmed beans in a bowl with 1 teaspoon of salt first, then add them to the pan. This guarantees they’re seasoned from the start, not just at the end when they’ve already soaked up all the flavor.
- Squeeze, Don’t Pour Lemon: Use a reamer or your hands to press the juice from the lemon directly into the pan—this keeps the beans bright and acidic, not watered down. Dumping juice from a bottle just dilutes the dish and makes cleanup worse.
Health benefits of old fashioned green bean
Fiber-Rich Nutrition
Green beans are an excellent source of dietary fiber, with about 3 grams per 100 grams—that’s roughly 4.5 grams per serving in this recipe. This fiber supports digestive health, helps regulate blood sugar levels, and keeps you feeling full longer.
I’ve noticed that adding these green beans to meals makes me feel satisfied for hours afterward, which is perfect for balanced eating. 💪
Low-Calorie Powerhouse
With only about 31 calories per 100 grams, this dish is ideal for those watching their calorie intake while still enjoying flavorful, nutrient-dense food. The garlic-lemon butter adds richness without significantly increasing calories—just 120 calories per serving from the butter alone.
This makes it a great side for anyone focused on maintaining a healthy weight or managing portion sizes.
Vitamin K Boost
Green beans are packed with vitamin K, which is essential for blood clotting and bone health. A single serving provides nearly 50% of your daily needs—something I always highlight when serving this dish to family members who prioritize bone health.
The blanching process helps preserve this vitamin, ensuring you get the maximum benefit from each bite.
Rich in Antioxidants
These beans contain flavonoids and polyphenols, powerful antioxidants that help combat oxidative stress and inflammation. The lemon zest in this recipe adds an extra layer of antioxidants, enhancing the dish’s health benefits.
I like to emphasize this when serving it to guests who are health-conscious, as it’s a simple way to boost their nutrient intake.
Vitamin C Support
While green beans aren’t as high in vitamin C as citrus fruits, they still provide a solid dose—about 12% of your daily needs per serving. The lemon juice in this recipe not only brightens the flavor but also doubles down on vitamin C content.
This combination makes the dish a great addition to meals, especially during cold seasons when immune support is key.
Versatile for Dietary Needs
This recipe is naturally gluten-free and dairy-free if you substitute the butter with olive oil. It’s also low-carb, making it suitable for keto or low-carb diets when paired with high-protein mains. The simplicity of the ingredients means it’s easy to adapt for various dietary preferences without sacrificing flavor. 🌱
Nutrition facts
Frequently asked questions
Can I use frozen green beans instead of fresh?
Yes, but with a few adjustments! Thaw frozen beans completely first, then pat them very dry to prevent sogginess. Blanch them for 1-2 minutes less than fresh beans since they're already partially cooked. The texture will be slightly softer, but the flavor remains excellent when finished with the garlic-lemon butter.
What's the best way to store leftover green beans?
Store them in an airtight container in the fridge for up to 4 days. For longer storage, freeze them in a single layer on a tray first to prevent clumping. Reheat gently in a skillet with a splash of water or directly from frozen in boiling water for 2-3 minutes to maintain crispness.
Can I make this recipe ahead of time?
Prepare the garlic-lemon butter sauce separately and store it in the fridge. Reheat the sauce gently, then toss it with freshly blanched beans just before serving. This keeps the beans crisp-tender. For make-ahead meals, blanch and ice bath the beans up to 1 day ahead, then reheat them separately before adding the sauce.
What's the secret to keeping green beans crisp-tender?
The ice bath is key! After blanching, immediately shock the beans in ice water to stop cooking instantly. This preserves their vibrant color and crisp texture. Also, avoid overcrowding the pot during blanching—use a large pot to allow room for the beans to move freely in the water.
How can I add protein to this side dish?
Try crispy bacon or diced ham! Cook 4 oz of bacon until crispy, then crumble it over the finished beans. For a lighter option, add 2 tbsp of grated Parmesan cheese or sprinkle with toasted slivered almonds for crunch. These additions work beautifully with the garlic-lemon flavor profile.