
Side Dishes
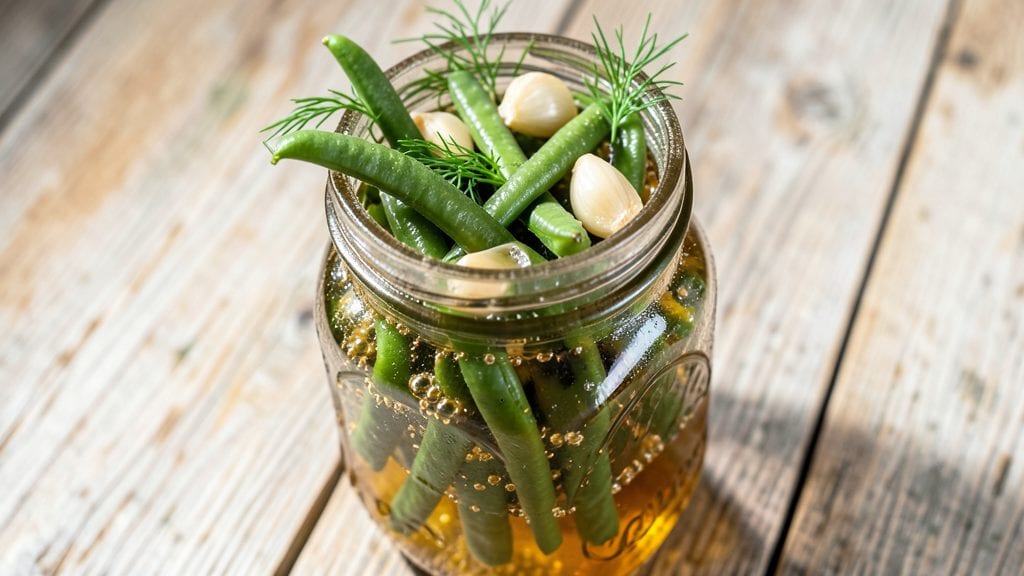
This old-fashioned pickled green beans recipe brings back the tangy, vinegary crunch that makes summer meals unforgettable. I first learned it from my Nonna while standing on a stool in her tiny Boston kitchen, watching her work with precision that turned simple beans into something extraordinary.
The secret lies in the balance of vinegar and spices, creating a bright, crunchy side that pairs perfectly with grilled meats or fresh bread.
The process is simpler than you might think, requiring just 20 minutes of active time and a few basic ingredients. We'll sterilize jars properly to ensure safety, then create a flavorful brine that preserves the beans' vibrant green color and crisp texture.
This isn't just about pickling—it's about capturing that perfect summer flavor all year long, with results that taste homemade and restaurant-quality at the same time.
What you'll end up with is a jar of beans that stay crisp for months, their bright green color preserved and their flavor bursting with vinegar, garlic, and herbs. The crunch is satisfying, the tang is refreshing, and the process itself is surprisingly straightforward.
These beans transform any meal from ordinary to special, proving that old-fashioned techniques still deliver the best results.
Perfect for canning ahead, serving at picnics, or adding to charcuterie boards, this recipe delivers professional-quality pickled beans without the fuss. The method I'm sharing has been tested repeatedly in my own kitchen—including through that disastrous pot pie night—and it never fails to impress.
Let's get started on creating your own jar of summer in a bottle.
Ingredients for old fashioned pickled green beans
Fresh green beans, vinegar, and herbs transform into summer's brightest side dish.
| Ingredient | Amount | Notes |
|---|---|---|
| Fresh Green Beans 🥦 | 2 lbs | Trimmed, cut into 2-inch pieces |
| White Vinegar 💧 | 2 cups | White or apple cider vinegar |
| Water 💧 | 2 cups | Filtered or distilled preferred |
| Salt 🧂 | 2 tbsp | Non-iodized preferred |
| Granulated Sugar 🍚 | 1 cup | White or raw sugar |
| Garlic Cloves 🧄 | 6 cloves | Smashed, not minced |
| Fresh Dill 🌿 | ¼ cup | Chopped, stems removed |
| Black Peppercorns 🌶️ | 1 tsp | Crushed lightly |
| Bay Leaves 🍃 | 2 whole | Fresh preferred |
| Clean Quart-Sized Mason Jars 🥫 | 4 pieces | With lids, sterilized |
The beans are the star here—look for bright green, crisp ones at the grocery store. Trader Joe's and Whole Foods usually have the freshest, but any well-stocked market works. Trim the ends carefully (leave the stems on until cooking to preserve texture). For the jars, Ball or Kerr brands are my go-to—they seal like a dream. If you're short on time, sterilize jars in boiling water for 10 minutes instead of baking them. That's the trick Nonna taught me, and it works every time.
No fresh dill? Dried dill at one-third the amount keeps the flavor, though it's not the same. Running out of vinegar? Lemon juice works in a pinch—just add an extra tablespoon of sugar to balance the acidity. The garlic can be roasted for a sweeter flavor (wrap whole cloves in foil, roast at 400°F for 15 minutes), but raw smashed cloves give that classic tang. If you're making a big batch, double the sugar slightly—it helps preserve that vibrant green color for months. And trust me, the crushed peppercorns make all the difference.
These beans keep for up to a year in the pantry if stored properly—tightly sealed jars in a cool, dark place. Once opened, they'll last 2 weeks in the fridge (though they taste best fresh). I always make extra—perfect for holiday gifts or last-minute potlucks. The brine gets even better after the first week, so don't be shy about tasting as you go. And if you're nervous about canning, process jars in a water bath for 10 minutes—just to be safe.
Why You'll Love This Recipe
- No-Fuss Pantry Staples: I swear by this recipe because it only needs five things—green beans, vinegar, water, salt, and sugar. That’s it. No specialty jars, no fancy herbs, just the basics you already have lurking in your cupboard.
- Tangy-Sweet Crunch: The vinegar and sugar balance makes these beans ridiculously addictive—bright, crisp, and just slightly sweet. I’ll be real: I’ve eaten them straight from the jar like candy, and my kids do too.
- Picnic to Potluck: These beans travel everywhere—coolers, lunchboxes, holiday tables. They’re the kind of side that disappears first, whether you’re grilling burgers or packing a church potluck. Honestly, they’re my go-to for any gathering.
- Lasts for Weeks: Make a big batch, and you’ll have a snack or side ready for months. The vinegar preserves them beautifully, so I always double the recipe—no wasted ingredients, just flavor on demand. Budget-friendly? Absolutely.
Step-by-step instructions for old-fashioned pickled green beans
Here's how to make these tangy, crunchy pickled green beans that taste like grandma's kitchen—bright, flavorful, and ready in minutes.
Prepare the Green Beans for Pickling
Start by trimming the ends off the 2 lbs fresh green beans, then cut them into 2-inch pieces. I like to work in batches—trim one end, cut, then trim the other end. This keeps your cutting surface clean and makes the process faster. Rinse the cut beans under cold water to remove any dirt or sand, then drain them well in a colander.
Here's the thing—don't skip the rinsing. Any dirt left on the beans will cloud your brine and make the final product look unappetizing. Once drained, give them a good shake to remove excess water. You want them damp but not dripping when you pack them into the jars. This ensures the pickling liquid penetrates evenly for maximum crunch and flavor.
Sterilize the Mason Jars and Prepare the Brine
While the beans drain, sterilize the 4 pieces clean quart-sized mason jars by running them through hot, soapy water, then rinsing thoroughly with boiling water. This step is crucial—sterile jars prevent contamination and keep your pickled beans safe to eat for months. Place the jars upside down on a clean kitchen towel to dry completely.
In a large saucepan, combine the 2 cups white vinegar, 2 cups water, 2 tbsp salt, and 1 cup granulated sugar. Stir over medium heat until the sugar and salt dissolve completely—this should take about 3-5 minutes. You'll know it's ready when the mixture looks clear and the sugar has fully melted. Remove the pan from heat and let the brine cool slightly while you prepare the remaining ingredients.
Pack the Jars with Flavorful Ingredients
Lightly crush the 6 cloves garlic with the side of a knife (don't mince them—whole cloves hold their shape better). Chop the 0.25 cup fresh dill finely, removing any tough stems. Lightly crush the 1 tsp black peppercorns with the bottom of a heavy pan or rolling pin. Divide the 2 whole bay leaves between the jars.
Pack the cut green beans tightly into each jar, leaving about 1 inch of headspace at the top. Then add the garlic, dill, peppercorns, and bay leaves to each jar. The beans should be completely submerged when you add the brine later, so pack them firmly. If they don't fill the jar completely, that's okay—just make sure the aromatics are distributed evenly.
Fill Jars with Hot Brine and Seal
Pour the cooled brine over the green beans in each jar until they're completely covered by about ½ inch. Tap the jars gently on the counter to remove any air bubbles trapped between the beans. Wipe the rims with a clean, damp cloth to ensure a good seal, then place the lids on the jars and screw the bands down until they're fingertip-tight.
Here's where it gets exciting—the jars should seal themselves as the brine cools. You'll know it's working when you hear a satisfying "ping" sound. If you don't hear it within 24 hours, check the seals. The beans will keep in the fridge for up to 3 months, but they'll taste best within the first 2 weeks when the flavors are at their peak.
Cool and Store for Maximum Flavor
Let the jars cool completely at room temperature. This allows the brine to fully penetrate the beans and develop that perfect tangy crunch. Once cooled, store the jars in the refrigerator. The longer they sit, the more flavor they absorb—so wait at least 24 hours before tasting if you can.
When you're ready to serve, simply open a jar and scoop out the beans. They're perfect straight from the jar as a snack, or tossed with pasta, potatoes, or grilled meats. The vinegar-bright flavor cuts through rich dishes beautifully. And the best part? These beans keep their crunch for weeks, making them a pantry staple you'll reach for again and again.
Pro Tips For Making Old Fashioned Pickled Green Beans
- Blanch Before Pickling: Drop your green beans into boiling water for exactly 3 minutes—no more, no less—then shock them in ice water. This stops cooking instantly and keeps them crisp. I learned this the hard way after serving mushy beans that tasted like they’d been sitting too long.
- Use Hot Brine: Heat your vinegar, water, salt, and sugar until the sugar dissolves completely—no grainy residue in your jar. Pour it hot over the blanched beans to seal the jars faster and prevent mold. (Yes, even if you’re impatient like me.)
- Trim Evenly: Snip the ends at a 45-degree angle with kitchen shears—this keeps the beans from floating like little rafts in your jars. Uneven cuts mean uneven cooking, and nobody wants half the batch swimming while the other half sinks.
- Skip the Crowding: Pack the beans loosely into jars, leaving at least an inch of headspace. Tightly packed beans won’t have room to expand, and you’ll end up with a mess of vinegar sloshing everywhere when you open them. (Your future self will thank you.)
Storing and reheating this dish
Refrigerator Storage
Once your jars are sealed and cooled, store them in the refrigerator for maximum freshness. These pickled green beans will stay crisp and flavorful for up to 3 months—though I find they taste best within the first 2 weeks when the flavors are at their peak.
The vinegar brine preserves that satisfying crunch, so don’t worry about them getting mushy like other pickled veggies. I always keep a jar in my fridge for quick snacks or last-minute meal additions. 🥫
Freezer Preservation
If you want to extend their shelf life beyond the fridge, freezing works surprisingly well. First, transfer the cooled beans and brine to freezer-safe containers (I use quart-sized glass containers with tight lids). Leave ½ inch of headspace to prevent cracks from ice expansion.
Label with the date—they’ll keep for up to 6 months without losing much flavor or texture. When ready to use, thaw overnight in the fridge and reheat gently in the brine to maintain crunch.
Room Temperature Safety
Unopened jars can sit at room temperature for up to 1 year in a cool, dark pantry—just make sure they’re properly sealed. Once opened, though, they must go in the fridge within 24 hours to prevent spoilage.
I’ve learned the hard way that leaving them out too long leads to soggy beans and cloudy brine. If you’re unsure about a jar’s seal (no "ping" sound after 24 hours), process it in a water bath for 10 minutes as a precaution. Safety first!
Reheating for Crunch
To revive slightly softened beans, pour them into a saucepan with their brine and heat over medium-low heat for 3-5 minutes. The acidity in the vinegar helps restore their crispness. For extra crunch, add a splash of fresh vinegar or lemon juice before serving.
I also like warming them in a microwave-safe bowl for 1-2 minutes—just cover loosely with a damp paper towel to retain moisture. The key is gentle heat to avoid turning them mushy. 🔥
Gift-Worthy Pantry Staple
These beans make fantastic homemade gifts—just tie a ribbon around the jar and add a handwritten note. The brine actually improves with age, so jars made in summer taste even better by winter. For gifting, I use amber glass jars to protect the light-sensitive green color.
If shipping, pack them in a cardboard box with bubble wrap to prevent breakage. Your friends will love the thoughtfulness (and the tangy crunch!). ✨
Nutrition facts
Frequently asked questions
Can I use wax beans instead of regular green beans?
Wax beans work beautifully in this recipe—their slightly sweeter flavor pairs wonderfully with the tangy vinegar. Just be sure to trim the ends carefully and cut them into the same 2-inch pieces. The texture will be slightly firmer but still delicious when pickled. For extra crunch, blanch wax beans for 2 minutes before packing them into jars.
How do I know if my pickled beans are properly sealed?
Check for a proper seal by pressing down on the jar lid—it shouldn't pop up. The most reliable test is the "ping" sound when the jar cools completely (usually within 24 hourswater bath for 10 minutes to ensure safety.
Can I make this recipe without vinegar?
While traditional recipes rely on vinegar for preservation and tang, you can substitute with lemon juice or apple cider vinegar (use 2 cups lemon juice + ½ cup extra sugar). For a fermented version (less acidic), use 2% salt brine instead and ferment for 3-5 days before refrigerating. The flavor will be milder but still delicious!
Why did my beans turn mushy instead of staying crisp?
Mushy beans usually mean overcooking or improper storage. Always pack beans raw into jars—they'll stay crisp when submerged in cold brine. If reheating, use gentle heat (never boil) and add a splash of fresh vinegar. For extra crunch, store opened jars in the fridge and eat within 2 weeks. Pro tip: Leave ½ inch of headspace to prevent beans from floating and softening.
What's the best way to use up extra pickled beans?
These versatile beans shine in so many dishes! Toss them with pasta and olive oil, mix into potato salad, or serve as a tangy topping for grilled chicken. For a quick snack, spread on toast with cream cheese. They also add crunch to charcuterie boards or sandwiches. The key is to drain them well before using to avoid soggy dishes.