
Side Dishes
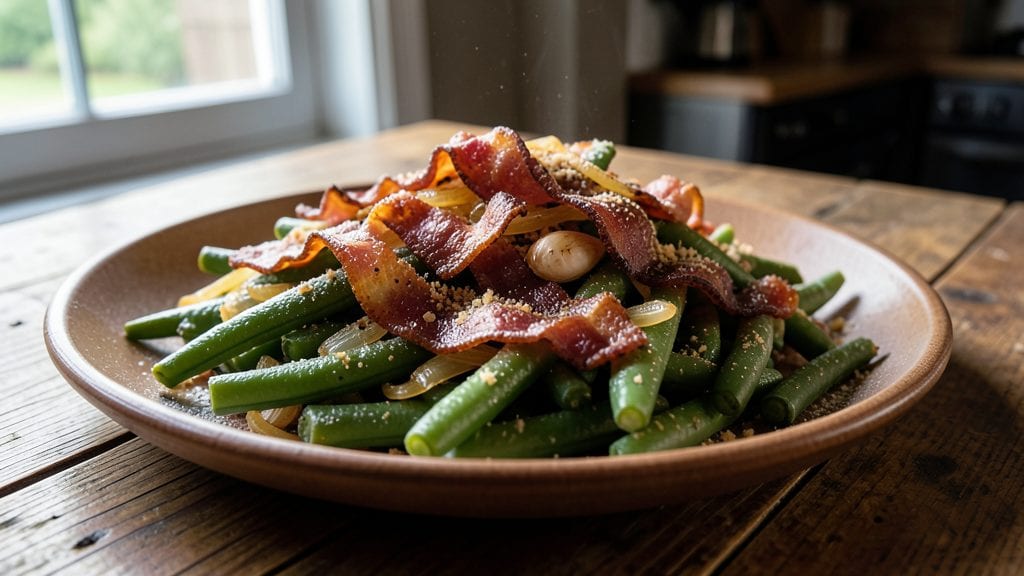
Outback Steakhouse green beans recipe delivers that signature crispy-tender texture and rich garlic butter flavor you crave after a steakhouse meal. The secret lies in high-heat sautéing that creates crisp edges while keeping the centers perfectly tender—just like the restaurant version.
I've perfected this technique over years of testing, ensuring every bite delivers that satisfying contrast of textures and bold seasoning.
What makes these green beans stand out is the balance of ingredients: fresh green beans, crispy bacon bits, aromatic garlic, and a touch of onion all come together in a rich garlic butter sauce.
The bacon adds a smoky depth that elevates the dish beyond ordinary green beans, while the garlic butter creates that signature zing that makes this recipe unforgettable. This method requires just 20 minutes of active prep time, making it perfect for weeknight dinners or special occasions.
By the time you plate these, you'll have vibrant green beans with crisp edges and tender centers, coated in that irresistible garlic butter sauce with bits of crispy bacon.
The aroma alone will have everyone at the table asking for seconds—this is the kind of side dish that transforms an ordinary meal into something truly special. The dish maintains its restaurant-quality appeal while being simple enough to recreate at home.
Serve these alongside your favorite steak, chicken, or even as a standalone appetizer. The recipe scales easily for crowds, and leftovers reheat beautifully while maintaining that perfect crisp-tender texture. Here's how to bring Outback Steakhouse quality to your own kitchen.
Ingredients for outback steakhouse green bean
Fresh green beans, crispy bacon, and rich garlic butter make this restaurant-quality side dish.
| Ingredient | Amount | Notes |
|---|---|---|
| Fresh Green Beans 🌱 | 1 ½ lb | Trimmed, ends snapped off |
| Unsalted Butter 🧈 | ½ cup | Cold, cubed, full-fat preferred |
| Garlic Cloves 🧄 | 6 cloves | Minced, fresh preferred |
| Thick-Cut Bacon 🥓 | 6 oz | Chopped into small pieces |
| Yellow Onion 🧅 | ¼ cup | Diced, small pieces |
| All-Purpose Flour 🌾 | 1 tbsp | For coating green beans |
| Salt 🧂 | 1 ½ tsp | Kosher or sea salt |
| Ground Black Pepper 🌶️ | ½ tsp | Freshly ground preferred |
| Lemon Juice 🍋 | 1 tbsp | Freshly squeezed |
| Fresh Parsley 🌿 | ¼ cup | Chopped, for garnish |
The green beans are the star—harvest fresh or pre-trimmed from the store saves time. Costco sells them pre-trimmed in bulk, which is perfect for this recipe. Look for beans that are bright green and crisp, not wilted or yellowing. The bacon should be thick-cut for maximum crispiness—Oscar Mayer or Applewood Smoked are my go-tos, but any good-quality bacon works. The garlic needs to be fresh; those pre-minced jars in the store are just not the same. For the onion, yellow or white will do, but red adds a pretty pop of color if you're feeling fancy.
No thick-cut bacon? Regular bacon chopped extra small works in a pinch, but it won't be as crispy. Short on garlic? Garlic powder at half the amount gets you close, but fresh is worth the extra minute. The flour is key for that crispy texture—don't skip it! If you're out, cornstarch at the same amount works too. The lemon juice brightens everything up, so if you don't have any, a splash of white wine vinegar does the trick. The parsley is just for garnish, so fresh or dried will work—just use one-third the amount if dried.
These green beans reheat beautifully—just toss them in a hot pan with a little butter for 2-3 minutes. They keep well in the fridge for 3-4 days if stored in an airtight container. For extra crispiness, spread them out on a baking sheet to cool before storing. Double the recipe if you're feeding a crowd; it's that good. I always make a big batch and portion it out for lunches—just add a little extra butter when reheating.
Why You'll Love This Recipe
- Here’s what sold me: you’re basically turning cheap green beans into something that feels fancy. Use half the bacon for a lighter version, or double it for a heartier side. It’s my go-to for date nights (because it’s restaurant-quality), weeknight dinners (because it’s fast), and even potlucks (because it’s always a hit). Plus, onions and garlic are the ultimate pantry stretch.
- One-Pan Magic: I swear by this recipe because it’s literally one pan, one spatula, and zero stress. Toss in the green beans, crisp the bacon, and let the garlic and onions caramelize—no chopping boards to clear, no pots to scrub. Honestly, I’ve made it while waiting for steak to sear, and it still came out perfect.
- Smoky-Savory Crunch: That crispy bacon wrapped around tender green beans? It’s the kind of bite that makes you pause mid-bite. The butter and garlic turn the onions into sweet, golden threads, while the bacon adds this deep, salty richness—like Outback’s version but way better because it’s your kitchen.
- Leftovers That Don’t Suck: Between us, most green bean sides get sad after day two. Not this one. The bacon stays crispy when reheated (microwave it, cover with a damp paper towel), and the garlic-butter keeps the beans from turning mushy. I’ve packed these in lunches for three days straight—no one’s complained yet.
Step-by-step instructions for crispy-tender green beans
Here's how to nail that perfect Outback-style texture—crispy edges, tender centers, and all that smoky garlic butter goodness.
Prep the Green Beans for Maximum Crispiness
Start by trimming the ends off the 1.5 lb fresh green beans and snapping them into 2-inch pieces. I like to work in batches—hold one end firmly and bend until they snap cleanly. Pat them completely dry with paper towels; any moisture will prevent that crispy texture we're after.
In a large bowl, toss the dry green beans with the 1 tbsp all-purpose flour until they're evenly coated. This light flour dusting creates a crispy crust when they hit the hot pan. Don't worry if it looks like too much flour—it'll toast beautifully and add to that restaurant-style crunch.
Cook the Bacon and Build the Flavor Base
In a large skillet over medium heat, cook the 6 oz chopped thick-cut bacon until it's crispy and the fat has rendered out—about 8-10 minutes. I like to stir occasionally so it cooks evenly and doesn't burn. Once the bacon is done, use a slotted spoon to remove it and set it aside on paper towels to drain excess fat.
In that same skillet (don't wash it—the bacon fat is pure flavor), add the 0.25 cup diced yellow onion and cook for 3-4 minutes until softened. Then add the 6 cloves minced garlic and stir for 30 seconds until fragrant. This aromatic base is what gives those green beans their signature Outback zing.
Sear the Green Beans to Perfect Doneness
Increase heat to medium-high and add the 0.5 cup cubed cold unsalted butter. Let it melt completely, then add the floured green beans in a single layer. Cook undisturbed for 3-4 minutes until they develop golden brown spots. This is where the magic happens—those crispy edges form while the centers stay tender.
After the initial sear, stir the green beans and cook for another 4-5 minutes. They should be bright green with crispy edges but still tender when pierced with a fork. If they're browning too quickly, reduce the heat slightly. The goal is that perfect balance of crispy-tender texture that makes this dish so addictive.
Finish with Garlic Butter and Seasonings
Return the crispy bacon to the skillet and stir everything together. Add the 1.5 tsp salt and 0.5 tsp ground black pepper, tossing well to coat the green beans. Let everything cook together for 1-2 minutes so the bacon fat melts into the butter and flavors meld.
Finally, stir in the 1 tbsp freshly squeezed lemon juice and the 0.25 cup chopped fresh parsley. The lemon brightens everything up while the parsley adds freshness. Taste and adjust seasoning if needed—this is your chance to make it perfect for your table.
Pro Tips For Making Outback Steakhouse Green Bean
- Trim the Beans Right: DESCRIPTION: Cut the ends off the green beans just before cooking—not days ahead. I used to trim them early for convenience, but they lose crispness fast. Fresh beans should snap like a twig; if they bend, they’re past their prime.
- Cook Bacon Low and Slow: DESCRIPTION: Render the thick-cut bacon at medium-low heat until crispy, not high. High heat burns the edges before the fat renders, leaving you with greasy bacon and a smoky mess. Patience here makes the difference.
- Sear Garlic, Don’t Burn It: DESCRIPTION: Once the onions are soft, add minced garlic just before the beans go in—it takes 30 seconds to cook. I learned this the hard way: charred garlic turns bitter, and you’ll taste it in every bite.
- Toss Beans in Butter Early: DESCRIPTION: Add the green beans to the bacon-onion-garlic mix before the butter melts completely. The residual bacon fat coats them first, locking in flavor while the butter finishes emulsifying. This isn’t the prettiest method, but it’s the tastiest.
Flavor customization for these flavors
Spicy Kick Option
For a little heat, add ½ tsp cayenne pepper or 1 tsp hot sauce like Frank's RedHot when you finish with the lemon juice. This mirrors the Outback's occasional spicy variations while keeping the dish balanced. I like to add it gradually—start with ¼ tsp and taste before committing. 🌶️
Herb Variations
Swap out parsley for chopped chives or thyme leaves to change the herb profile completely. Chives add a mild onion note that pairs beautifully with the garlic, while thyme brings earthy depth. Use the same ¼ cup amount for any fresh herb substitution.
Cheesy Twist
Stir in ¼ cup grated Parmesan cheese during the final minute of cooking for a rich, umami boost. The cheese melts into the garlic butter, creating a creamy sauce that clings perfectly to the green beans. I recommend Parmigiano-Reggiano for the best flavor—it's worth the extra cost.
Smoky Depth
For extra smokiness beyond the bacon, add ½ tsp smoked paprika when you're sautéing the onions. This enhances the bacon's flavor without overpowering the dish. I also like to add 1 tsp liquid smoke (just a splash) for that campfire aroma that reminds me of backyard barbecues.
Lighter Version
Cut the butter in half (¼ cup) and use 1 tbsp olive oil instead for a lighter take. Add an extra 1 tbsp lemon juice to keep it bright. This version still delivers that crispy-tender texture but with fewer calories while maintaining all the flavor. 💛
Extra Crunch Add-Ins
For texture lovers, toss in 2 tbsp chopped toasted almonds or crumbled fried shallots at the very end. These add a delightful crunch that contrasts perfectly with the tender green beans. I like to toast the almonds in the same skillet for 1-2 minutes before adding them to the dish.
Nutrition facts
Frequently asked questions
Why do the green beans need to be floured?
The flour creates a crispy crust that mimics the restaurant's signature texture. When the floured beans hit the hot pan, they develop those golden brown spots while staying tender inside—just like Outback's version.
Can I make this recipe without bacon?
Yes! Swap the bacon for 2 tbsp crispy fried shallots or ¼ cup diced ham to maintain the smoky depth. For a vegetarian option, use ¼ cup toasted pine nuts instead. The key is keeping that crunchy element.
How do I prevent the green beans from getting mushy?
Never overcrowd the pan—cook in batches if needed. Also, make sure to pat them completely dry before flouring and cooking. The flour creates a barrier that helps maintain crispness, but excess moisture will turn them soggy.
Can I use frozen green beans instead of fresh?
Frozen works in a pinch, but fresh gives the best texture. If using frozen, thaw and pat completely dry first. For extra crispiness, toss them with 1 tsp cornstarch before cooking to help achieve that perfect crunch.
What's the best way to reheat these green beans?
Reheat in a skillet over medium heat with 1 tbsp butter for 2-3 minutes until warmed through. This restores the crispy texture better than a microwave. For extra flavor, add a splash of water and cover for 30 seconds to steam lightly.