
Side Dishes
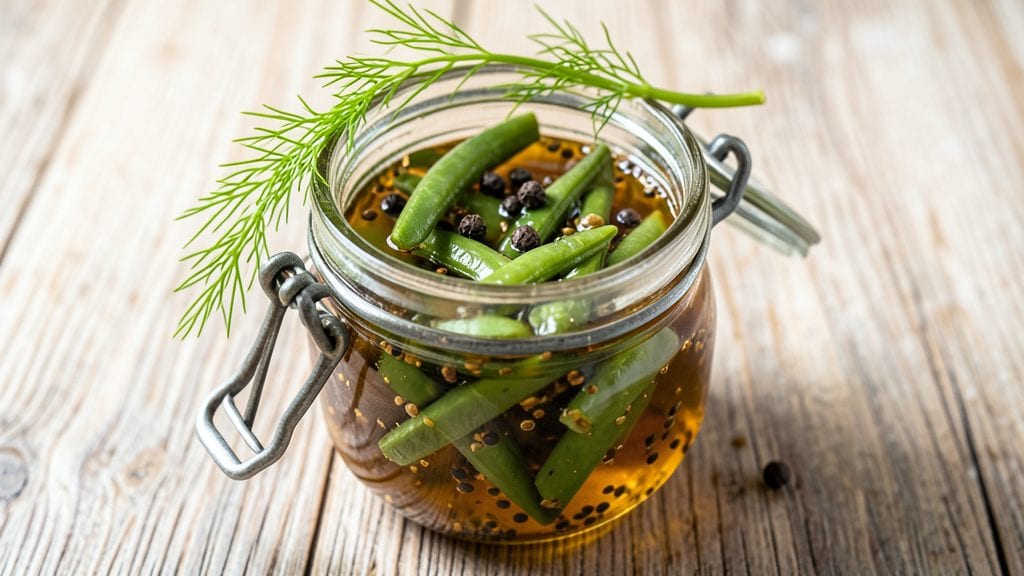
This pickled French beans recipe transforms fresh beans into vinegar-kissed crunch in just 15 minutes of active time, delivering restaurant-quality pickles that stay crisp for weeks. The secret lies in proper blanching—briefly boiling the beans preserves their texture while allowing the tangy brine to penetrate deeply.
I developed this method after struggling with limp, waterlogged pickles, and it never fails to impress.
This recipe delivers authentic flavor without shortcuts: a balanced brine of white vinegar, salt, and sugar creates that signature tang, while aromatic spices like mustard seeds and black pepper add depth.
The process is straightforward—wash, blanch, pack jars tightly, and pour the hot brine—but precision at each step ensures perfect results every time. No special equipment is needed beyond clean jars and a pot.
By the time you seal the jars, you’ll have vibrant green beans with a satisfying crunch and bright acidity that cuts through rich dishes. These pickles elevate sandwiches, charcuterie boards, or even pasta salads, offering a burst of flavor with every bite.
The recipe scales easily for gifts or meal prep, and variations like adding garlic or chili flakes let you customize the taste.
Once cooled, store the pickles in the refrigerator for up to 2 months, where they’ll continue to develop flavor. The key to success is patience—letting the beans marinate overnight ensures maximum crunch and taste. Ready to make your own? Here’s how to get started with foolproof technique.
Ingredients for pickled french beans
Fresh beans meet vinegar and spices for restaurant-style crunch in just minutes.
| Ingredient | Amount | Notes |
|---|---|---|
| Fresh French Green Beans 🥦 | 1 ½ lb | Trimmed, ends snapped off |
| White Distilled Vinegar 💧 | 2 cups | 5% acidity minimum for safety |
| Granulated Sugar 🍚 | ½ cup | Light or raw preferred |
| Diamond Crystal Kosher Salt 🧂 | ¼ cup | Not iodized, for proper balance |
| Mustard Seeds 🌶️ | 1 tbsp | Yellow or brown, whole seeds |
| Black Peppercorns 🌶️ | 1 tsp | Crushed lightly, not powdered |
| Garlic Cloves 🧄 | 4 cloves | Sliced thin, optional for flavor |
| Red Chili Flakes 🔥 | ½ tsp | Adjust for heat preference |
| Fresh Dill Sprigs 🌿 | 4 whole | Stems removed, loosely packed |
| Water 💧 | 2 cups | Filtered preferred for clarity |
| Mason Jars (Pint Size) 🥫 | 4 whole | Clean, sterilized, airtight seal |
The beans are the foundation—harvest fresh French green beans from your garden or grab them at Whole Foods or local farmers' markets for the best texture. Avoid thick beans over 1/4 inch wide; they won't blanch evenly. If using store-bought, Trader Joe's or Costco carry consistently crisp options. Trim the ends cleanly with a knife—snapping them leaves stringy bits. For maximum crunch, blanch them for exactly 3 minutes in boiling water before shocking in ice water; this preserves their vibrant green color and satisfying bite. The blanching time is critical—any longer and they'll turn mushy.
White vinegar is non-negotiable here—apple cider vinegar works but alters the classic tang. If you're sensitive to heat, reduce the red chili flakes to 1/4 tsp or omit entirely. No mustard seeds? 1/2 tsp ground mustard works in a pinch, but whole seeds add that signature crunch. The garlic and dill are optional but elevate the flavor—fresh dill is best, but dried at 1/4 tsp works if needed. For a sweeter brine, increase sugar to 2/3 cup; for more tang, add 1/4 cup extra vinegar. The brine should cover beans by 1/2 inch in the jars—adjust water accordingly.
Once sealed, these pickles develop deeper flavor over time—wait at least 24 hours before eating for maximum crunch and tang. Store in the refrigerator for up to 2 months; the acidity preserves them safely. For gifting, use ball or Kerr jars and include care instructions. The beans stay crisp for weeks, but the dill and garlic may soften after 3-4 weeks. To revive limp pickles, let them sit in fresh brine for 1 hour before serving. This recipe scales perfectly—double the ingredients for 8 pint jars, adjusting water to maintain the 1:1 vinegar-to-water ratio.
Why You'll Love This Recipe
- No-Fuss Pantry Magic: I swear by this one—just beans, vinegar, sugar, and salt. That’s it. No fancy prep, no last-minute grocery runs. The mustard seeds add a tiny pop of texture without extra effort, and the beans stay crisp when jarred right.
- Tangy Crunch Alert: Honestly, the balance here is chef’s kiss—bright vinegar cuts through the natural sweetness of the beans, while the sugar just mellows the edge enough to make it addictive. The mustard seeds? Tiny but mighty, giving each bite a subtle, satisfying bite that lingers.
- Picnic or Potluck Hero: Between us, this is my go-to for gatherings. Cold or room temp, it travels well, and no one ever turns down pickled beans. Serve them alongside grilled meats, toss in salads, or just eat straight from the jar—no judgment here.
- Zero-Waste, Budget Win: I make a big batch and keep it in the fridge for weeks. The vinegar preserves them perfectly, so there’s no sad wilted beans in the crisper. Plus, kosher salt and sugar are cheap staples—this recipe stretches my grocery budget without sacrificing flavor.
Step-by-step instructions for pickled French beans
Here's how to create vibrant, tangy pickled French beans with crisp texture and balanced flavor.
Prepare and Blanch the French Green Beans
Begin by trimming the ends from the 1.5 lb of fresh French green beans, discarding any woody stems. Cut the beans into 2-inch pieces for even pickling. In a large pot, bring 2 cups of water to a rolling boil. Add the bean pieces and blanch for exactly 2 minutes - this preserves their crisp texture while softening slightly. Immediately drain in a colander and rinse under cold water to stop the cooking process. You'll notice the beans turn a bright green color and maintain their straight shape.
Transfer the blanched beans to a large bowl and set aside. The beans should be hot but not steaming when you handle them. This brief cooking step is crucial - under-blancing leaves them too tough, while over-blancing makes them mushy. The 2-minute window ensures perfect texture for pickling.
Create the Pickling Brine
In a separate large bowl, combine the 2 cups of white distilled vinegar, 0.5 cup of granulated sugar, and 0.25 cup of Diamond Crystal kosher salt. Stir until the sugar and salt completely dissolve - this creates the flavor base. Add the 1 tbsp of mustard seeds, 1 tsp of lightly crushed black peppercorns, 0.5 tsp of red chili flakes, and the 4 cloves of sliced garlic. Mix well to distribute all spices evenly throughout the liquid. The mixture should be warm from the dissolved sugar.
Add the 4 whole fresh dill sprigs (with stems removed) to the brine. The dill will infuse its aromatic flavor into the liquid. Give everything one final stir to ensure all ingredients are fully incorporated. The brine should have a slightly cloudy appearance from the dissolved salt and sugar, with visible specks of mustard seeds and peppercorns throughout.
Pack and Seal the Mason Jars
Divide the blanched green beans evenly among the 4 sterilized pint-sized mason jars, packing them tightly but not compressing. Pour the warm brine over the beans until each jar is completely filled, leaving only about ½-inch headspace at the top. Use a wooden spoon to gently press down on the beans, ensuring they're fully submerged in the brine and no air pockets remain. This prevents mold growth during storage.
Wipe the rims of the jars with a clean, damp cloth to remove any residue. Place the lids on the jars and screw on the bands until fingertip-tight - not too tight, as the jars need room to expand slightly during processing. The beans should be completely covered by the brine, with no visible bean surfaces above the liquid level.
Process for Preservation
Place the filled jars in a large pot and add enough water to come 1-2 inches above the tops of the jars. Bring to a gentle boil over medium heat, then process for 10 minutes. Maintain a steady simmer - the water should bubble gently but not vigorously. This boiling process creates a vacuum seal that preserves the pickled beans for months.
After processing, carefully remove the jars using tongs and place them on a clean towel. Let them cool completely at room temperature for 12-24 hours. You'll hear a satisfying "ping" as the lids seal. Check each jar to ensure the lids have sealed properly - the center should not flex when pressed. Store in a cool, dark place for up to 6 months, though they'll be delicious within a few days.
Pro Tips For Making Pickled French Beans
- Blanch First: DESCRIPTION:
- Measure Salt Precisely: DESCRIPTION:
- Simmer Gently: DESCRIPTION:
- Add Mustard Seeds Last: DESCRIPTION:
Essential equipment for this recipe
Essential Jars
You'll need 4 sterilized pint-sized mason jars—I recommend Ball or Kerr jars for their airtight seals and durability. Sterilize them by boiling in water for 10 minutes or run through a dishwasher cycle.
The jars should be completely dry before filling to prevent contamination. For gifting, these brands also look elegant on shelves. 🥫
Blanching Pot
A large stockpot with a lid is essential for blanching the beans. I use an All-Clad stainless steel pot because it heats evenly and prevents scorching.
The pot needs to hold at least 4 quarts of water to accommodate the beans comfortably. A slotted spoon helps drain the blanched beans efficiently.
Measuring Tools
Precision matters in pickling, so invest in a digital kitchen scale for the beans and a stainless steel measuring cup for vinegar. I use a OXO Good Grips scale for accuracy and a Weck glass measuring cup for vinegar—it's heat-resistant and easy to read.
A fine-mesh strainer is also useful for rinsing the blanched beans.
Brine Mixing Bowl
A large stainless steel bowl (at least 2-quart capacity) is perfect for mixing the brine. I prefer stainless steel because it won’t react with the vinegar or spices. A wooden spoon helps stir the brine without scratching the bowl. Avoid plastic—vinegar can degrade it over time.
Wooden Spoon
Use a wooden spoon to pack the beans tightly into jars without crushing them. I keep a cherry wood spoon in my kitchen specifically for pickling—it’s gentle on jars and adds a rustic touch. Avoid metal spoons, as they can dent the jars or react with the vinegar.
Water Bath Setup
A deep pot or canner (at least 8-quart capacity) is needed for processing the jars. I use a Presto 01304 canner because it distributes heat evenly. Place a rack or folded towel at the bottom to elevate the jars and prevent cracking.
Keep a timer handy—10 minutes of processing is critical for safety.
Nutrition facts
Frequently asked questions
Why do I need to blanch the beans before pickling?
Blanching for exactly 2 minutes softens the beans slightly while preserving their crisp texture. This step also removes surface dirt and enzymes that could cause spoilage. Without blanching, the beans stay too tough and won't absorb the brine flavors properly.
Can I use store-bought green beans instead of fresh?
Yes, but fresh beans yield the best texture. If using canned or frozen beans, drain and rinse them thoroughly, then blanch for 3 minutes instead. Look for Trader Joe's or Costco brands—they're consistently high-quality for pickling. The key is starting with firm, straight beans under 1/4 inch wide.
How do I know if my pickled beans are properly sealed?
The jar should make a satisfying "ping" sound when sealed, and the lid shouldn't flex when pressed. If the seal fails, the beans will be safe to eat but should be refrigerated within 3-5 days. For extra security, check for a slight concave lid center—this indicates a proper vacuum seal.
Can I adjust the spice level in this recipe?
Reduce the 0.5 tsp red chili flakes to 0.25 tsp for mild heat or omit entirely. For extra kick, add 1/4 tsp cayenne pepper or 1 sliced jalapeño per jar. You can also swap mustard seeds for 1/2 tsp ground mustard if whole seeds aren't available. The brine ratio remains the same for all variations.
How long do these pickles last, and can I make them ahead?
Properly sealed jars last 6 months in a cool, dark pantry. For immediate use, refrigerate and enjoy within 2 months for maximum crunch. Make them 1-2 weeks ahead to let flavors develop—this is when they taste best! The beans stay crisp for weeks, though the dill may soften after 3-4 weeks.