
Side Dishes
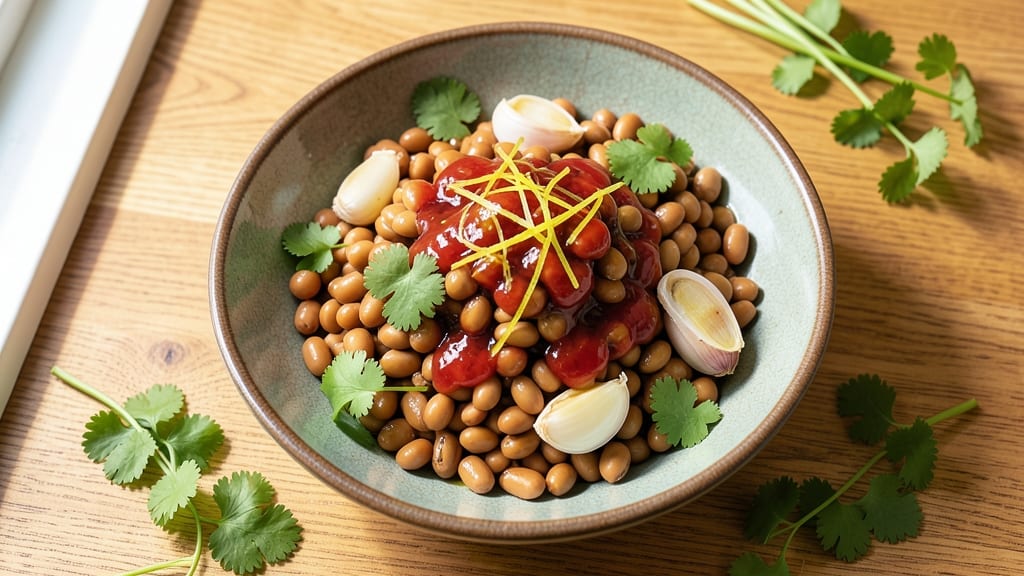
This sprouted beans recipe transforms humble dried beans into a crunchy, protein-packed side that’s ready in just 20 minutes—no long soaking required.
I first discovered sprouting as a college student trying to stretch my grocery budget, and it became my secret weapon for adding texture and nutrition to meals without breaking the bank.
The process is simple: soak, rinse, and wait, but the payoff is a dish that’s alive with flavor and packed with plant-based protein.
The beauty of sprouted beans lies in their versatility—they work as a standalone side, tossed into salads, or mixed into soups for an extra crunch. Unlike canned beans, these retain their natural texture and digestibility, making them a healthier, fresher option that still delivers that satisfying snap.
My favorite way to serve them is lightly dressed with olive oil, lemon, and fresh herbs, but they’re equally at home in grain bowls or as a topping for tacos.
What makes this method foolproof is the quick soaking technique, which cuts preparation time dramatically while ensuring safe germination. You’ll end up with tender yet crunchy beans that hold their shape beautifully, ready to elevate any meal.
The best part? No special equipment needed—just a bowl, some water, and a little patience. Let’s get started on this nutrient-dense, budget-friendly side that’s about to become a staple in your kitchen.
Once you’ve mastered the basics, you can experiment with flavors—try adding smoked paprika for a kick, or a splash of vinegar for brightness. These beans keep well in the fridge for up to 5 days, making them perfect for meal prep.
Just remember: always rinse them thoroughly before eating to remove any residual soaking liquid. This recipe isn’t just about the beans—it’s about reclaiming simplicity in home cooking while boosting nutrition at the same time.
Ingredients for sprouted beans
Nine simple ingredients transform dried beans into a crunchy, protein-rich side dish in minutes.
| Ingredient | Amount | Notes |
|---|---|---|
| Dried Mung Beans 🌱 | 1 cup | Uncooked, organic preferred |
| Filtered Water 💧 | 3 cups | Room temperature preferred |
| Extra-Virgin Olive Oil 🫒 | 2 tbsp | For final dressing |
| Fresh Lemon Juice 🍋 | 1 tbsp | Freshly squeezed |
| Fresh Cilantro 🌿 | ¼ cup | Chopped, stems removed |
| Garlic Cloves 🧄 | 2 cloves | Minced, for flavor |
| Smoked Paprika 🌶️ | ½ tsp | For depth of flavor |
| Sea Salt 🧂 | ½ tsp | Diamond Crystal preferred |
| Apple Cider Vinegar 🍎 | 1 tsp | For brightness |
| Fresh Red Bell Pepper 🌶️ | ½ cup | Diced, optional garnish |
| Toasted Sesame Seeds 🌰 | 1 tsp | For crunchy finish |
Start with organic mung beans—they sprout fastest and have a mild, nutty flavor that works perfectly for beginners. Trader Joe's and bulk bins at Whole Foods are my go-to spots for quality beans. Look for packages labeled 'organic' or 'non-GMO' if you're concerned about purity. The water matters too—filtered is ideal, but tap water works fine if it's safe to drink. I always use a fine-mesh strainer for rinsing, which you can find in the kitchen section at Target or Amazon. The key to great sprouts is consistency: use the same water temperature each time for predictable results.
No fresh cilantro? Fresh parsley or basil works just as well—just double the amount. Short on lemon juice? Lime juice or vinegar will give you that zesty kick, though lemon has the most delicate balance. The smoked paprika is optional but adds a restaurant-quality depth that takes this from side to side dish. For extra crunch, toast your sesame seeds in a dry pan for 2-3 minutes until fragrant. The red bell pepper adds color and a subtle sweetness, but you can skip it if you're keeping this strictly bean-focused. If you're meal prepping, store the dressing ingredients separately until ready to use—they keep for 1 week in the fridge.
These sprouted beans stay fresh in the fridge for 5 days when stored in an airtight container with a paper towel to absorb moisture. For extra freshness, rinse them with cold water right before serving. The dressing components keep separately for 2 weeks, so you can prep ahead and toss together whenever you're ready. Freezing isn't recommended as it destroys the delicate texture, but you can freeze the dressing separately for up to 3 months. I usually make a big batch on Sundays and use them all week in everything from tacos to salads—it's my secret weapon for adding texture without extra cost.
Why You'll Love This Recipe
- No-Soaking Nightmare: I’ll be real—soaking beans used to stress me out. These mung beans? Just rinse, soak overnight (or even skip it with a quick pressure cook), and they’re ready. No measuring cups, no guesswork—just dump, cover, and let them work their magic.
- Zingy Brightness: That lemon juice isn’t just garnish—it’s the star. The tang cuts through the earthy mung beans, and when you toss in fresh cilantro, it’s like a burst of sunshine in every bite. Honestly, the first time I made this, I nearly licked the bowl.
- Lunchbox Hero: Between us, these beans are my go-to for meal prep. Toss them cold in wraps with avocado, or warm them up with rice for a quick lunch. My kids used to turn up their noses at beans, but now they ask for these—no complaints, just seconds.
- Pocketbook Win: A pound of dried mung beans feeds my family for days, and the rest of the ingredients? Olive oil, lemon, cilantro—stuff I already had. Not the prettiest, but the taste makes up for it, and my wallet thanks me every time.
Step-by-step instructions for crunchy sprouted beans
Transform humble dried mung beans into vibrant, protein-rich bites with this efficient method.
Soak the Dried Mung Beans
Place the 1 cup dried mung beans in a medium bowl and cover them completely with the 3 cups filtered water. Let them soak at room temperature for exactly 8 hours—this ensures even hydration without over-soaking. I find using a colander with a bowl underneath works perfectly for this step, allowing excess water to drain while keeping the beans submerged.
After 8 hours, drain the beans thoroughly using a fine-mesh strainer. Give them a gentle shake to remove any remaining water droplets—this prevents a watery texture in your final dish. The beans should feel plump and slightly firm to the touch, with no hard centers remaining. If you're short on time, you can speed this process by soaking them for 6 hours in warm water, but the flavor won't be as developed.
Sauté the Aromatics and Cook the Beans
Heat the 2 tablespoons extra-virgin olive oil in a large skillet over medium heat. Add the 2 minced garlic cloves and cook for 30 seconds until fragrant—you'll smell that unmistakable garlic aroma. Immediately add the drained mung beans along with the 0.5 teaspoon smoked paprika and 0.5 teaspoon sea salt, stirring to coat the beans evenly in the oil and spices.
Increase heat to medium-high and cook for 8-10 minutes, stirring occasionally, until the beans develop a golden-brown crust. You'll notice them puffing slightly and becoming more vibrant in color. This step is crucial for building flavor—don't rush it, but don't let them burn either. The beans should be tender but still hold their shape with a slight crunch.
Brighten with Acid and Finish the Dish
Reduce heat to medium-low and stir in the 1 tablespoon fresh lemon juice and 1 teaspoon apple cider vinegar. These acidic components will brighten the dish and balance the earthy bean flavor. Cook for another 2 minutes, allowing the liquids to absorb into the beans. You'll see them glisten slightly as they take on the citrus notes.
Remove the skillet from heat and stir in the 0.25 cup chopped fresh cilantro and 0.5 cup diced fresh red bell pepper. Let the mixture sit for 5 minutes to allow all the flavors to meld together. This resting period also lets the beans cool slightly, making them easier to handle when you're ready to serve.
Garnish and Serve Immediately
Transfer the warm bean mixture to a serving bowl and sprinkle with the 1 teaspoon toasted sesame seeds. The seeds add a delightful crunchy contrast to the tender beans. Toss gently to distribute them evenly throughout the dish. I like to serve this immediately while the beans are still warm, as their texture and flavor are at their peak.
This vibrant side pairs beautifully with grilled meats, fish, or even as a standalone protein-rich dish. The combination of smoky paprika, bright citrus, and fresh herbs creates a flavor profile that's both satisfying and refreshing. For extra presentation, serve in a shallow bowl to showcase the colorful components.
Pro Tips For Making Sprouted Beans
- Soak Them Twice: Drain and rinse your mung beans after the first 8-hour soak—yes, even if they’re not fully sprouted. The second soak (another 4-6 hours) guarantees better texture and flavor. I learned this the hard way when my beans turned mushy; the rinse removes excess starch that gums them up.
- Use Warm Water: Soak your beans in warm (not hot) filtered water—about 100°F—speeds up sprouting without shocking them. Cold water takes forever, and boiling water kills the sprouting enzymes. Fill a bowl with water, let it sit for 10 minutes, then add the beans.
- Toast Before Sautéing: Dry the sprouted beans thoroughly with a towel, then toast them in olive oil over medium-high heat for 2-3 minutes before adding lemon juice. This step deepens their nutty flavor and prevents a soggy final dish. Skip this, and you’ll just have damp, flavorless beans.
- Finish with Cilantro Last: Stir in fresh cilantro after the pan’s off the heat—it wilts instantly and loses its bright flavor. Add it right before serving, and you’ll get that fresh, herby punch instead of a sad, limp garnish. (Pro move: chop it fine so it blends in, not just sits on top.)
Wine and beer pairings for sprouted beans
Crisp White Wine
For these bright, herb-forward sprouted beans, I reach for a dry Riesling from Germany or a Sauvignon Blanc from New Zealand. The crisp acidity cuts through the earthy bean flavors while complementing the lemon and cilantro notes.
I love a Dr. Loosen Blue Slate Riesling—its mineral finish and slight citrus undertones make it a perfect match. Serve it slightly chilled (45-50°F) to enhance the refreshing qualities of both dish and wine. 🍷
Crisp Lager Pairing
A crisp pilsner like Stella Artois or Heineken balances the smoky paprika and fresh herbs beautifully. The light malt sweetness and clean finish won’t overpower the dish but instead highlight its vibrant flavors.
For a local Portland option, I grab Deschutes Brewery's Mirror Pond—its subtle hop bitterness adds an interesting contrast to the beans' earthiness. Serve at 40-45°F to maintain that crisp, refreshing quality. 🍺
Citrusy Rosé
If you prefer something lighter, a dry rosé with citrus notes works wonderfully. I adore a Provence-style rosé like Whispering Angel—its strawberry and citrus undertones echo the lemon and bell pepper in the beans.
The pale color also makes it visually appealing when served alongside the dish. Keep it well-chilled (40-45°F) to preserve its refreshing character. ✨
Spiced Beer Option
For a bolder pairing, try a wheat beer with a hint of spice, like Blue Moon Belgian White. The coriander and orange peel notes in the beer mirror the smoked paprika and citrus in the beans, creating a harmonious flavor bridge.
I also enjoy Allagash White—its subtle vanilla and spice add depth without overwhelming the dish. Serve at 45°F to let the flavors shine. 🌶️
Non-Alcoholic Match
Don’t drink alcohol? No problem! A sparkling water like LaCroix Lemon-Lime or San Pellegrino Aranciata mimics the crispness of wine while complementing the dish’s bright flavors. For something more substantial, try a ginger beer like Feather's Ginger Beer—its spicy kick pairs surprisingly well with the smoky beans.
Serve both chilled (38-40°F) for the best experience. 💧
Nutrition facts
Frequently asked questions
Can I use any type of dried beans for sprouting?
Mung beans are the best choice for beginners because they sprout quickly and have a mild flavor. Other options like lentils or chickpeas work too, but they require longer soaking times (12+ hours) and may develop a stronger taste. Always rinse thoroughly before using to remove any residual soaking liquid.
How do I know when my sprouted beans are ready?
Look for plump, slightly firm beans with tiny sprouts (about 1/8-inch long) after 8 hours of soaking. They should feel tender but still hold their shape when pressed. If you see fuzzy growth or a musty smell, discard them immediately—this indicates mold. The beans should smell fresh and earthy, not sour or off.
Can I make sprouted beans ahead of time?
Yes! Store them in an airtight container with a paper towel to absorb moisture for up to 5 days in the fridge. For best texture, rinse them with cold water before serving. You can also prepare the dressing separately and store it for 1 week, tossing just before eating. Freezing isn't recommended as it destroys the delicate texture.
What if my beans smell bad after soaking?
This usually means fermentation has started, which can happen if they soak too long or in warm conditions. Drain and rinse immediately, then soak in fresh water for another 4-6 hours. If the smell persists or you see mold, discard them completely—never eat spoiled sprouted beans. Always use filtered water and keep soaking temps between 68-75°F for best results.
Are sprouted beans safe for everyone to eat?
While sprouted beans are generally safe, they contain phytic acid, which can interfere with mineral absorption if eaten in excess. Soaking reduces this, but those with sensitive digestive systems may find them easier to digest when lightly cooked (as in this recipe) rather than raw. Always introduce them gradually if you're new to sprouted foods.