
Side Dishes
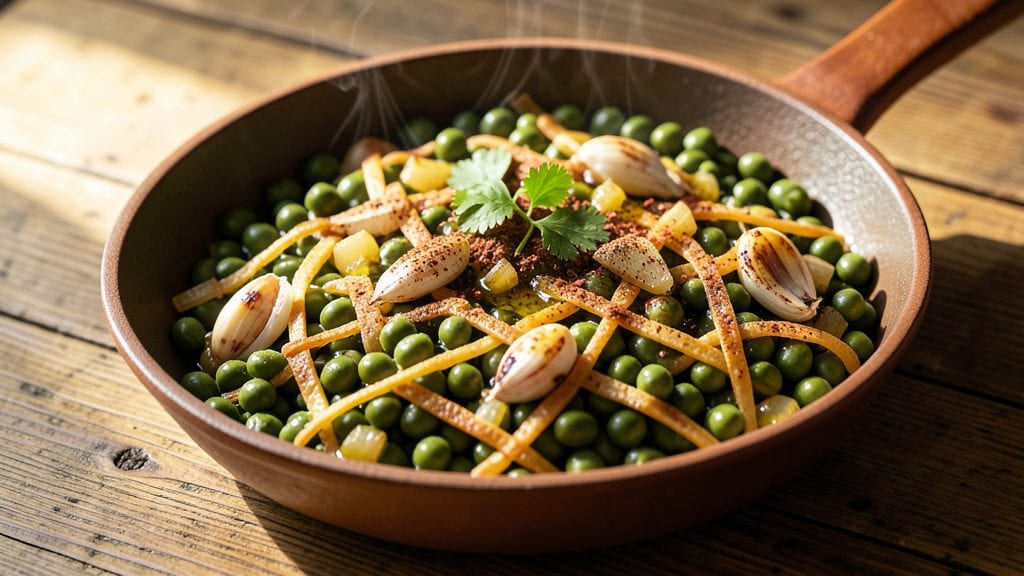
Transforming canned black-eyed beans into a spiced, flavorful side dish in just 15 minutes proves that quick meals can still pack serious taste. These humble beans absorb bold seasonings like cumin, garlic, and smoked paprika, turning into a hearty, protein-rich dish that’s perfect for weeknight dinners or potlucks.
The secret lies in balancing heat and acidity—just a splash of vinegar or lime brightens the earthy beans without overpowering their natural richness.
This recipe delivers restaurant-quality results with minimal effort, using pantry staples you likely already have. The beans simmer in a fragrant, slightly smoky broth that clings to every bite, while a touch of olive oil adds richness.
It’s a vegan powerhouse, packed with plant-based protein and fiber, yet light enough to serve alongside grilled meats or as a standalone meal. The texture is tender but holds its shape, making it versatile for salads, bowls, or even tacos.
By the end, you’ll have a speedy, satisfying side that’s far from boring—think warm spices, a hint of tang, and a satisfying bite. The aroma alone will have everyone at the table asking for seconds, and the best part?
It’s ready in 15 minutes, with no soaking or long cooking times required. This is comfort food at its most efficient, proving that great flavor doesn’t need hours in the kitchen.
Serve it alongside grilled chicken, fish, or even as a filling for wraps. The possibilities are endless, and the prep is foolproof—ideal for busy weeknights or meal prep Sundays. Let’s get cooking!
Ingredients for canned black eyed beans
Pantry staples transform into a restaurant-worthy side in just 15 minutes of simmering.
| Ingredient | Amount | Notes |
|---|---|---|
| Canned Black Eyed Peas 🌱 | 2 cans | 15 oz each, drained and rinsed |
| Extra-Virgin Olive Oil 🫒 | 2 tbsp | For sautéing aromatics |
| Yellow Onion 🧅 | ½ whole | Diced, about 1 cup |
| Garlic Cloves 🧄 | 4 cloves | Minced, fresh preferred |
| Ground Cumin 🌿 | 1 ½ tsp | Toasted for deeper flavor |
| Smoked Paprika 🌶️ | 1 tsp | For smoky depth |
| Ground Coriander 🌿 | ½ tsp | Brightens the dish |
| Dried Oregano 🍃 | ½ tsp | Mexican oregano preferred |
| Salt 🧂 | ¾ tsp | Diamond Crystal preferred |
| Black Pepper 🌶️ | ¼ tsp | Freshly ground |
| Red Wine Vinegar 🍷 | 1 tbsp | Brightens the flavor |
| Vegetable Broth 💧 | 1 cup | Low-sodium preferred |
| Lime Juice 🍋 | 1 tbsp | Freshly squeezed |
| Fresh Cilantro 🌿 | ¼ cup | Chopped, for garnish |
| Avocado Oil 🫒 | 1 tbsp | For finishing drizzle |
The cumin and smoked paprika are non-negotiable here—they build that warm, earthy backbone. Penzeys or bulk bins at Whole Foods have the best quality, but honestly, the store-brand stuff works fine if it's fresh. Toast the cumin seeds in a dry pan for 30 seconds before grinding if you're feeling fancy—it adds a nutty depth. For the onion, yellow onions give the best balance of sweetness and bite, but red will work too. I usually grab a whole onion and dice it myself because pre-chopped can get watery. The garlic? Fresh is a must—jarred garlic just doesn't cut it. If you're short on time, though, Trader Joe's sells pre-minced garlic in tubes that's perfect for this.
No smoked paprika? Regular paprika plus a pinch of liquid smoke gets you close. Swapping out the cumin for coriander? Use half the amount—it's more potent. Vinegar substitute? Lemon juice works 1:1, but it's tangier. The cilantro is optional but adds that fresh finish—if you hate it, skip it. For the vegetable broth, low-sodium is key—you don't want to overpower the spices. If you're making this ahead, add the lime juice and cilantro just before serving or they'll get bitter. The avocado oil at the end? Don't skip it—it adds richness without overpowering the spices.
This reheats beautifully—just add a splash of water or broth to loosen it up. Keeps in the fridge for 5 days and freezes for 3 months. I always double the batch because it's perfect for meal prep. Portion it into containers with a drizzle of avocado oil on top—it keeps everything fresh and adds that restaurant-quality shine. The lime juice and cilantro can be added fresh when serving, so don't worry about prepping those too early.
Why You'll Love This Recipe
- Same recipe, endless uses: toss with rice for a quick dinner, pile onto toast for breakfast, or bring it as-is to a picnic. I’ve even used it as a filling for tacos—because why not? It’s that adaptable.
- No Chopping Needed: I swear by this trick—just drain the can, toss in the onions and garlic whole, and let them soften in the oil. The beans stay intact, the flavors meld, and I’m not drowning in a pile of scraps. (Yes, even on a Tuesday night.)
- Earthy, Toasty Magic: That cumin? It’s the secret weapon—warm, nutty, and just a pinch makes the whole dish sing. The olive oil finishes it with a silky richness that turns a simple can of beans into something you’d happily eat straight from the pot.
- Weeknight to Potluck: Same recipe, endless uses: toss with rice for a quick dinner, pile onto toast for breakfast, or bring it as-is to a picnic. I’ve even used it as a filling for tacos—because why not? It’s that adaptable.
Step-by-step instructions for spiced black eyed peas
Here's how to transform canned black eyed peas into a vibrant, flavor-packed side dish in record time.
Sauté Aromatics in Extra-Virgin Olive Oil
Heat the 2 tablespoons extra-virgin olive oil in a medium saucepan over medium-high heat. Add the ½ whole yellow onion (previously diced) and cook for 3-4 minutes until the onions soften and begin to turn translucent. You'll know they're ready when they release their natural sweetness and start to caramelize slightly at the edges.
Add the 4 cloves garlic cloves (minced) and cook for another 30 seconds until fragrant. Here's the thing—don't let the garlic brown or it'll turn bitter. Watch it closely and stir constantly. The moment you catch that garlic aroma filling your kitchen, it's time to move to the next step. This aromatic base is the flavor foundation for everything that follows.
Toast the Spice Blend
Reduce the heat to medium and add the 1½ teaspoons ground cumin, 1 teaspoon smoked paprika, ½ teaspoon ground coriander, and ½ teaspoon dried oregano. Stir continuously for 1 minute until the spices release their oils and begin to sizzle gently. You should see the spices darken slightly and smell their earthy, smoky aromas.
This toasting step is crucial—it deepens the flavor profile by activating the spices' natural oils. If you skip this, your dish will taste flat and one-dimensional. Keep stirring to prevent burning, which would make the spices taste bitter. The spices should be evenly distributed and clinging to the onions and garlic.
Add Liquids and Simmer
Pour in the 1 tablespoon red wine vinegar and 1 cup vegetable broth, scraping up any browned bits from the bottom of the pan. Add the 2 cans black eyed peas (drained and rinsed) and bring the mixture to a gentle simmer. Here's where it gets good—cover the pan and reduce heat to low, letting it cook for 8-10 minutes until the flavors meld together.
You'll notice the peas begin to absorb the spiced liquid, which is exactly what we want. Stir occasionally to prevent sticking, but don't over-stir—this keeps the peas intact. The dish should smell like a warm, spiced hug by the time it's ready. If it looks too thick, add a splash of water to loosen it up.
Finish with Bright Flavors
Remove the pan from heat and stir in the 1 tablespoon lime juice and ¾ teaspoon salt. The lime juice cuts through the richness of the spices and adds a bright, refreshing note. Taste and adjust seasoning with the ¼ teaspoon black pepper if needed. This is your chance to balance the flavors—too much salt? Add a bit more lime. Too spicy? A pinch of salt helps.
Let the mixture sit off heat for 2-3 minutes to allow the lime juice to fully integrate. The peas should be tender but still hold their shape, with a glossy sheen from the lime and spices. This resting period also lets the flavors settle and develop.
Garnish and Serve Warm
Transfer the black eyed peas to a serving bowl and drizzle with the 1 tablespoon avocado oil. This final touch adds a silky finish and helps carry the flavors. Sprinkle with the ¼ cup fresh cilantro (chopped) and give it a gentle toss to distribute the garnish evenly.
Serve immediately while warm. The dish should have a perfect balance of smoky, spicy, and bright flavors, with tender peas that hold their shape. This side pairs beautifully with grilled meats, tacos, or even as a standalone dish with warm tortillas. The avocado oil finish gives it a luxurious touch that elevates the humble canned pea.
Pro Tips For Making Canned Black Eyed Beans
- Sauté Onions Slow: I learned this the hard way—drowning onions in oil at high heat turns them bitter. Instead, cook them over medium-low for 8-10 minutes until soft and translucent, stirring occasionally. The longer they sweat, the sweeter the base for your beans.
- Crush Garlic Properly: Minced garlic burns fast, but crushed cloves (peeled, smashed with the flat side of your knife) release flavor gradually without scorching. Toss them in when onions are nearly done—they’ll mellow instead of overpowering.
- Rinse Beans First: Canned beans come packed in salty brine, and that extra sodium sneaks up on you. Drain and rinse them under cold water before cooking—it cuts down on saltiness and keeps the dish balanced, especially if you’re adding other salty ingredients later.
- Toast Cumin Low: Ground cumin loses its earthy punch when fried too hot. Bloom it in the oil with the onions, stirring constantly, until it smells aromatic (about 30 seconds). This guarantees it’ll flavor the whole dish, not just the first bite.
Common mistakes when making your canned black eyed beans
Skipping the Rinse
Drained but unrinsed canned black-eyed peas can introduce a metallic taste from the canning liquid. Always rinse them under cold water for 30 seconds to remove excess sodium and starch.
I once skipped this step and ended up with a slightly slimy texture—never again! Use a fine-mesh strainer for best results. 💧
Overcooking the Peas
Simmering for more than 10 minutes turns tender peas into mushy bits. They should hold their shape but be soft enough to eat. If your pan has a heavy bottom, reduce heat to low-medium to prevent overcooking.
I recommend using a medium saucepan with a 2-3 quart capacity for even heat distribution.
Burning the Aromatics
Letting onions or garlic brown too much creates bitter flavors that ruin the dish. Keep heat at medium-high and stir constantly—especially the garlic. The moment it releases its aroma (30 seconds max), move to the next step.
I once charred garlic and spent the next hour trying to salvage the dish. Trust me, it's not worth it. 🔥
Underseasoning the Spices
Taste as you go! The spices need time to meld, but if you wait until the end, you might realize they're too mild. After adding the spices, taste the onions and garlic mixture—it should be noticeably seasoned.
Adjust with ½ teaspoon salt or ¼ teaspoon smoked paprika if needed. I often double-check seasoning after the simmering step too.
Ignoring the Vinegar
The 1 tablespoon red wine vinegar is crucial for balancing the dish. Without it, the spices can taste flat. Add it early in the cooking process so it has time to integrate fully. If you're using lemon juice instead, add it at the very end to preserve its bright flavor.
I once forgot the vinegar entirely—my dish tasted dull and needed a whole lime to fix it. 🍋
Serving Without Garnish
Fresh cilantro and avocado oil aren't just for looks—they add freshness and richness. The cilantro brightens the dish, while the avocado oil gives it a silky finish. Skip them, and you'll miss out on that restaurant-quality touch.
I always garnish right before serving so the cilantro stays vibrant. A sprinkle of crumbled cotija cheese also works if you're not keeping it vegan. 🌿
Nutrition facts
Frequently asked questions
Can I use dried black-eyed peas instead of canned?
Dried peas work but require 1-2 hours of soaking (or overnight for best texture) followed by 45-60 minutes of simmering. For this quick recipe, canned is ideal—they're pre-cooked and ready in 15 minutes. If using dried, increase the broth to 2 cups and adjust seasoning at the end.
How do I make this spicier?
Add ½ teaspoon cayenne pepper with the other spices or stir in 1 chopped jalapeño with the onions. For heat without texture, use 1 teaspoon hot sauce at the end. Always taste first—spices build intensity as they cook.
Can I prepare this ahead of time?
Yes! Make it 2 days ahead and store in the fridge. The flavors deepen over time. Reheat gently with 1 tablespoon water to prevent drying. Add fresh lime juice and cilantro just before serving to keep them vibrant.
What's the best way to serve these?
Try them as a taco filling, over rice, or with grilled chicken. For a complete meal, top with avocado slices and lime wedges. They also work perfectly in sandwiches or as a hearty salad base with mixed greens and corn.
Why are my peas mushy?
Overcooking is the most common cause. Simmer uncovered for no more than 10 minutes—they should be tender but still hold their shape. If using a heavy pan, reduce heat to low-medium to prevent overcooking. Stir occasionally to avoid sticking.