
Desserts
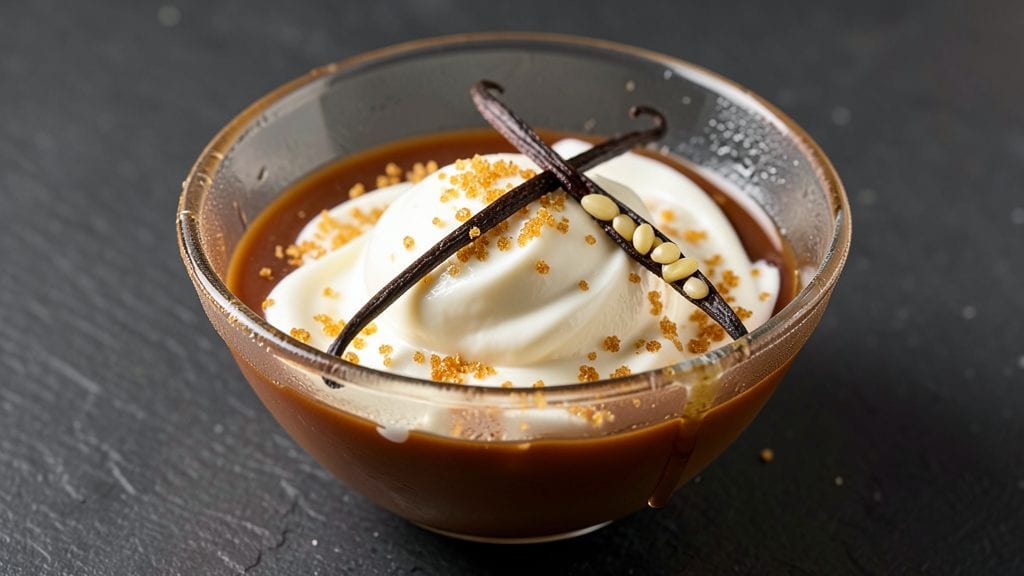
Creating no-cook vanilla bean ice cream is the perfect solution when you crave creamy, dreamy dessert without turning on the oven or waiting hours. This recipe delivers restaurant-quality texture in just 10 minutes—no churning, no ice cream maker, and no stress.
The secret lies in the perfect balance of heavy cream, sweetened condensed milk, and real vanilla bean, which infuses every spoonful with rich, aromatic flavor.
What makes this recipe truly special is its simplicity—just 5 ingredients and a few minutes of prep work. The heavy cream provides that signature velvety smoothness, while the sweetened condensed milk adds natural sweetness and helps create a stable, scoopable texture.
A single vanilla bean (or extract) ensures depth of flavor that store-bought versions can’t match. This is the kind of dessert that feels indulgent yet effortless, perfect for last-minute cravings or impressing guests with minimal effort.
The result is a silky-smooth ice cream with a delicate vanilla aroma and a perfectly creamy consistency that melts on your tongue. Unlike traditional ice cream, this version requires no special equipment—just a mixing bowl and a freezer.
You can enjoy it immediately or let it firm up for 2-3 hours for a firmer texture. The best part? It’s completely customizable with mix-ins like chocolate chips, crushed cookies, or fresh fruit.
Whether you're hosting a small gathering or treating yourself to a luxurious dessert, this no-cook vanilla bean ice cream delivers restaurant-quality results without the fuss. Ready to make dessert in minutes? Let’s get started!
Ingredients for no cook vanilla bean ice cream
Five luxurious ingredients transform into velvety vanilla bean ice cream with zero effort.
| Ingredient | Amount | Notes |
|---|---|---|
| Heavy Whipping Cream 🥛 | 2 cups | Full-fat for best texture |
| Sweetened Condensed Milk 🥛 | 1 can | 14 oz can (standard size) |
| Vanilla Bean 🌿 | 1 whole | Seeded and scraped for infusion |
| Vanilla Extract 🍯 | 1 tbsp | Pure extract if no bean |
| Granulated Sugar 🍚 | ¼ cup | Adjust for sweetness preference |
The vanilla bean is non-negotiable for that authentic aroma—Whole Foods or specialty markets carry the best. If you can't find a whole bean, pure Madagascar vanilla extract works in a pinch, but nothing beats scraping seeds from a fresh pod. The heavy cream must be full-fat; anything lighter compromises that signature silky texture. Grab the sweetened condensed milk from the baking aisle—Carnation is the gold standard, but any name brand will do. Pro tip: check the expiration date; this stuff thickens over time and can ruin your texture if too old.
No vanilla bean? Double the vanilla extract (2 tbsp) and add a pinch of salt to mimic depth. The sugar is flexible—reduce to 1/4 cup if your condensed milk is already sweet enough. For a boozy twist, add 1 tbsp bourbon or rum. Want extra richness? Swap 1/2 cup of the heavy cream for whipped cream (folded in at the end). If you're making this ahead, add a splash of vodka (1 tbsp) to prevent ice crystals—trust me, it works like magic. And if you're feeling fancy, a pinch of sea salt at the end elevates everything.
This ice cream is ready to eat immediately, but for that perfect scoopable texture, freeze for 2-3 hours. Store in an airtight container with parchment between layers to prevent freezer burn—it keeps its creamy magic for up to 2 weeks. For single servings, freeze in silicone ice cube trays and pop out as needed. The vanilla bean pods? Save them! Once scraped, wrap the empty pods in a damp paper towel and freeze for future recipes—they’ll keep their flavor for months.
Why You'll Love This Recipe
- No Mixing Needed: I swear by this—just combine the cream, condensed milk, and split vanilla bean, then freeze. No churning, no fuss, no waiting for the ice cream maker to do its thing. The only "work" is scraping the sides after, which feels like a treat.
- Vanilla Overload (Best Part): That split vanilla bean? It’s the star—thick, fragrant seeds swirling through creamy, caramel-kissed sweetness. Honestly, I’ve tried vanilla extract, but this? It’s like dessert-level vanilla without the effort.
- Freezer-Friendly Flexibility: Make a big batch and forget about it—this stays perfect for weeks. Need a last-minute gift? Toss it in a container with a ribbon. Or just grab it straight from the freezer when you’re craving something smooth and indulgent.
- Just Three Ingredients (Really): Between us, the pantry staples here (cream, condensed milk, sugar) are already in my fridge. The vanilla bean’s the only splurge, and it makes the whole thing taste like a luxury dessert. Budget win, flavor flex.
Step-by-step instructions for no-cook vanilla bean ice cream
Here's how to transform simple pantry staples into luxurious, creamy ice cream without a single minute in the freezer—just 10 minutes of hands-on work!
Infuse the Heavy Whipping Cream with Vanilla
Begin by splitting the 2 cups heavy whipping cream into two equal portions—1 cup and 1 cup. In a small saucepan, combine the 1 cup heavy whipping cream with the 1 whole vanilla bean (split lengthwise and scraped) and the 0.25 cup granulated sugar. Place over medium-low heat and warm gently until the sugar dissolves completely—you should see tiny sugar crystals disappear, leaving a smooth, slightly syrupy mixture.
Remove from heat immediately and let steep for 5 minutes, covered. This infusion captures the deep, floral notes of the vanilla bean, which will become the soul of your ice cream. The cream should now have a delicate vanilla aroma—if it doesn't, let it steep an additional 2-3 minutes. Strain out the vanilla bean pod and discard it, reserving only the infused cream for the next step.
Whip the Cream to Stiff Peaks
Transfer the infused cream to a clean, chilled mixing bowl (place the bowl in the freezer for 5 minutes before using). Using a hand mixer or stand mixer, whip the cream on high speed until it forms stiff peaks—when you lift the beaters, the cream should hold its shape and leave a clear trail. This typically takes 3-5 minutes, but don't rush it; properly whipped cream is the secret to that silky, melt-in-your-mouth texture.
Here's the thing—if your cream hasn't reached stiff peaks after 5 minutes, your bowl might not be cold enough. Scrape down the sides and whip for another 1-2 minutes. Over-whipping can turn the cream grainy, so stop as soon as it holds its shape. Set the whipped cream aside in the freezer while you prepare the base.
Combine the Sweetened Condensed Milk and Vanilla Extract
In a separate medium bowl, pour the 1 can sweetened condensed milk and stir in the 1 tbsp vanilla extract. The condensed milk should be smooth and slightly thick—if it's clumpy, gently warm it in the microwave for 10-15 seconds to dissolve any lumps. This mixture forms the rich, caramel-like backbone of your ice cream, balancing the airy whipped cream.
Taste a small spoonful—it should be sweet but not cloying. If you prefer a sweeter ice cream, add 1-2 tablespoons more granulated sugar (though the original 0.25 cup is perfectly balanced for most palates). The condensed milk will thicken slightly as it cools, so don't overcompensate.
Fold the Whipped Cream into the Base
Now, gently fold the stiffly whipped cream into the sweetened condensed milk mixture using a spatula. Work in three additions, cutting through the center of the cream and folding from the bottom up to incorporate air without deflating the whipped cream. The goal is to create a light, marbled texture—think of it like folding egg whites into batter. If the mixture looks too thick, it's okay; it will soften as it chills.
This is where the magic happens: the air from the whipped cream lightens the dense condensed milk, creating a velvety consistency that mimics traditional ice cream. For best results, fold quickly and decisively—lingering too long can cause the cream to separate. Once fully combined, transfer the mixture to an airtight container and smooth the top with a spatula.
Freeze and Chill for Perfect Texture
Place the container in the freezer and let it set for 4-6 hours, or until completely firm. For the creamiest texture, I recommend freezing it overnight—this allows the flavors to meld and the consistency to become ultra-smooth. Avoid opening the container during freezing, as moisture can cause ice crystals to form.
When ready to serve, let the ice cream sit at room temperature for 5-10 minutes before scooping. This brief rest period prevents it from sticking to your spoon and ensures each bite is lusciously creamy. If it's too hard, run the container under cool water for 1-2 minutes to soften slightly. Serve immediately and enjoy the velvety result of this no-churn, no-machine method!
Pro Tips For Making No Cook Vanilla Bean Ice Cream
- Whip Cream Cold: Grab that heavy whipping cream straight from the fridge—room temperature is the enemy here. Cold cream whips faster and holds its shape better, so resist the urge to let it sit out "just for a minute." I learned this after watching my first batch turn into a sad, soupy mess.
- Scrape the Vanilla: Don’t just dump in vanilla extract—split that bean, scrape out every last bit of those black seeds, and toss the pod in too. The scrapings pack way more flavor, and the pod infuses the cream while it chills. (Yes, even if you’re impatient like me.)
- Mix Condensed Milk Slowly: Drizzle that sweetened condensed milk into the cream gradually while mixing—like you’re pouring honey, not water. Dumping it all at once can curdle the cream, and nobody wants grainy ice cream. Stir gently until just combined.
- Freeze in Shallow Layers: Spread the mixture in a single, even layer across your container—no more than 2 inches deep. Thicker layers freeze rock-hard and take forever to soften. Use a spatula to smooth it out, then cover tightly. (Your future self will thank you.)
Make-ahead tips for this recipe
Freeze Ahead Prep
Make this ice cream up to 3 days in advance—it actually tastes better as flavors meld! Store in an airtight glass container (I love Pyrex) with parchment paper between layers to prevent freezer burn.
Label with the date and freeze flat for even freezing. The texture remains creamy for up to 2 weeks, though I recommend eating it within 1 week for peak freshness. 💫
Portion Control
For single servings, freeze in silicone ice cube trays—each cube makes one perfect scoop. Once frozen, pop them out and store in a ziplock bag with parchment between layers.
This method prevents freezer burn and lets you enjoy just what you need without thawing the whole batch. I keep these in my freezer for spontaneous dessert cravings.
Mix-Ins Ready
Prep your mix-ins ahead of time and fold them in right before freezing. Chocolate chips, crushed cookies, or fresh berries should be chilled (place in the freezer for 15 minutes) to prevent melting.
For a boozy twist, add 1 tbsp vodka or rum to the base before freezing—it prevents ice crystals and adds subtle depth. 🍸
Thawing Tricks
If your ice cream gets too hard, don’t panic! Run the airtight container under cool water for 1-2 minutes to soften slightly. For a quicker fix, let it sit at room temperature for 5-10 minutes before scooping.
Pro tip: If it’s still too firm, place the container in a bowl of warm water (not hot!) for 30 seconds—this works like magic without melting it completely.
Storage Containers
Use glass containers (like Le Creuset or Pyrex) for the best results—they prevent freezer burn and keep flavors pure. Avoid plastic if possible, as it can absorb odors.
For long-term storage, vacuum-seal bags work too, but glass is my go-to for daily use. Always leave ½ inch of headspace to allow for expansion as it freezes. ❄️
Flavor Boosting
Enhance your prepped ice cream by adding 1 tsp of instant coffee or ½ tsp of espresso powder to the base for a mocha twist. For a citrusy kick, mix in 1 tbsp lemon or orange zest before freezing.
These additions work best when folded in right before freezing so they don’t lose their potency over time. 🍋
Nutrition facts
Frequently asked questions
Can I make this without a vanilla bean?
Yes! Use 2 tablespoons pure vanilla extract instead of the whole bean, plus a pinch of salt to mimic depth. For extra richness, add ½ teaspoon almond extract—it complements vanilla beautifully. The texture stays the same, but the flavor will be slightly less complex.
Why does my ice cream get icy after freezing?
Ice crystals form when moisture escapes during freezing. To prevent this, always use an airtight container and avoid opening it while freezing. For extra insurance, stir in 1 tablespoon vodka or rum before freezing—it lowers the freezing point and keeps the texture silky. Also, let the ice cream sit at room temperature for 5 minutes before scooping.
How do I make this sweeter or less sweet?
Adjust sweetness by adding 1-2 tablespoons more sugar to the condensed milk mixture if it needs more sweetness. For less sweetness, reduce the sugar to ¼ cup total (including what’s in the condensed milk). If using a lower-sugar condensed milk, add 1-2 tablespoons extra sugar to compensate. Taste as you go!
Can I use half-and-half instead of heavy cream?
Not recommended! Half-and-half is too thin and won’t whip to stiff peaks, which is key for that creamy texture. If you’re short on heavy cream, try whipped topping (Cool Whip)—fold it in at the very end for a lighter consistency. But for best results, stick with full-fat heavy cream.
What are the best mix-ins for this recipe?
Classic choices include chocolate chips, crushed Oreos, or fresh berries. For a gourmet twist, try toasted coconut flakes, caramel drizzle, or espresso powder**. Chill mix-ins for 15 minutes before folding to prevent melting. Add them right before freezing for even distribution.