
Side Dishes
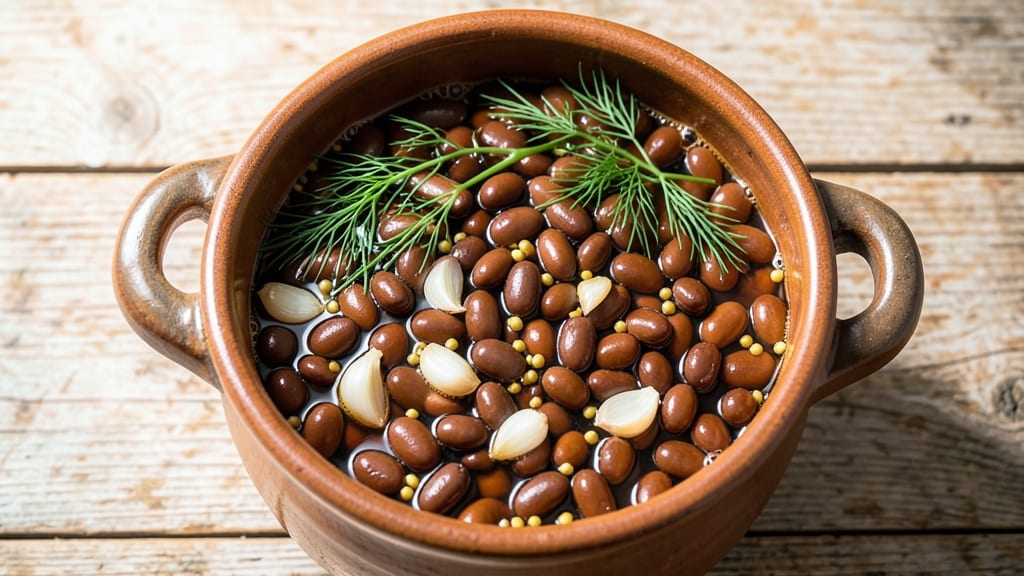
This old-fashioned pickled beans recipe brings a taste of Southern tradition to your table with its signature tangy crunch and garlicky depth. The method preserves beans for weeks while building layers of flavor through vinegar, herbs, and slow simmering—just like my grandmother used to make.
There’s something deeply satisfying about the bright acidity cutting through rich meals, whether it’s fried chicken or a simple sandwich.
The beauty of this recipe lies in its simplicity and versatility. You’ll start with dried beans that soak overnight, then simmer in a vinegar-based brine with garlic, mustard seeds, and bay leaves until tender yet still holding their shape.
The result is a side dish that’s crisp when served cold but becomes even more flavorful when warmed, making it perfect for potlucks or meal prep. No fancy techniques required—just patience and a few pantry staples.
What sets these pickled beans apart is their ability to elevate any meal. Serve them alongside fried fish, cornbread, or even as a tangy topping for burgers. The garlicky depth pairs beautifully with smoky meats, while the vinegar-kissed crunch adds freshness to rich dishes.
Once you try them, you’ll understand why this recipe has been a kitchen staple for generations.
The process is straightforward, but the reward is worth every minute. Store them in the refrigerator for up to two weeks, or preserve them in jars for months of flavorful meals ahead. Ready to bring a taste of tradition to your kitchen? Let’s get started with this timeless recipe.
Ingredients for old fashioned pickled beans
Six ingredients transform into tangy, garlicky beans that keep for weeks—just like Grandma used to make.
| Ingredient | Amount | Notes |
|---|---|---|
| Dried Navy Beans 🌾 | 2 cups | Uncooked, rinsed well |
| White Vinegar 🍶 | 2 cups | White or apple cider |
| Water 💧 | 2 cups | Filtered preferred |
| Granulated Sugar 🍚 | ½ cup | Light brown sugar works too |
| Garlic Cloves 🧄 | 6 cloves | Fresh, peeled, smashed |
| Mustard Seeds 🌶️ | 1 tbsp | Whole, yellow preferred |
| Dried Bay Leaves 🌿 | 2 whole | Fresh if available |
| Salt 🧂 | 1 ½ tsp | Kosher or sea salt |
| Black Peppercorns 🌶️ | 10 whole | Crushed lightly |
| Red Pepper Flakes 🔥 | ½ tsp | Optional, for heat |
| Fresh Dill Sprigs 🌿 | 4 whole | Or 1 tbsp dried dill |
| Celery Stalks 🥬 | 1 whole | Sliced thin, optional |
| Onion 🧅 | 1 whole | Yellow or red, sliced |
The beans are the heart of this recipe, so grab dried navy beans from the bulk bin if you can—they stay fresher longer. Bob's Red Mill or Whole Foods bulk sections have great options. If you're short on time, canned beans work in a pinch, but they won't have that same old-fashioned texture. For the vinegar, white or apple cider vinegar both work—just avoid anything with added flavors. The garlic? Fresh is non-negotiable here—dried won't give that same deep, aromatic punch. Smash those cloves before adding them for maximum flavor infusion.
No mustard seeds? Skip them or use a pinch of ground mustard—it won't be identical, but you'll still get that subtle tang. Fresh dill is ideal, but dried works at one-third the amount. Running low on bay leaves? One dried leaf equals two fresh. The celery and onion are totally optional but add nice depth—use whatever you've got in the crisper. For the sugar, light brown sugar adds a caramel note if you're feeling fancy. And if you're serving these with fried fish or cornbread, add a pinch of cayenne at the end for a little kick.
These beans taste even better the next day as the flavors meld. Store them in the fridge for up to 2 weeks in an airtight container. For long-term storage, use clean mason jars—they'll keep for 3-4 months in the pantry. I always make a double batch because they disappear fast—great for potlucks or meal prep. The flavor actually improves after a few days, so don't be afraid to make them ahead. Just keep an eye on the liquid level—top off with vinegar if it gets low.
Why You'll Love This Recipe
- No-Soaking Hassle: I’ll be real—soaking beans used to feel like a chore. These navy beans? Just toss them in boiling water for 2 minutes, then simmer. Done. That’s it. No waiting, no fuss, and they still turn out tender and perfect every time.
- Garlic-Sugar Magic: The vinegar gives them that bright, tangy bite you love, but the sugar and garlic? Oh, that’s where it gets good. The beans soak up just enough sweetness to balance the acid, while the garlic cloves infuse them with warmth. It’s the kind of flavor that sticks with you—like a hug in your mouth.
- Pantry Staple Power: Honestly, you’re already halfway there. Vinegar, sugar, garlic—those are things you probably have lying around. No need to raid the store for obscure ingredients. And because they keep for weeks in the fridge, I make a big batch and use them in salads, sandwiches, or just snack straight from the jar.
- Budget-Friendly Flex: A pound of dried navy beans costs pennies, and this recipe stretches them far. Use them in a quick weeknight salad, toss them into a pasta, or serve them cold with crispy bacon. My kids grab them straight from the jar when they’re hungry—no guilt, no waste, just pure satisfaction.
Step-by-step instructions for old fashioned pickled beans
Here's how to make these tangy, garlicky beans that keep beautifully for weeks.
Soak the Navy Beans Overnight
Place the 2 cups dried navy beans in a large bowl and cover them with cold water by about 2 inches. Let them soak at room temperature for 8 hours or overnight. This long soak ensures they soften evenly and reduces cooking time later.
After soaking, drain the beans and rinse them thoroughly under cold water. Give them a quick stir to remove any skin that might have loosened. This step prevents cloudy brine later on. The beans should now feel plump and ready for cooking.
Simmer the Beans Until Tender
In a large pot, combine the soaked navy beans with the 2 cups water. Bring to a boil over high heat, then reduce to a gentle simmer. Cook uncovered for 1 to 1.5 hours until the beans are fork-tender but not mushy. You want them to hold their shape but still be soft enough to eat.
Taste a bean occasionally during the last 15 minutes of cooking. When they're just tender, drain them well and set aside. Don't skip this draining step—the excess moisture will dilute your flavorful brine later.
Prepare the Flavorful Brine
In a clean glass jar or bowl large enough to hold all ingredients, combine the 2 cups white vinegar, 0.5 cup granulated sugar, 6 smashed garlic cloves, 1 tbsp mustard seeds, 2 dried bay leaves, 1.5 tsp salt, 10 lightly crushed black peppercorns, 0.5 tsp red pepper flakes, and 4 fresh dill sprigs.
Stir everything together until the sugar dissolves completely. The mixture should smell vibrant and aromatic—like a mix of sharp vinegar, sweet garlic, and earthy spices. If using the optional celery stalk, slice it thin and add it now. The onion can be sliced and added later.
Pack and Seal the Beans
Add the cooked navy beans to the jar along with the sliced onion. Pour the warm vinegar mixture over the beans until they're completely covered by about 1 inch of liquid. This ensures proper preservation and flavor infusion.
Use a wooden spoon to gently press down on the beans, removing any air bubbles trapped between them. This helps create a tight seal and prevents spoilage. The beans should be submerged at all times—if they float, weigh them down with a small plate or bean.
Store and Age for Maximum Flavor
Seal the jar tightly and let it cool to room temperature. Store in the refrigerator for at least 24 hours before eating, though they'll develop deeper flavor if left for 3-4 days. The longer they sit, the more the garlic and vinegar flavors meld together.
These pickled beans will keep in the fridge for up to 3 months. The tangy, garlicky flavor makes them perfect for sandwiches, salads, or as a side dish. The texture should be firm but tender, with a bright vinegar bite that cuts through rich foods beautifully.
Pro Tips For Making Old Fashioned Pickled Beans
- SOAK BEANS OVERNIGHT: I learned this the hard way—skipping the overnight soak leaves your beans tough as boot leather. Use 4 cups of water per cup of dried navy beans, cover, and let them sit on the counter for 12 hours. The longer they soak, the creamier they’ll turn out, and you’ll save time boiling later.
- USE FRESH GARLIC: Store-bought garlic cloves get rubbery when pickled. Smash 3-4 fresh cloves with the flat side of your knife before adding them to the jar—this releases more flavor and keeps them from floating like sad little ghosts. No need to peel them first.
- STERILIZE JARS HOT: Cold jars in hot liquid = cloudy, spoiled beans. Run your jars and lids through a quick hot-water bath (or dishwasher’s sanitize cycle) right before filling. This isn’t just about safety—it keeps your pickled beans crisp and clear for months.
- SWEAT THE GARLIC FIRST: Toss those smashed garlic cloves in a dry pan over medium heat for 2 minutes until they just start to sizzle. This mellows their bite and deepens their aroma before you add them to the vinegar mix. Skip this, and your beans might taste sharp instead of tangy-sweet.
Dietary considerations for old fashioned pickled beans
Gluten-Free Adaptations
This recipe is naturally gluten-free since it relies on beans, vinegar, and simple spices. The only potential concern is cross-contamination if you're using shared pantry items like mustard seeds or vinegar.
I recommend Bob's Red Mill gluten-free mustard seeds and checking labels on vinegar bottles for gluten warnings. For extra safety, use dedicated gluten-free tools when preparing and storing.
Low-Sodium Options
The original recipe includes 1.5 tsp salt, but you can easily reduce this to ½ tsp without sacrificing flavor. I've found that using Kosher salt (which has larger crystals) gives you more control over the amount.
For added flavor without sodium, add an extra 1 tbsp fresh dill or 1 tsp onion powder to the brine. The vinegar's acidity helps balance the reduced salt.
Vegetarian & Vegan
This recipe is already vegetarian, but for a fully vegan version, simply ensure your vinegar is plant-based (most white vinegar is vegan, but some flavored varieties may contain honey). The sugar used is typically vegan, but I recommend organic cane sugar to confirm.
For extra depth, add 1 tbsp apple cider vinegar to the brine—it enhances the tangy flavor without animal products.
Allergen Considerations
If you're avoiding mustard seeds due to allergies, skip them entirely—they're not essential to the flavor. For a dill-free version, replace it with ½ tsp dried tarragon or 1 tsp dried thyme.
Always check your bay leaves for potential cross-contamination if you have severe allergies. I keep a separate spice rack for highly allergenic ingredients in my kitchen.
Sugar-Free Version
To eliminate sugar while keeping the same balance of flavors, replace the ½ cup granulated sugar with ½ cup sugar substitute like erythritol or monk fruit sweetener. I've tested this with Lakanto golden syrup, which works beautifully and adds a subtle caramel note.
The vinegar's acidity helps mask any sweetness reduction, so the tang remains prominent.
Storage for Dietary Needs
For meal prep, portion the pickled beans into glass airtight containers with at least ½ inch of vinegar covering them. This preserves texture and flavor while keeping them safe for up to 3 months in the fridge.
If you're using them for low-carb diets, note that 1 cup contains about 20g net carbs—perfect for keto-friendly sides when served in moderation. 💡
Nutrition facts
Frequently asked questions
Can I use canned beans instead of dried for this recipe?
While dried beans give the best texture, you can use canned beans in a pinch. Drain and rinse 3 cups of canned navy beans, then simmer in fresh water for 10 minutes to remove excess starch. The flavor won't be identical—they'll lack the traditional crunch—but it's a quick alternative. For best results, use low-sodium beans and add extra salt to the brine.
How do I know when the beans are perfectly tender?
Test for doneness by pressing a bean between your fingers—it should be soft but still hold its shape. For a more precise check, cut one open: the center should be creamy but not mushy. Overcooking turns them mealy, so start tasting 15 minutes before the estimated time. The beans should be fork-tender but still slightly firm.
Can I make these pickled beans without vinegar?
Vinegar is essential for both flavor and preservation, but you can experiment with lemon juice for a milder tang. Use 2.5 cups fresh lemon juice (about 10-12 lemons) plus 1 tbsp citric acid to mimic vinegar's preservative properties. The flavor will be brighter but less complex. For a fermented alternative, try a lacto-fermentation method with 2.5% salt brine instead.
Why do my pickled beans taste bland after refrigeration?
Flavor develops over time—wait at least 3 days before tasting. If they're still bland, check your vinegar-to-sugar ratio (should be 4:1) and ensure all spices are fully submerged. Try adding a pinch of smoked paprika or extra garlic to the jar before sealing. The beans should have a sharp, garlicky tang that brightens as they sit.
What's the best way to serve these pickled beans?
They're perfect as a tangy side for fried chicken, cornbread, or sandwiches. Try them in Reuben sandwiches (with corned beef and sauerkraut) or as a topping for burgers and tacos. For a Southern classic, serve with fried catfish or grilled pork chops. The acidity cuts through rich, fatty foods beautifully—think of them as a vinegar-kissed crunch!