
Beverages
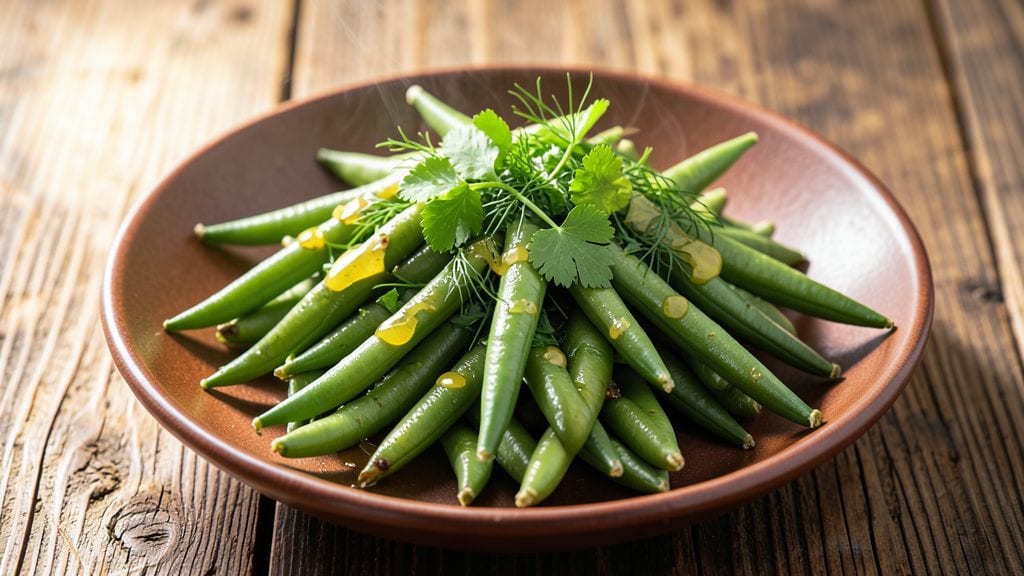
This steamed string beans recipe delivers crisp-tender vegetables that stay vibrant and bright green—no mushy texture in sight. After years of testing different methods, I’ve found the perfect balance between firmness and tenderness that holds up even when reheated.
The secret lies in precise timing and proper preparation, ensuring every bite is satisfyingly crisp with just the right snap.
What makes this recipe stand out is its simplicity—just string beans, water, and a pinch of salt, yet it transforms into a restaurant-quality side dish. The key is steaming them over boiling water (not direct boiling) to preserve their natural color and nutrients while achieving that ideal texture.
You’ll need about 10 minutes of active prep time, followed by 5-7 minutes of steaming, depending on your preferred doneness.
By the end, you’ll have a pot of bright green, crisp-tender string beans that pair perfectly with grilled meats, roasted chicken, or even as a standalone vegetarian dish. The flavor remains clean and fresh, with just enough seasoning to enhance their natural taste.
This is the kind of side dish that elevates any meal without stealing the spotlight.
For extra brightness, finish with a squeeze of lemon or a sprinkle of fresh herbs like parsley or dill. The recipe scales effortlessly, so you can make a small batch for two or a larger one for a crowd. Let’s get started on this foolproof method!
Ingredients for steamed string beans
Bright green string beans, crisp-tender texture, and just the right seasoning—this recipe delivers perfect steamed sides every time.
| Ingredient | Amount | Notes |
|---|---|---|
| Fresh String Beans 🥦 | 1 ½ lb | Trimmed, ends cut off |
| Water 💧 | 4 cups | Room temperature preferred |
| Kosher Salt 🧂 | ½ tsp | Fine grain preferred |
| Lemon Juice 🍋 | 1 tbsp | Freshly squeezed |
| Fresh Parsley 🌿 | ¼ cup | Chopped, for garnish |
| Fresh Dill 🌿 | ¼ cup | Chopped, optional garnish |
| Extra-Virgin Olive Oil 🫒 | 1 tbsp | For finishing drizzle |
| Garlic Cloves 🧄 | 2 cloves | Minced, optional |
The string beans are the star here, so pick fresh, vibrant ones—look for bright green color and crisp ends at the grocery store. Trader Joe's or Whole Foods often carry the freshest varieties, but any well-stocked supermarket will do. Avoid beans that look wilted or yellowed, as they’ll lose their crispness during steaming. For best results, trim the ends and rinse briefly under cold water to remove any dirt or debris. The 5-7 minute steaming time is critical—overcooking turns them mushy, while undercooking leaves them too tough. If you’re short on time, blanched frozen string beans work in a pinch, but fresh is always superior for that restaurant-quality texture.
No fresh herbs? Dried parsley or dill at one-third the amount will work, though fresh adds that bright pop of color. Short on lemon juice? A splash of white wine vinegar gives similar acidity. The olive oil is optional but adds a lovely finish—high-quality extra-virgin makes the most difference. For extra flavor without compromising texture, add the minced garlic cloves to the steaming water. If you’re serving this as a vegetarian dish, consider adding a sprinkle of toasted pine nuts or slivered almonds for crunch and protein. The salt is key—use kosher or sea salt for best flavor control, and adjust to taste after steaming.
Steamed string beans keep their best texture when served immediately, but they reheat beautifully if stored properly. Refrigerate in an airtight container for up to 3 days, covering with a damp paper towel to retain moisture. Reheat gently in a steamer basket or with a splash of water in the microwave. For meal prep, portion into glass containers with tight lids—they’ll stay crisp-tender for 2 days in the fridge. Freezing isn’t recommended as it destroys the crisp texture, but if you must, blanch first and store for up to 3 months. The lemon juice and herbs can be added fresh just before serving to keep everything vibrant.
Why You'll Love This Recipe
- No-Chop Needed: Honestly, I just rinse the beans and toss them in—no chopping, no fuss. The steam does all the work while I sip my coffee, and the result? Perfectly tender strings every single time.
- Zesty Brightness: That squeeze of lemon juice at the end? It’s the secret weapon. The salt and parsley make it savory, but the citrus cuts through it all—like a fresh, tangy hug for your plate.
- Meal Prep MVP: I make a big batch on Sundays and keep it in the fridge for salads, wraps, or even as a side for grilled chicken. It stays crisp for days, so I’m never scrambling for a last-minute veggie fix.
- Pocketbook Hero: Fresh string beans are cheaper than most greens, and this recipe uses almost nothing else. A splash of water, a pinch of salt, and a handful of herbs—it’s the kind of simple side that doesn’t break the bank.
Step-by-step instructions for crisp-tender steamed string beans
Master this simple technique to achieve perfectly tender string beans that stay vibrant and bright.
Prepare the Beans for Even Steaming
Begin by thoroughly rinsing the 1.5 lb of fresh string beans under cold water to remove any dirt or debris clinging to the pods. Using a sharp knife, trim off the tough ends—this ensures uniform cooking and prevents any bitter flavors from developing. I like to cut about ¼ inch from each end while leaving the beans whole for even steaming.
Next, spread the trimmed beans on a clean kitchen towel and pat them completely dry. Removing excess moisture is critical—it helps the beans steam more evenly and prevents them from becoming waterlogged. Arrange them in a single layer on a baking sheet and set aside while you prepare the steaming setup. This drying step also makes the beans more receptive to absorbing the lemon and herb flavors later.
Set Up the Steaming Process
Fill a medium pot with the 4 cups of water and bring it to a rolling boil over medium-high heat. While the water heats, I recommend using a steamer basket or colander that fits snugly over the pot—this allows direct steam contact while keeping the beans elevated. Place the basket in the pot and add the 0.5 tsp of kosher salt to the boiling water.
The salt infuses the steam, which then seasons the beans as they cook. Once the water reaches a full boil, carefully add the prepared string beans to the steamer basket in a single layer. Avoid overcrowding, as this can lead to uneven cooking. Cover the pot with a tight-fitting lid and reduce the heat to medium to maintain a gentle but steady steam.
Steam Until Perfectly Tender
Steam the string beans for exactly 5 to 7 minutes, depending on their thickness. You'll know they're done when they're bright green and tender yet still hold their shape—what I call "crisp-tender." To test, pierce one bean with a fork; it should yield slightly but still maintain structure. Overcooking turns them mushy, so keep a close eye on the timer.
While the beans steam, prepare the finishing touches. In a small bowl, combine the 1 tbsp of freshly squeezed lemon juice, the 2 minced garlic cloves (if using), and the 1 tbsp of extra-virgin olive oil. This bright, aromatic mixture will elevate the natural flavor of the beans once they're steamed. The acidity from the lemon juice also helps preserve their vibrant green color.
Finish and Garnish for Maximum Flavor
Once the beans reach the perfect tenderness, immediately transfer them to a large bowl. Drizzle the lemon-garlic olive oil mixture evenly over the steaming beans and toss gently to coat. This step ensures every pod absorbs the bright, herby flavors. Let the beans sit for 2 to 3 minutes while you prepare the garnishes.
Stir in the 0.25 cup of chopped fresh parsley and the 0.25 cup of chopped fresh dill. These herbs add a fresh, vibrant finish and complement the lemon and garlic beautifully. Taste one bean and adjust the seasoning if needed—you might want to add a pinch more salt or a splash of lemon juice to taste. Serve immediately while the beans are still hot and crisp-tender, garnished with extra herbs if desired.
Pro Tips For Making Steamed String Beans
- Trim the Ends: Cut off the very last inch of the stems—those tough fibers never soften, no matter how long you steam them. I used to leave them and wondered why my beans always felt slightly bitter after cooking.
- Salt the Water Hard: Toss in at least 1½ teaspoons of kosher salt per quart of water before adding the beans. The salt penetrates faster when the water’s already hot, and undercooked beans taste bland no matter how much you season after.
- Shock After Steaming: Drain the beans into an ice bath for 30 seconds to stop the cooking process instantly. This keeps them crisp-tender and prevents them from turning mushy—especially important if you’re adding them to salads or cold dishes later.
- Zest Before Juicing: Grate the lemon zest directly into the hot beans while they’re still steaming, then add the juice. The heat releases the citrus oils, making the flavor punchier than just squeezing juice over them at the end. (Yes, even if you’re impatient like me.)
Make-ahead tips for this recipe
Prep Ahead for Meals
Trim and wash the string beans up to 2 days in advance—store them in an airtight container lined with a damp paper towel to keep them crisp. I like to portion them into quart-sized glass containers with tight lids, leaving ½ inch of headspace to prevent crushing.
This method preserves their texture until you're ready to steam. 💫
Steam in Batches
If you’re prepping for a crowd, steam the beans in 2-3 batches rather than overcrowding the steamer. I use a 12-inch stainless steel steamer basket from OXO for even heat distribution.
Keep the cooked batches warm in a covered bowl over a pot of simmering water (no direct contact) until all are ready to finish with lemon and herbs.
Flavor Boost Prep
Make the lemon-garlic olive oil mixture ahead of time and store it in a small jar in the fridge for up to 5 days. This shortcut saves 5 minutes of prep when you’re ready to serve.
I also pre-chop the parsley and dill, storing them separately in airtight containers with a paper towel to absorb moisture. This keeps them fresh for up to 3 days in the fridge.
Reheat Like a Pro
To reheat, steam the beans for 2-3 minutes in a steamer basket over boiling water—this restores their crisp-tender texture. For microwave reheating, cover with a damp paper towel and heat on 50% power for 1-2 minutes.
Always finish with fresh lemon juice and herbs to revive their bright flavor. 🔥
Freezer-Friendly Blanching
If you must freeze, blanch the trimmed beans in boiling water for 2 minutes, then plunge into ice water. Drain well and pack into freezer bags, squeezing out excess air.
They’ll keep for 3 months, but texture won’t be as crisp after thawing. For best results, steam from frozen for 8-10 minutes—just add 1 extra minute to the cooking time.
Portion for Perfect Sides
Divide the finished beans into 4-6 serving containers (about ½ cup each) with a sprinkle of lemon juice and herbs. Cover tightly and refrigerate—this keeps them fresh for 3 days while maintaining their vibrant color.
When ready to serve, simply reheat and garnish with extra herbs. This makes meal prep effortless for busy weeks. ✨
Nutrition facts
Frequently asked questions
Can I use frozen string beans instead of fresh?
Frozen string beans work in a pinch, but fresh delivers the best texture. If using frozen, thaw them first and steam for 6-8 minutes instead of 5-7 minutes. For a restaurant-quality result, always choose fresh, bright green beans with crisp ends. The frozen version can become slightly mushy when reheated.
Why do my steamed string beans turn out mushy?
Overcooking is the most common cause—steam for exactly 5-7 minutes and test with a fork for tenderness. Also, check your beans: older or wilted ones break down faster. Always use a steamer basket (not boiling water) and avoid overcrowding. Pat them completely dry before steaming to prevent waterlogging.
Can I make this recipe ahead of time?
Yes! Trim and wash beans up to 2 days ahead and store in an airtight container with a damp paper towel. For fully cooked beans, steam, then refrigerate in portions with lemon juice. Reheat by steaming for 2-3 minutes—never microwave without moisture. The texture stays best when reheated gently.
What's the best way to keep them bright green?
The secret is steaming (not boiling) and finishing with lemon juice immediately. The acidity preserves color while the gentle steam prevents nutrient loss. For extra vibrancy, add a splash of lemon to the steaming water. Avoid overcooking—beans should stay bright green and crisp, not dull and limp.
Are there any vegetarian-friendly variations?
This recipe is already vegetarian! For extra protein, toss with toasted pine nuts or slivered almonds. Add minced garlic to the steaming water or serve with a sprinkle of nutritional yeast for a cheesy flavor. The lemon, herbs, and olive oil keep it light while making it heartier for meat-free meals.