
Sauces & Condiments
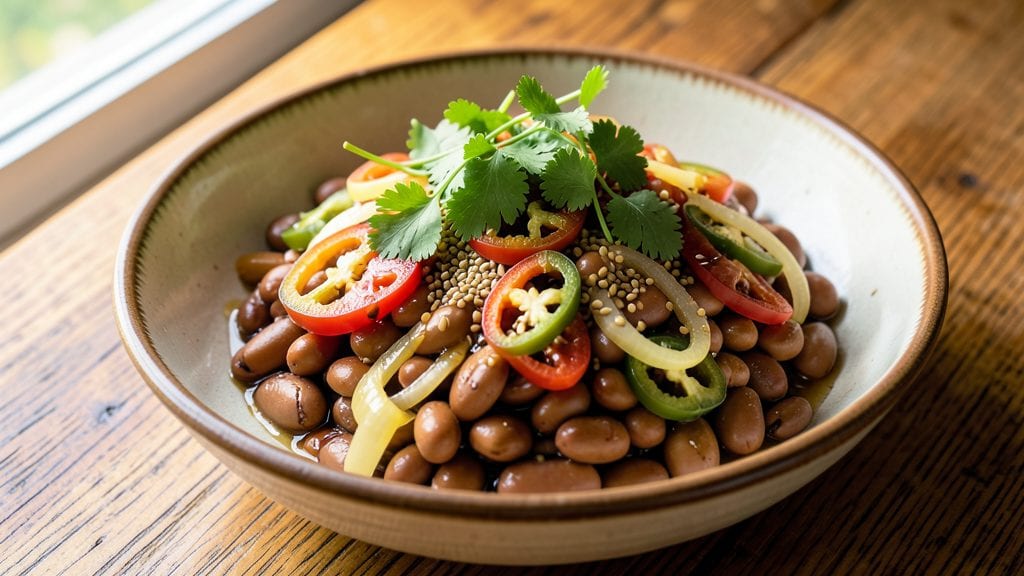
This Texas bean salsa recipe delivers the bold, smoky flavors of the Lone Star State in every bite—where tender pinto beans meet charred jalapeños and earthy cumin for a dish that feels like a hug from a backyard BBQ. 🌟 I first made this during a summer visit to my uncle’s ranch in West Texas, where the air smelled of mesquite and the beans simmered for hours in cast iron.
The secret lies in slow-cooking the beans until they’re creamy yet hold their shape, then balancing that richness with bright vinegar and fresh cilantro.
What sets this recipe apart is the layered texture: crispy roasted jalapeños add heat, while toasted cumin seeds deepen the earthy notes. It’s a complete dish—no need for chips or tortillas—because the beans hold together like a thick, flavorful stew.
The dish comes together in one pot, making it perfect for weeknight dinners or meal prep. My Portland neighbors swear it’s the only bean salsa they’ll ever need, and I can’t blame them.
By the time you serve it, you’ll have a restaurant-quality dish with smoky, slightly sweet beans, vibrant green jalapeños, and a tangy finish that cuts through the richness.
The aroma alone will have everyone gathering around the table, and the first bite delivers that perfect balance of heat, smokiness, and creaminess. This is comfort food with a kick—ideal for serving with warm cornbread or over grilled chicken.
Leftovers keep well for up to 5 days, and the flavors only deepen as the beans absorb more of the cumin and vinegar. If you’re feeling adventurous, top with a dollop of sour cream or crumbled queso fresco for extra indulgence.
Let’s get cooking—this dish is worth every minute of simmering time.
Ingredients for texas bean salsa
Pantry staples meet smoky Texas heat—just 13 ingredients for bold, restaurant-quality flavor.
| Ingredient | Amount | Notes |
|---|---|---|
| Dry Pinto Beans 🌾 | 2 cups | Unsoaked, rinsed well |
| Jalapeño Peppers 🌶️ | 3 whole | Charred over gas flame |
| Cumin Seeds 🌿 | 2 tbsp | Toasted in dry pan |
| White Vinegar 🍶 | ½ cup | White or apple cider |
| Fresh Cilantro 🌿 | ½ cup | Stems removed, chopped |
| Yellow Onion 🧅 | 1 whole | Diced, medium size |
| Garlic Cloves 🧄 | 4 cloves | Minced, fresh preferred |
| Ground Cumin 🌿 | 1 tbsp | For extra depth |
| Salt 🧂 | 1 ½ tsp | Kosher or sea salt |
| Black Pepper 🌶️ | ½ tsp | Freshly ground |
| Vegetable Oil 🫒 | 2 tbsp | For roasting peppers |
| Lime 🍋 | 1 whole | Juiced, for brightness |
| Water 💧 | 4 cups | For soaking beans |
The beans are non-negotiable here. Dry pinto beans give that classic Texas texture—canned won’t cut it. I always grab mine from Whole Foods or the bulk section at Trader Joe’s—they’re fresher and hold up better. The jalapeños need that char—roast them directly over gas flame for 2-3 minutes per side—don’t skip this step. Toasting the cumin seeds in a dry pan first? Game changer. It’s worth the extra 5 minutes—you’ll taste the difference. For the cilantro, grab organic from the store if possible—it’s brighter and less bitter.
No fresh jalapeños? Dried arbol chiles rehydrated work in a pinch, but you’ll lose that crispy texture. Short on cumin seeds? Ground cumin at double the amount gets you close, but the toasted seeds add depth. Vinegar substitutes? Lemon juice works 1:1, but white vinegar’s sharpness balances the beans better. The onion can be yellow or red—red adds a pretty color—and the garlic? Fresh is non-negotiable here. Pre-minced garlic lacks punch. Lime juice is key for brightness—don’t use bottled lime juice unless it’s the good stuff like Rey.
This keeps for 5 days in the fridge, and honestly, it tastes better the next day as the flavors meld. Portion into containers for easy lunches—double the batch if you’re feeding a crowd. The charred jalapeños can be prepped ahead and stored in a jar, but add them fresh when reheating. Freezes beautifully for 3 months—just thaw in the fridge overnight. Serve with warm cornbread or over grilled chicken for the full Texas experience.
Why You'll Love This Recipe
- No-Soaking Needed: I toss in dry pinto beans straight from the bag—no overnight soak, no fuss. They soften perfectly in the simmering vinegar and jalapeños, and honestly? That little shortcut saves me from forgetting to soak them overnight.
- Heat That Lingers: The jalapeños here aren’t just chopped—they’re charred just enough to give this salsa a smoky kick that stays with you. Between us, the cumin seeds toasted in the pot? That earthy warmth makes every bite feel like a hug.
- Game for Any Meal: Slather it on grilled cheese, mix it into scrambled eggs, or serve it cold with chips. I’ve even dumped it over tacos straight from the freezer—yes, even on a Tuesday night—and it never lets me down.
- Pantry Goldmine: A bag of beans and a few spices cost less than takeout, and this batch stretches for days. I freeze half for when I’m too tired to cook, and the rest? Gone in 48 hours because it’s just that good. Budget-friendly doesn’t even begin to cover it.
Step-by-step instructions for Texas bean salsa
Here's how to make this smoky, spicy bean salsa that's perfect for tacos, nachos, or just scooping up with chips.
🔥 Step 1: Toast the Cumin Seeds and Char the Jalapeños
Heat a dry skillet over medium heat and add the 2 tablespoons cumin seeds. Toast them for 2-3 minutes until they turn a deep golden brown and release their nutty aroma. Watch closely—they burn quickly! Transfer the toasted seeds to a small bowl and set aside.
While the cumin toasts, char the 3 whole jalapeño peppers directly over a gas flame (or under a broiler). Turn them often until the skin is completely blackened and blistered all over—this deep charing adds incredible smoky depth to the salsa. Place the charred peppers in a bowl and cover with a plate to steam for 5 minutes before peeling off the skin.
👨🍳 Step 2: Soak and Cook the Pinto Beans
Rinse the 2 cups dry pinto beans thoroughly under cold water. In a large pot, combine the beans with 4 cups water and bring to a boil over high heat. Once boiling, reduce heat to low and simmer for 45-60 minutes until the beans are tender but not mushy. They should hold their shape but be easily mashable.
Drain the cooked beans and reserve 1 cup of the cooking liquid—this starchy water will help create a silky texture in your salsa. While still warm, mash about half of the beans with a fork or potato masher to create texture variation. You want some whole beans and some mashed for that authentic Texas bean salsa bite.
🍳 Step 3: Build the Flavor Base with Aromatics
In a large skillet, heat the 2 tablespoons vegetable oil over medium heat. Add the diced yellow onion and cook for 5-6 minutes until softened and translucent. Add the minced garlic cloves and cook for another 30 seconds until fragrant—don't let it brown or it'll turn bitter.
Stir in the 1 tablespoon ground cumin and 1.5 teaspoons salt and cook for 30 seconds to toast the spices and release their flavors. Add the toasted cumin seeds and the peeled, charred jalapeños (cut into strips) to the skillet. Cook for 2 minutes until the jalapeños soften slightly and release their smoky essence.
🥘 Step 4: Combine and Balance the Salsa
In a large mixing bowl, combine the cooked beans (both whole and mashed), the onion-garlic-jalapeño mixture, 0.5 cup chopped fresh cilantro, 0.5 cup white vinegar, and 0.5 teaspoon black pepper. Mix everything together thoroughly. Taste and adjust seasoning—you might want to add a pinch more salt or vinegar depending on your preference.
Add the reserved 1 cup bean cooking liquid and mix until the salsa reaches your desired consistency. If it's too thick, add more of the cooking liquid 1 tablespoon at a time until it's spreadable but still has good body. The salsa should be vibrant green with red jalapeño streaks and a thick, chunky texture.
⏰ Step 5: Finish and Rest for Maximum Flavor
Transfer the salsa to a serving bowl and let it rest for at least 15 minutes at room temperature. This resting period allows all the flavors to meld together beautifully. Just before serving, stir in the juice of the whole lime—this bright citrus note cuts through the richness and adds that final Texas touch.
Taste again and adjust seasoning if needed. The salsa should be bold with smoky, spicy, and earthy flavors that make every bite exciting. Serve immediately with warm tortilla chips, or store in an airtight container in the refrigerator for up to 5 days. The flavors will actually improve as it sits, developing even more depth over time.
Pro Tips For Making Texas Bean Salsa
- SOAK BEANS OVERNIGHT: If you’re in a hurry, at least do a 6-hour soak in warm water—don’t just toss them in boiling water dry. Pinto beans expand aggressively, and skipping this step means your pot will look like a science experiment gone wrong. (Yes, I’ve seen it happen.)
- TOAST CUMIN LOW: Crank the heat to medium-low for toasting cumin seeds—high heat burns them fast, turning your salsa bitter. Listen for a gentle sizzle, then remove them at 30 seconds. Burnt cumin ruins everything, and you’ll know immediately when it’s gone too far.
- PEEL JALAPEÑOS AFTER CHARRING: Charred jalapeños lose their skins easier if you peel them right after hitting the flame or broiler. Wait 10 minutes, and you’ll be picking at stubborn patches like it’s a puzzle. A quick ice bath afterward makes the peeling even simpler—just dunk and rub.
- SAVE VINEGAR FOR LAST: Add vinegar when the beans are fully cooked, not at the start. It’ll break down the beans prematurely, turning your salsa mushy. Stir it in at the end, let it sit 5 minutes, then taste—adjust if needed. (I’ve learned this the hard way with a batch that looked like bean paste.)
Essential equipment for this recipe
Cast Iron Skillet
This is your workhorse for Texas bean salsa—nothing beats the flavor development in a heavy cast iron skillet like my Lodge 10.25-inch (I’ve had mine since college). The even heat distribution ensures your onions caramelize perfectly while keeping the jalapeños from burning.
If you don’t have cast iron, a stainless steel skillet works too, but watch for hot spots. Pro tip: Season your skillet with flaxseed oil before use for extra nonstick properties—trust me, it makes all the difference when scraping up those last bits of salsa. 🔥
Gas Burner or Grill
The charred jalapeños are non-negotiable for that authentic Texas smokiness, and you need a gas flame to achieve it. If you’re cooking indoors, hold them directly over the highest flame until blackened all over. No gas stove?
Use a grill grate or even a broiler set to high—just keep an eye on them. I’ve even charred peppers on my portable propane burner during backyard cookouts. The key is getting that deep, smoky char without burning the flesh underneath.
Mixing Bowls
For combining all your ingredients, I swear by stainless steel mixing bowls—they’re durable and won’t absorb flavors like plastic. I use a 3-quart bowl from OXO because it’s wide enough to stir easily and deep enough to hold everything without spills.
If you’re prepping ahead, grab a glass storage container with a tight-sealing lid (like Pyrex) to keep your salsa fresh for up to 5 days. For serving, a wooden spoon helps scrape up every last bit of that thick, flavorful goodness.
Knives and Cutting Board
You’ll need two sharp knives for this recipe: a 8-inch chef’s knife for dicing the onion and a paring knife for mincing the garlic. My go-to is a Wüsthof Classic set—I’ve had mine for years, and the blades stay sharp with proper care.
For the cutting board, teak or bamboo is ideal because they’re gentle on knives and add a nice aesthetic to your prep station. Pro move: Keep a small bowl of water nearby while chopping garlic to rinse your fingers between cloves—it prevents that lingering garlic breath. 🌿
Measuring Tools
Precision matters when balancing flavors in Texas bean salsa, so don’t skimp on your measuring tools. I use a stainless steel measuring cup set (like Farberware) for liquids and a digital kitchen scale for spices—it’s easier to measure 2 tbsp cumin seeds accurately by weight than by volume.
For the white vinegar, a medicine dropper comes in handy if you need to adjust the tanginess by ¼ tsp at a time. And trust me, you’ll want that control when you’re fine-tuning the perfect balance of heat, smokiness, and acidity.
Optional: Immersion Blender
While this recipe calls for a chunky texture, an immersion blender (like Ninja) lets you customize the consistency on the fly. If you prefer a smoother salsa, blend half the beans before mixing everything together.
I keep mine in my Portland farmers market haul—it’s a game-changer for quick adjustments. No immersion blender? A regular blender works in a pinch, but blend in batches to avoid splattering.
Just remember: the traditional Texas style leans toward textured, so use this tool sparingly unless you’re experimenting with a fusion twist. 💡
Nutrition facts
Frequently asked questions
Can I make this Texas bean salsa without pinto beans?
While pinto beans are traditional, you can substitute black beans or kidney beans for a similar texture. Just note that pinto beans hold their shape better after cooking, which gives this dish its signature chunky bite. For a smoky twist, try black-eyed peas—they absorb flavors beautifully but may need an extra 15 minutes of simmering.
How do I adjust the heat level in this recipe?
For milder heat, remove the seeds and membranes from the jalapeños before charring. If you love spice, add ½ teaspoon cayenne pepper or swap jalapeños for serrano peppers. Pro tip: Taste as you go—add vinegar first to balance heat before adjusting other spices.
Can I make this ahead of time for a party?
This salsa tastes even better the next day as flavors meld. Make it 24 hours ahead and store in an airtight container. Reheat gently on the stove with 1 tablespoon water to restore texture. For serving, top with fresh cilantro and lime juice just before guests arrive to keep it vibrant.
What's the best way to serve this Texas bean salsa?
This isn't your typical dip—it's a complete dish! Serve it warm with grilled chicken, over cornbread, or alongside tortilla chips for scooping. For a hearty meal, top with avocado slices or a dollop of sour cream. In Texas, it's often paired with steak or brisket for a full spread.
Why does my bean salsa turn out too thick or watery?
Thick? Add 1-2 tablespoons bean cooking liquid at a time until creamy but still chunky. Watery? Simmer uncovered for 5-10 minutes to reduce. The key is balancing the reserved cooking liquid—start with 1 cup and adjust. For extra richness, stir in 1 tablespoon olive oil at the end.